HP OfficeJet 8702 User Guide - Page 53
Copy and scan, Copy, Scan, To copy document or ID card
 |
View all HP OfficeJet 8702 manuals
Add to My Manuals
Save this manual to your list of manuals |
Page 53 highlights
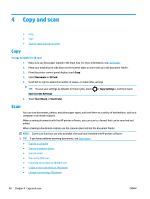
4 Copy and scan ● Copy ● Scan ● Tips for copy and scan success Copy To copy document or ID card 1. Make sure you have paper loaded in the input tray. For more information, see Load paper. 2. Place your original print-side down on the scanner glass or print-side up in the document feeder. 3. From the printer control panel display, touch Copy . 4. Select Document or ID Card . 5. Scroll left or right to select the number of copies, or make other settings. TIP: To save your settings as defaults for future jobs, touch Save Current Settings. 6. Touch Start Black or Start Color. ( Copy Settings ), and then touch Scan You can scan documents, photos, and other paper types, and send them to a variety of destinations, such as a computer or an email recipient. When scanning documents with the HP printer software, you can scan to a format that can be searched and edited. When scanning a borderless original, use the scanner glass and not the document feeder. NOTE: Some scan functions are only available after you have installed the HP printer software. TIP: If you have problems scanning documents, see Scan issues. ● Scan to a computer ● Scan to a memory device ● Scan to email ● Scan using Webscan ● Scanning documents as editable text ● Create a new scan shortcut (Windows) ● Change scan settings (Windows) 40 Chapter 4 Copy and scan ENWW
-
 1
1 -
2
-
3
-
4
-
5
-
6
-
7
-
8
-
9
-
10
-
11
-
12
-
13
-
14
-
15
-
16
-
17
-
18
-
19
-
20
-
21
-
22
-
23
-
24
-
25
-
26
-
27
-
28
-
29
-
30
-
31
-
32
-
33
-
34
-
35
-
36
-
37
-
38
-
39
-
40
-
41
-
42
-
43
-
44
-
45
-
46
-
47
-
 48
48 -
 49
49 -
 50
50 -
 51
51 -
 52
52 -
 53
53 -
 54
54 -
 55
55 -
 56
56 -
 57
57 -
 58
58 -
59
-
60
-
61
-
62
-
63
-
64
-
65
-
66
-
67
-
68
-
69
-
70
-
71
-
72
-
73
-
74
-
75
-
76
-
77
-
78
-
79
-
80
-
81
-
82
-
83
-
84
-
85
-
86
-
87
-
88
-
89
-
90
-
91
-
92
-
93
-
94
-
95
-
96
-
97
-
98
-
99
-
100
-
101
-
102
-
103
-
104
-
105
-
106
-
107
-
108
-
109
-
110
-
111
-
112
-
113
-
114
-
115
-
116
-
117
-
118
-
119
-
120
-
121
-
122
-
123
-
124
-
125
-
126
-
127
-
128
-
129
-
130
-
131
-
132
-
133
-
134
-
135
-
136
-
137
-
138
-
139
-
140
-
141
-
142
-
143
-
144
-
145
-
146
-
147
-
148
-
149
-
150
-
151
-
152
-
153
-
154
-
155
-
156
-
157
-
158
-
159
-
160
-
161
-
162
-
163
-
164
-
165
-
166
-
167
-
168
-
169
-
170
-
171
-
172
-
173
-
174
-
175
-
176
-
177
-
178
-
179
 |
 |