HP dx7200 HP Compaq Business PC dx7200 MT Service Reference Guide, 1st edition
HP dx7200 - Microtower PC Manual
 |
View all HP dx7200 manuals
Add to My Manuals
Save this manual to your list of manuals |
HP dx7200 manual content summary:
- HP dx7200 | HP Compaq Business PC dx7200 MT Service Reference Guide, 1st edition - Page 1
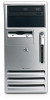
service reference guide HP Compaq Business PC dx7200 Series 1st Edition This document provides information on the removal and replacement of all parts as well as information on troubleshooting, Desktop Management, setup utilities, PATA and SATA drives, safety, routine care, connector pin assignments - HP dx7200 | HP Compaq Business PC dx7200 MT Service Reference Guide, 1st edition - Page 2
- HP dx7200 | HP Compaq Business PC dx7200 MT Service Reference Guide, 1st edition - Page 3
Service Reference Guide HP Compaq Business PC dx7200 Series 1st Edition Document Part Number: 390812-001 July 2005 - HP dx7200 | HP Compaq Business PC dx7200 MT Service Reference Guide, 1st edition - Page 4
subject to change without notice. Microsoft, MS-DOS, Windows, Windows NT, and Windows XP are trademarks of Microsoft Corporation in the U.S. and equipment or loss of information. Service Reference Guide HP Compaq Business PC dx7200 Series First Edition (July 2005) Document Part Number: 390812-001 - HP dx7200 | HP Compaq Business PC dx7200 MT Service Reference Guide, 1st edition - Page 5
1.1 Installing or Upgrading Device Drivers 1-1 1.2 Transferring Files and Settings 1-2 1.3 Backing Up and Restoring Files 1-2 1.3.1 Creating a Backup File-Windows XP Professional 1-2 1.3.2 Restoring from the Backup File-Windows XP Professional 1-2 1.4 Converting to NTFS 1-2 1.5 HP Software - HP dx7200 | HP Compaq Business PC dx7200 MT Service Reference Guide, 1st edition - Page 6
Dual- HP BIOS 4-5 4.8.1 Legacy Mode 4-6 4.8.2 Native Mode 4-6 4.9 Mixed Devices Boot and Drive Letter Ordering 4-7 5 Identifying the Chassis, Routine Care, and Disassembly Preparation 5.1 Chassis Designations 5-1 5.1.1 Microtower (MT 5-1 5.1.2 Slim Tower (ST Service Reference Guide, dx7200 - HP dx7200 | HP Compaq Business PC dx7200 MT Service Reference Guide, 1st edition - Page 7
Cleaning the Mouse 5-7 5.5 Service Considerations 5-7 5.5.1 Power Supply Fan 5-7 5.5.2 Tools and Software Requirements 5-7 5.5.3 Screws 5-8 5.5.4 Cables and Connectors 5-8 5.5.5 Hard Drives 5-8 5.5.6 Lithium Coin Cell Battery 5-9 6 Removal and Replacement Procedures- Microtower (MT) Chassis - HP dx7200 | HP Compaq Business PC dx7200 MT Service Reference Guide, 1st edition - Page 8
Contents 7 Removal and Replacement Procedures- Slim Tower (ST) Chassis 7.1 Preparation for Disassembly 7-1 7.2 Unlocking the Smart Cover Lock D Troubleshooting Without Diagnostics E System Board and Riser Board Reference Designators F Memory Index vi 390812-001 Service Reference Guide, dx7200 - HP dx7200 | HP Compaq Business PC dx7200 MT Service Reference Guide, 1st edition - Page 9
path specification with C:\i386, or use the Browse button in the dialog box to locate the i386 folder. This action points the operating system to the appropriate drivers. Obtain the latest support software, including support software for the operating system from www.hp.com. Click Driver Downloads - HP dx7200 | HP Compaq Business PC dx7200 MT Service Reference Guide, 1st edition - Page 10
at that time on selected models: ■ Computer Setup Utilities ■ HP Support Software including device drivers ■ Online Safety & Comfort Guide ■ Power Management with energy saver features ■ Security Management tools ■ Software Support Management tools 1-2 390812-001 Service Reference Guide, dx7200 - HP dx7200 | HP Compaq Business PC dx7200 MT Service Reference Guide, 1st edition - Page 11
of these files, in English and selected other languages, in one of three ways: ■ Support Software CD ■ HP Web site at www.hp.com ■ Restore Plus! CD, which is supplied with many HP models ✎ Additional HP software may be required in certain situations. Service Reference Guide, dx7200 390812-001 1-3 - HP dx7200 | HP Compaq Business PC dx7200 MT Service Reference Guide, 1st edition - Page 12
Installing the Operating System 1-4 390812-001 Service Reference Guide, dx7200 - HP dx7200 | HP Compaq Business PC dx7200 MT Service Reference Guide, 1st edition - Page 13
computer system when contacting Customer Support. These tools can also be this chapter may not be available on all HP products. 2.1 Power-On Self-Test ( system is functioning properly: ■ Keyboard ■ Memory modules ■ All mass storage devices ■ Processors Service Reference Guide, dx7200 390812-001 2-1 - HP dx7200 | HP Compaq Business PC dx7200 MT Service Reference Guide, 1st edition - Page 14
date and time. ■ Set, view, change, or verify the system configuration, including settings for processor, graphics, memory, audio selected. To manually switch to supported by drive). ■ Enable or disable DriveLock security (when supported by drive). 2-2 390812-001 Service Reference Guide, dx7200 - HP dx7200 | HP Compaq Business PC dx7200 MT Service Reference Guide, 1st edition - Page 15
Setup Utilities menu, complete the following steps: 1. Turn on or restart the computer. If you are in Windows, click Start >Shut Down >Restart. 2. As soon as the computer is turned on, press and hold the computer after you exit the F10 Setup screen. Service Reference Guide, dx7200 390812-001 2-3 - HP dx7200 | HP Compaq Business PC dx7200 MT Service Reference Guide, 1st edition - Page 16
Set Time and Date Allows you to set system time and date. Flash System ROM Allows you to select a drive containing a new BIOS. Replicated Setup Setup. ✎ Support for specific Computer Setup options may vary depending on the hardware configuration. 2-4 390812-001 Service Reference Guide, dx7200 - HP dx7200 | HP Compaq Business PC dx7200 MT Service Reference Guide, 1st edition - Page 17
Heading Option Description Storage Device Configuration Lists all installed BIOS-controlled storage devices. When a device is selected drive). ✎ Support for specific Computer Setup options may vary depending on the hardware configuration. Service Reference Guide, dx7200 390812-001 2-5 - HP dx7200 | HP Compaq Business PC dx7200 MT Service Reference Guide, 1st edition - Page 18
the translation mode to be used for the device. This enables the BIOS to access disks partitioned and formatted on other systems and may be manually. ✎ Support for specific Computer Setup options may vary depending on the hardware configuration. 2-6 390812-001 Service Reference Guide, dx7200 - HP dx7200 | HP Compaq Business PC dx7200 MT Service Reference Guide, 1st edition - Page 19
BIOS DMA Data Transfers Allows you to control how BIOS device I/O requests are serviced. When "Enable" is selected, the BIOS will service Windows 2000 and Windows XP. Support for specific Computer Setup options may vary depending on the hardware configuration. Service Reference Guide, dx7200 390812 - HP dx7200 | HP Compaq Business PC dx7200 MT Service Reference Guide, 1st edition - Page 20
(such as a USB flash media device, diskette drive, hard drive, optical drive, or network interface card) are checked for supported on some models only. ✎ Support for specific Computer Setup options may vary depending on the hardware configuration. 2-8 390812-001 Service Reference Guide, dx7200 - HP dx7200 | HP Compaq Business PC dx7200 MT Service Reference Guide, 1st edition - Page 21
computer off and then back on. ✎ This selection is in effect only if the processor and operating system being used comprehend and utilize this feature. ✎ Support for specific Computer Setup options may vary depending on the hardware configuration. Service Reference Guide, dx7200 390812-001 2-9 - HP dx7200 | HP Compaq Business PC dx7200 MT Service Reference Guide, 1st edition - Page 22
when supported by the processor. • ACPI S3 Support - Enables or disables ACPI S3 support. • ACPI S3 Hard Disk Reset - Enabling this causes the BIOS to . ✎ Support for specific Computer Setup options may vary depending on the hardware configuration. 2-10 390812-001 Service Reference Guide, dx7200 - HP dx7200 | HP Compaq Business PC dx7200 MT Service Reference Guide, 1st edition - Page 23
Network Service on some PCI cards Windows Operating Systems to run optimally. This feature must be disabled for certain non-Microsoft Operating Systems to work properly. ✎ Support for specific Computer Setup options may vary depending on the hardware configuration. Service Reference Guide, dx7200 - HP dx7200 | HP Compaq Business PC dx7200 MT Service Reference Guide, 1st edition - Page 24
palette snooping, which sets the VGA palette snooping bit in PCI configuration space; only needed when more than one graphics controller is installed. ✎ Support for specific Computer Setup options may vary depending on the hardware configuration. 2-12 390812-001 Service Reference Guide, dx7200 - HP dx7200 | HP Compaq Business PC dx7200 MT Service Reference Guide, 1st edition - Page 25
only if there are multiple PCI video adapters in the system. Allows you to specify which VGA controller will be the "boot" or primary VGA controller. ✎ Support for specific Computer Setup options may vary depending on the hardware configuration. Service Reference Guide, dx7200 390812-001 2-13 - HP dx7200 | HP Compaq Business PC dx7200 MT Service Reference Guide, 1st edition - Page 26
. To restore the configuration, insert the diskette, USB flash media device, or other storage media emulating a diskette with the Customer Support Center. ✎ Third party devices may not be detected by HP Insight Diagnostics. 2.3.1 Accessing HP Insight Diagnostics 001 Service Reference Guide, dx7200 - HP dx7200 | HP Compaq Business PC dx7200 MT Service Reference Guide, 1st edition - Page 27
want to test your specific keyboard. 6. In the End User License Agreement page, click Agree if you agree with the terms. The HP Insight Diagnostics utility launches board, processor, chassis, and BIOS, plus internal speaker and PCI bus information. Service Reference Guide, dx7200 390812-001 2-15 - HP dx7200 | HP Compaq Business PC dx7200 MT Service Reference Guide, 1st edition - Page 28
the most flexibility in controlling the testing of a system. The Custom Test mode allows you to specifically select which devices, tests, and test parameters are run. To begin testing: 1. Select the Test detailed information and recommended actions. 2-16 390812-001 Service Reference Guide, dx7200 - HP dx7200 | HP Compaq Business PC dx7200 MT Service Reference Guide, 1st edition - Page 29
not supported. 2. Click Save in the upper right corner of the tab. 3. Select Save to the floppy or Save to USB key. 4. Enter a file name in the File Name box and click the Save button. An html file will be saved to the inserted diskette or USB HP Drive Key. Service Reference Guide, dx7200 390812 - HP dx7200 | HP Compaq Business PC dx7200 MT Service Reference Guide, 1st edition - Page 30
, dc7600) in the text box and press the Enter key. 5. Select your product. 6. Select your OS. 7. Click the Diagnostics link. 8. Select HP Insight Diagnostics and click Download. ✎ The download includes instructions on how to create the bootable CD. 2-18 390812-001 Service Reference Guide, dx7200 - HP dx7200 | HP Compaq Business PC dx7200 MT Service Reference Guide, 1st edition - Page 31
PCs in a networked environment. The key capabilities and features of desktop management are: ■ Initial configuration and deployment ■ Remote system installation ■ Software updating and management ■ ROM flash ■ Asset tracking and security ■ Fault notification and recovery ✎ Support for specific - HP dx7200 | HP Compaq Business PC dx7200 MT Service Reference Guide, 1st edition - Page 32
updating the system BIOS in flash ROM. See Section 3.4.1, "Remote ROM Flash." ■ Configuring the system BIOS settings. To initiate Remote System Installation, press F12 when the F12 = Network Service Boot message appears in the lower-right corner of the HP logo screen. Follow the instructions - HP dx7200 | HP Compaq Business PC dx7200 MT Service Reference Guide, 1st edition - Page 33
aspects of HP client systems. Use HP Client Manager to: ■ Get valuable hardware information such as CPU, memory, video, and security settings ■ Monitor system health to fix problems before they occur ■ Install drivers and BIOS updates without visiting each PC ■ Remotely configure BIOS and security - HP dx7200 | HP Compaq Business PC dx7200 MT Service Reference Guide, 1st edition - Page 34
utilizes this solution for provisioning ProLiant servers (including blade servers) as well as Blade PCs, a core component of HP's Consolidated Client Infrastructure. Following the HP and Compaq merger, the alliance has continued to expand with the following offerings: ■ Altiris Deployment Solution - HP dx7200 | HP Compaq Business PC dx7200 MT Service Reference Guide, 1st edition - Page 35
hard drive failure or stolen and misplaced PCs. For more information on HP Local Recovery, visit www.hp.com/go/easydeploy. 3.3.5 Dantz Retrospect Express Dantz Retrospect Express protects a single Windows desktop or notebook computer. Retrospect Express allows recovery from data loss due to viruses - HP dx7200 | HP Compaq Business PC dx7200 MT Service Reference Guide, 1st edition - Page 36
's Choice Subscriber's Choice is a client-based service from HP. Based on your profile, HP will supply you with personalized product tips, feature articles, and/or driver and support alerts/notifications. Subscriber's Choice Driver and Support Alerts/Notifications will deliver E-mails notifying you - HP dx7200 | HP Compaq Business PC dx7200 MT Service Reference Guide, 1st edition - Page 37
ROM from being unintentionally updated or overwritten. This is important to ensure the operating integrity of the computer. Should you need or want to upgrade the BIOS, you may download the latest BIOS images from the HP driver and support page: http://www.hp.com/support/files. CAUTION: For maximum - HP dx7200 | HP Compaq Business PC dx7200 MT Service Reference Guide, 1st edition - Page 38
-specific. Unpredictable results may occur if source and target computers are not the same model. For example, do not copy the setup configuration from a dc7nnn Ultra-Slim Desktop to a dx6nnn Slim Tower. 1. Select a setup configuration to copy. Turn off the computer. If you are in Windows, click - HP dx7200 | HP Compaq Business PC dx7200 MT Service Reference Guide, 1st edition - Page 39
model-specific. Unpredictable results may occur if source and target computers are not the same model. For example, do not copy the setup configuration from a dc7nnn Ultra-Slim Desktop to a dx6nnn Slim Tower. This method takes a little longer to prepare the configuration diskette or USB flash media - HP dx7200 | HP Compaq Business PC dx7200 MT Service Reference Guide, 1st edition - Page 40
Desktop Management 8. Download a BIOS utility for replicating setup (repset.exe) and copy it onto the configuration diskette or USB flash media device. To obtain this utility, go to http://www.hp.com/support/files and enter the model number of the computer. 9. On the configuration diskette or USB - HP dx7200 | HP Compaq Business PC dx7200 MT Service Reference Guide, 1st edition - Page 41
must be used. 1. If there are any PCI cards in the system that have SCSI, ATA RAID, or SATA drives attached, turn off the computer and unplug the power cord. Ä CAUTION: The power cord MUST be unplugged. 2. Open the computer and remove the PCI cards. Service Reference Guide, dx7200 390812-001 3-11 - HP dx7200 | HP Compaq Business PC dx7200 MT Service Reference Guide, 1st edition - Page 42
Advanced > PCI Devices to Windows 9x, you may see a brief Windows logo screen. If you do not want this screen, add a zero-length file named LOGO.SYS to the root directory of the USB flash media device. Return to "Copying to Multiple Computers." 3-12 390812-001 Service Reference Guide, dx7200 - HP dx7200 | HP Compaq Business PC dx7200 MT Service Reference Guide, 1st edition - Page 43
and installing the latest support software easier. You can download the software from http://www.hp.com/support. The Web site contains the latest device drivers, utilities, and flashable ROM images needed to run the latest Microsoft Windows operating system on the HP computer. 3.4.7 Building Blocks - HP dx7200 | HP Compaq Business PC dx7200 MT Service Reference Guide, 1st edition - Page 44
Windows. Power-On Password Allows you to set and enable power-on password. ✎ For more information about Computer Setup, see the Computer Setup (F10) Utility Guide. Support for security features may vary depending on your specific computer configuration. 3-14 390812-001 Service Reference Guide - HP dx7200 | HP Compaq Business PC dx7200 MT Service Reference Guide, 1st edition - Page 45
locale setting (for example, English or German) for System ID entry. ✎ For more information about Computer Setup, see the Computer Setup (F10) Utility Guide. Support for security features may vary depending on your specific computer configuration. Service Reference Guide, dx7200 390812-001 3-15 - HP dx7200 | HP Compaq Business PC dx7200 MT Service Reference Guide, 1st edition - Page 46
Desktop Management Computer Setup Utilities (F10) Security Features (Continued) Feature Description Setup, see the Computer Setup (F10) Utility Guide. Support for security features may vary depending on your specific computer configuration. 3-16 390812-001 Service Reference Guide, dx7200 - HP dx7200 | HP Compaq Business PC dx7200 MT Service Reference Guide, 1st edition - Page 47
removal. How It Is Established For information on enabling Memory Change Alerts, refer to the online Desktop Management Guide on the Documentation and Diagnostics CD. Install a cable keyboard, you may see a Keyboard Error message-disregard it. Service Reference Guide, dx7200 390812-001 3-17 - HP dx7200 | HP Compaq Business PC dx7200 MT Service Reference Guide, 1st edition - Page 48
Desktop Management 3. Select Security, then select Setup Password and follow the instructions on the screen. 4. Before exiting, Select File > Save Changes and Exit. 3.5.3 Establishing a on the monitor, type the setup password, then press Enter. 3-18 390812-001 Service Reference Guide, dx7200 - HP dx7200 | HP Compaq Business PC dx7200 MT Service Reference Guide, 1st edition - Page 49
Desktop Management ✎ Type carefully; embedded security device, refer to the HP ProtectTools Security Manager Guide at www.hp.com. 1. Turn on or restart the computer. If you are in Windows, click Start > Shut Down > : current password/ 4. Press Enter. Service Reference Guide, dx7200 390812-001 3-19 - HP dx7200 | HP Compaq Business PC dx7200 MT Service Reference Guide, 1st edition - Page 50
Desktop is designed to meet country-specific requirements. The syntax and keys the Troubleshooting Guide on the Documentation and Diagnostics CD for instructions on drives that support the ATA Security command set are detected. DriveLock is intended for HP customers Service Reference Guide, dx7200 - HP dx7200 | HP Compaq Business PC dx7200 MT Service Reference Guide, 1st edition - Page 51
Desktop Management In the event unauthorized software, other asset control functions, and support. For users with less stringent security requirements, HP does not recommend enabling DriveLock. Users in this restrict users from enabling DriveLock. Service Reference Guide, dx7200 390812-001 3-21 - HP dx7200 | HP Compaq Business PC dx7200 MT Service Reference Guide, 1st edition - Page 52
Desktop steps: 1. Turn on or restart the computer. If you are in Windows, click Start > Shut Down > Restart. 2. As soon as the computer Lock is a software-controllable cover lock featured on some HP computers. This lock prevents unauthorized access to the internal Service Reference Guide, dx7200 - HP dx7200 | HP Compaq Business PC dx7200 MT Service Reference Guide, 1st edition - Page 53
tool available from HP. Be prepared; order this key before you need one (Tamper-resistant wrench PN 166527-001 or tamper-resistant bits PN 166527-002). For more information about using the Smart Cover FailSafe Key, consult the Hardware Reference Guide. Service Reference Guide, dx7200 390812-001 - HP dx7200 | HP Compaq Business PC dx7200 MT Service Reference Guide, 1st edition - Page 54
the foundation for authentication of TPM-enabled PCs to the corporate network. HP ProtectTools Security Manager can be configured to service provider can use this information to help diagnose conditions that caused you to run the DPS software. Refer to the Troubleshooting Guide for instructions - HP dx7200 | HP Compaq Business PC dx7200 MT Service Reference Guide, 1st edition - Page 55
HP only supports the use of a MultiBay PATA (IDE) hard drive on this model of computer. 3.5-inch PATA hard drives are not supported SATA connectors on the system board are color coded to make identification easier. SATA Identification Primary channel Service Reference Guide, dx7200 390812-001 4-1 - HP dx7200 | HP Compaq Business PC dx7200 MT Service Reference Guide, 1st edition - Page 56
3.0 Gb/s cable as it is fully backwards compatible with the SATA 1.5 Gb/s drives. Current HP desktop products ship with SATA 1.5 Gb/s or 3.0 Gb/s hard drives. SATA data cables are susceptible 12 12 V power P14 V12 12 V power P15 V12 12 V power 4-2 390812-001 Service Reference Guide, dx7200 - HP dx7200 | HP Compaq Business PC dx7200 MT Service Reference Guide, 1st edition - Page 57
PATA drive controller. Only a MultiBay PATA hard drive is supported on these computers. No other PATA hard drives are supported on these models. Parallel ATA MultiBay Hard Drive Characteristics Number DA2 37 CS1FX 38 CS3FX 39 DASP 40 Ground Service Reference Guide, dx7200 390812-001 4-3 - HP dx7200 | HP Compaq Business PC dx7200 MT Service Reference Guide, 1st edition - Page 58
is determined by the device class of the drives and by specific attach sequence rules. 4.5.1 PATA Device Classes In order to and the least demanding are in Class 4. Class 1 Hard Drives Supported only on USDT chassis with MultiBay Class 2 High Speed Optical Drives Service Reference Guide, dx7200 - HP dx7200 | HP Compaq Business PC dx7200 MT Service Reference Guide, 1st edition - Page 59
computer specification. Drive size calculations by drive manufacturers are bytes to the base 10 while calculations by Microsoft are bytes to the base 2. Drive/Partition Capacity Limits File System FAT 32 NTFS Controller Type ATA ATA Operating System Windows 2000/ XP Windows NT/2000/XP Maximum - HP dx7200 | HP Compaq Business PC dx7200 MT Service Reference Guide, 1st edition - Page 60
for the Command and Control Block are found in the PCI Configuration Space. ■ Offset 10h-Primary Command base address ■ Offset 14h-Primary Control base address ■ Offset 18h-Secondary Command base address ■ Offset 1Ch-Secondary Control base address 4-6 390812-001 Service Reference Guide, dx7200 - HP dx7200 | HP Compaq Business PC dx7200 MT Service Reference Guide, 1st edition - Page 61
Drive Letter Ordering SATA Emulation Separate IDE Controller (default). Used with Windows 2000 and XP. Hard Drive Order A. Integrated SATA B. Integrated IDE Separate IDE 0 B2. IDE Device 1 A1. IDE Device 0 A2. IDE Device 1 B1. SATA 0 B2. SATA 2 Service Reference Guide, dx7200 390812-001 4-7 - HP dx7200 | HP Compaq Business PC dx7200 MT Service Reference Guide, 1st edition - Page 62
Serial and Parallel ATA Drive Guidelines and Features 4-8 390812-001 Service Reference Guide, dx7200 - HP dx7200 | HP Compaq Business PC dx7200 MT Service Reference Guide, 1st edition - Page 63
Adherence to the procedures and precautions described in this chapter is essential for proper service. Ä CAUTION: When the computer is plugged into an AC power source, system board or component damage. 5.1 Chassis Designations 5.1.1 Microtower (MT) Service Reference Guide, dx7200 390812-001 5-1 - HP dx7200 | HP Compaq Business PC dx7200 MT Service Reference Guide, 1st edition - Page 64
Identifying the Chassis, Routine Care, and Disassembly Preparation 5.1.2 Slim Tower (ST) 5-2 390812-001 Service Reference Guide, dx7200 - HP dx7200 | HP Compaq Business PC dx7200 MT Service Reference Guide, 1st edition - Page 65
but it has been degraded in the internal layers, reducing its life expectancy. Networks built into many integrated circuits provide some protection, but in many cases, the sensitive parts from assemblies in protective packaging or conductive foam. Service Reference Guide, dx7200 390812-001 5-3 - HP dx7200 | HP Compaq Business PC dx7200 MT Service Reference Guide, 1st edition - Page 66
nonconductive materials such as ordinary plastic assembly aids and Styrofoam. ■ Use field service tools, such as cutters, screwdrivers, and vacuums, that are conductive. dissipative table or floor mats with hard tie to ground ■ Field service kits 5-4 390812-001 Service Reference Guide, dx7200 - HP dx7200 | HP Compaq Business PC dx7200 MT Service Reference Guide, 1st edition - Page 67
Do not place the keyboard, with the keyboard feet down, directly against the front of the desktop unit as this also restricts airflow. ■ Occasionally clean the air vents on all vented sides of the computer when cleaning with liquids or damp cloths. Service Reference Guide, dx7200 390812-001 5-5 - HP dx7200 | HP Compaq Business PC dx7200 MT Service Reference Guide, 1st edition - Page 68
body, follow the procedures described in Section 5.4.2. When cleaning debris from under the keys, review all rules in Section 5.4.1 before following these procedures: Ä CAUTION: Use safety glasses equipped the parts to air dry before reassembly. 5-6 390812-001 Service Reference Guide, dx7200 - HP dx7200 | HP Compaq Business PC dx7200 MT Service Reference Guide, 1st edition - Page 69
may sometimes be used in place of the Torx screwdriver) ■ Phillips #2 screwdriver ■ Diagnostics software ■ HP tamper-resistant T-15 wrench (Smart Cover FailSafe Key, PN 166527-001) or HP tamper-resistant bits (Smart Cover FailSafe Key, PN 166527-002) Service Reference Guide, dx7200 390812-001 5-7 - HP dx7200 | HP Compaq Business PC dx7200 MT Service Reference Guide, 1st edition - Page 70
, it can damage the unit. HP strongly recommends that all screws removed during proper locations. ✎ Metric screws have a black finish. U.S. screws have a silver finish packaging until they are actually mounted in the CPU. ■ Avoid dropping drives from any height onto Service Reference Guide, dx7200 - HP dx7200 | HP Compaq Business PC dx7200 MT Service Reference Guide, 1st edition - Page 71
removal and replacement chapter for the chassis you are working on in this guide for instructions on the replacement procedures. Å WARNING: This computer contains a lithium battery. or return them to HP, their authorized partners, or their agents. Service Reference Guide, dx7200 390812-001 5-9 - HP dx7200 | HP Compaq Business PC dx7200 MT Service Reference Guide, 1st edition - Page 72
Identifying the Chassis, Routine Care, and Disassembly Preparation 5-10 390812-001 Service Reference Guide, dx7200 - HP dx7200 | HP Compaq Business PC dx7200 MT Service Reference Guide, 1st edition - Page 73
and Replacement Procedures- Microtower (MT) Chassis Adherence to the procedures and precautions described in this chapter is essential for proper service. After completing all necessary using the wrong screw in an application may damage the unit. Service Reference Guide, dx7200 390812-001 6-1 - HP dx7200 | HP Compaq Business PC dx7200 MT Service Reference Guide, 1st edition - Page 74
Microtower (MT) Chassis 6.2 External Security Devices 6.2.1 Installing a Cable Lock The cable lock may be used to secure the computer access panel to the chassis and, at the same time, secure the computer to a fixed object. Insert the cable lock in the location shown below. 6-2 390812-001 Service - HP dx7200 | HP Compaq Business PC dx7200 MT Service Reference Guide, 1st edition - Page 75
and Replacement Procedures- Microtower (MT) Chassis 6.2.2 Installing a Padlock A padlock may be used by itself to secure the access panel to the computer chassis. A padlock may also be used with a security cable to secure the computer to a fixed object. I Service Reference Guide, dx7200 390812-001 - HP dx7200 | HP Compaq Business PC dx7200 MT Service Reference Guide, 1st edition - Page 76
Removal and Replacement Procedures- Microtower (MT) Chassis 6.3 Access Panel 1. Prepare the computer for disassembly (Section 6.1). Ä CAUTION: Before removing the computer is facing up. To install the access panel, reverse the removal procedure. 6-4 390812-001 Service Reference Guide, dx7200 - HP dx7200 | HP Compaq Business PC dx7200 MT Service Reference Guide, 1st edition - Page 77
right corner of the bezel to release the hook that secures the top of the bezel to the chassis. Continue to rotate the bezel, then push the bezel to the left to release the right side latches and rotate the bezel off the chassis from left to right 2. Service Reference Guide, dx7200 390812-001 6-5 - HP dx7200 | HP Compaq Business PC dx7200 MT Service Reference Guide, 1st edition - Page 78
Removal and Replacement Procedures- Microtower (MT) Chassis To reinstall the front bezel: 1. Position the chassis in the upright position. 2. Insert the hooks on the tab on the upper right corner of the bezel snap into the slots on the chassis. 6-6 390812-001 Service Reference Guide, dx7200 - HP dx7200 | HP Compaq Business PC dx7200 MT Service Reference Guide, 1st edition - Page 79
Removal and Replacement Procedures- Microtower (MT) Chassis 6.5 Front Drive Bezels Follow these steps release the bezel blank 1. At the same time, pull the bezel blank in to remove it from the front bezel 2. To install a bezel blank, reverse the removal procedure. Service Reference Guide, dx7200 - HP dx7200 | HP Compaq Business PC dx7200 MT Service Reference Guide, 1st edition - Page 80
Removal and Replacement Procedures- Microtower (MT) Chassis 6.5.2 Diskette Drive Bezel Press the two upper 1 or the two lower 2 tabs for the diskette out to remove it from the front bezel. To install a bezel blank, reverse the removal procedure. 6-8 390812-001 Service Reference Guide, dx7200 - HP dx7200 | HP Compaq Business PC dx7200 MT Service Reference Guide, 1st edition - Page 81
Microtower (MT) Chassis 6.6 Cable Management Always follow good cable management practices when working inside the computer. ■ Keep cables away from major heat sources like the heatsink. ■ Do not jam cables on top of expansion cards or memory supply. Service Reference Guide, dx7200 390812-001 6-9 - HP dx7200 | HP Compaq Business PC dx7200 MT Service Reference Guide, 1st edition - Page 82
Replacement Procedures- Microtower (MT) Chassis 6.7 Memory Ä CAUTION: The memory module sockets have gold metal contacts. When upgrading the memory, it is important to use memory modules with gold Make sure the latches are in the closed position 3. 6-10 390812-001 Service Reference Guide, dx7200 - HP dx7200 | HP Compaq Business PC dx7200 MT Service Reference Guide, 1st edition - Page 83
Removal and Replacement Procedures- Microtower (MT) Chassis ✎ The computer automatically recognizes the additional memory when the computer is turned on. To reassemble the computer, reverse the 2 so that they are no longer secured by the lock. Service Reference Guide, dx7200 390812-001 6-11 - HP dx7200 | HP Compaq Business PC dx7200 MT Service Reference Guide, 1st edition - Page 84
- Microtower (MT) Chassis from the inside of the chassis. b. If removing a standard PCI expansion card, hold the card at each end, and carefully rock release it from the chassis frame. Be sure not to scrape the card against the other components. 6-12 390812-001 Service Reference Guide, dx7200 - HP dx7200 | HP Compaq Business PC dx7200 MT Service Reference Guide, 1st edition - Page 85
Removal and Replacement Procedures- Microtower (MT) Chassis c. If removing a PCI Express x16 card, pull the retention arm on the back of the expansion a new card or expansion slot cover for proper cooling of internal components during operation. Service Reference Guide, dx7200 390812-001 6-13 - HP dx7200 | HP Compaq Business PC dx7200 MT Service Reference Guide, 1st edition - Page 86
Removal and Replacement Procedures- Microtower (MT) Chassis 6. If replacing or adding a new expansion card, hold the card just above the expansion slot on to the installed card, if needed. Connect internal cables to the system board, if needed. 6-14 390812-001 Service Reference Guide, dx7200 - HP dx7200 | HP Compaq Business PC dx7200 MT Service Reference Guide, 1st edition - Page 87
Microtower (MT) Chassis 6.9 Drives The computer supports up to six drives that may be installed in various configurations. This Section describes the procedure for replacing or upgrading the storage drives. A Torx T-15 screwdriver is needed to remove and install the guide load the HP factory- - HP dx7200 | HP Compaq Business PC dx7200 MT Service Reference Guide, 1st edition - Page 88
Removal and Replacement Procedures- Microtower (MT) Chassis 6.9.2 Removing a Drive 1. Remove any removable media, such as a compact disc or diskette, from the illustrations. Disconnecting Optical Drive Cables Disconnecting Diskette Drive Cables 6-16 390812-001 Service Reference Guide, dx7200 - HP dx7200 | HP Compaq Business PC dx7200 MT Service Reference Guide, 1st edition - Page 89
bay. Lift the release tab on the latch drive bracket 1 for the drive you want to remove, then slide the drive from its drive bay 2. 7. Remove the four guide screws (two on each side) from the old drive. You will need these screws to install a new drive. Service Reference Guide, dx7200 390812-001 - HP dx7200 | HP Compaq Business PC dx7200 MT Service Reference Guide, 1st edition - Page 90
a black finish. U.S. threaded screws have a silver finish. Make sure to install the appropriate guide screws into the drive. 2. Align the guide screws with the guide slots, then slide the drive into the drive bay, making sure it is fully seated. 6-18 390812-001 Service Reference Guide, dx7200 - HP dx7200 | HP Compaq Business PC dx7200 MT Service Reference Guide, 1st edition - Page 91
Removal and Replacement Procedures- Microtower (MT) Chassis 3. Reconnect the power and data cables to the drive as shown in the following cabling to get optimum performance. Connecting Optical Drive Cables Connecting Diskette Drive Cables Service Reference Guide, dx7200 390812-001 6-19 - HP dx7200 | HP Compaq Business PC dx7200 MT Service Reference Guide, 1st edition - Page 92
and Replacement Procedures- Microtower (MT) Chassis Connecting instructions in the guide included with the Restore Plus! CD. When the restore process has completed, reinstall any personal files that were backed up before replacing the hard drive. 6-20 390812-001 Service Reference Guide, dx7200 - HP dx7200 | HP Compaq Business PC dx7200 MT Service Reference Guide, 1st edition - Page 93
Removal and Replacement Procedures- Microtower (MT) Chassis 6.10 Chassis Fan 1. Prepare the computer for disassembly (Section 6.1). 2. Remove the access 5. Remove the fan from the chassis 3. To install the chassis fan, reverse the removal procedure. Service Reference Guide, dx7200 390812-001 6-21 - HP dx7200 | HP Compaq Business PC dx7200 MT Service Reference Guide, 1st edition - Page 94
Removal and Replacement Procedures- Microtower (MT) Chassis 6.11 Front I/O Panel Housing Assembly 1. Prepare the from the system board: the power switch/LED cable, the front USB cable, and the front audio cable. 4. Remove the two screws that secure the housing to the chassis 1 then pull the housing - HP dx7200 | HP Compaq Business PC dx7200 MT Service Reference Guide, 1st edition - Page 95
Procedures- Microtower (MT) Chassis audio port assembly in place 1. 5. Remove the I/O device assembly from the I/O panel by pushing it out of the housing 2. To install the I/O devices, reverse the removal procedures and then reinstall the housing assembly. Service Reference Guide, dx7200 - HP dx7200 | HP Compaq Business PC dx7200 MT Service Reference Guide, 1st edition - Page 96
Removal and Replacement Procedures- Microtower (MT) Chassis 6.13 Power Switch Assembly 1. Prepare the computer for disassembly (Section 6.1). 2. Remove the access panel and to the front of the chassis and reconnect the cables to the system board. 6-24 390812-001 Service Reference Guide, dx7200 - HP dx7200 | HP Compaq Business PC dx7200 MT Service Reference Guide, 1st edition - Page 97
Removal and Replacement Procedures- Microtower (MT) Chassis 6.14 Heatsink 1. Prepare the computer for disassembly (Section 6.1). 2. Remove the access panel and socket are very fragile and any damage to them may require replacing the system board. Service Reference Guide, dx7200 390812-001 6-25 - HP dx7200 | HP Compaq Business PC dx7200 MT Service Reference Guide, 1st edition - Page 98
Removal and Replacement Procedures- Microtower (MT) Chassis 6.15 Processor 1. Prepare the computer for disassembly (Section 6.1). 2. Remove the computer cover (Section 6.3). 3. the top of the processor from the syringe supplied in the spares kit. 6-26 390812-001 Service Reference Guide, dx7200 - HP dx7200 | HP Compaq Business PC dx7200 MT Service Reference Guide, 1st edition - Page 99
Removal and Replacement Procedures- Microtower (MT) Chassis 4. Apply the update the system ROM to ensure that the latest version of the BIOS is being used on the computer. The latest system BIOS can be found on the Web at: http://h18000.www1.hp.com/support/files. Service Reference Guide, dx7200 - HP dx7200 | HP Compaq Business PC dx7200 MT Service Reference Guide, 1st edition - Page 100
Removal and Replacement Procedures- Microtower (MT) Chassis 6.16 Speaker 1. Prepare the computer for disassembly (Section 6.1). 2. Remove the access panel and rotate out of the retaining clips. To install the speaker, reverse the removal procedures. 6-28 390812-001 Service Reference Guide, dx7200 - HP dx7200 | HP Compaq Business PC dx7200 MT Service Reference Guide, 1st edition - Page 101
Removal and Replacement Procedures- Microtower (MT) Chassis 6.17 Power Supply Å WARNING: Voltage is always present on the system board when the devices and from the system board. 4. Remove the screws that connect the power supply to the chassis 1. Service Reference Guide, dx7200 390812-001 6-29 - HP dx7200 | HP Compaq Business PC dx7200 MT Service Reference Guide, 1st edition - Page 102
- Microtower (MT) Chassis 5. Pull the power supply towards the front of the chassis while depressing the two sets of retaining clips 1 to allow the power supply to move far enough to lift it from the chassis 2. To install the power supply, reverse the removal procedure. 6-30 390812-001 Service - HP dx7200 | HP Compaq Business PC dx7200 MT Service Reference Guide, 1st edition - Page 103
Procedures- Microtower (MT) Chassis 6.18 System Board 1. Prepare the computer for disassembly (Section 6.1). 2. Remove the access panel and rotate the computer so the system board is parallel to the table to make it easier to work on (Section 6.3). 3. Remove all PCI and PCI Express expansion boards - HP dx7200 | HP Compaq Business PC dx7200 MT Service Reference Guide, 1st edition - Page 104
Replacement Procedures- Microtower (MT) Chassis 6. or dispose of in fire or water. ■ Replace the battery only with the HP spare designated for this product. Ä CAUTION: Before replacing the battery, it is following instructions to replace the battery: 6-32 390812-001 Service Reference Guide, dx7200 - HP dx7200 | HP Compaq Business PC dx7200 MT Service Reference Guide, 1st edition - Page 105
Removal and Replacement Procedures- Microtower (MT) Chassis 6.19.1 Type 1 Battery Holder 1. Lift the battery Reset the date and time, your passwords, and any special system setups, using Computer Setup. Refer to the Computer Setup (F10) Utility Guide. Service Reference Guide, dx7200 390812-001 6- - HP dx7200 | HP Compaq Business PC dx7200 MT Service Reference Guide, 1st edition - Page 106
and Replacement Procedures- Microtower (MT) Chassis 6.19.2 Type 2 Battery Holder 1. To release the battery from its date and time, your passwords, and any special system setups, using Computer Setup. Refer to the Computer Setup (F10) Utility Guide. 6-34 390812-001 Service Reference Guide, dx7200 - HP dx7200 | HP Compaq Business PC dx7200 MT Service Reference Guide, 1st edition - Page 107
Removal and Replacement Procedures- Microtower (MT) Chassis 6.19.3 Type 3 Battery Holder 1. Pull back on 5. Reset the date and time, your passwords, and any special system setups, using Computer Setup. Refer to the Computer Setup (F10) Utility Guide. Service Reference Guide, dx7200 390812-001 6- - HP dx7200 | HP Compaq Business PC dx7200 MT Service Reference Guide, 1st edition - Page 108
Removal and Replacement Procedures- Microtower (MT) Chassis 6-36 390812-001 Service Reference Guide, dx7200 - HP dx7200 | HP Compaq Business PC dx7200 MT Service Reference Guide, 1st edition - Page 109
and Replacement Procedures- Slim Tower (ST) Chassis Adherence to the procedures and precautions described in this chapter is essential for proper service. After completing all necessary using the wrong screw in an application may damage the unit. Service Reference Guide, dx7200 390812-001 7-1 - HP dx7200 | HP Compaq Business PC dx7200 MT Service Reference Guide, 1st edition - Page 110
Removal and Replacement Procedures- Slim Tower (ST) Chassis 8. Lift the computer off the stand. 9. Lay the computer on its side (with the computer cover facing up) before removing the computer cover and installing hardware. 7-2 390812-001 Service Reference Guide, dx7200 - HP dx7200 | HP Compaq Business PC dx7200 MT Service Reference Guide, 1st edition - Page 111
Slim Tower (ST) Chassis 7.2 Unlocking the Smart Cover Lock If you have locked the Smart Cover Lock use Computer Setup to unlock the lock. Refer to the Desktop Management Guide on Lock from the chassis. 4. Remove the computer cover (Section 7.5). Service Reference Guide, dx7200 390812-001 7-3 - HP dx7200 | HP Compaq Business PC dx7200 MT Service Reference Guide, 1st edition - Page 112
Removal and Replacement Procedures- Slim Tower (ST) Chassis To reattach the Smart Cover Lock: 1. Install the Smart Cover Lock assembly on the inside of the . 2. Use the supplied tamper-resistant screw 2 to secure the Smart Cover Lock to the chassis. 7-4 390812-001 Service Reference Guide, dx7200 - HP dx7200 | HP Compaq Business PC dx7200 MT Service Reference Guide, 1st edition - Page 113
Removal and Replacement Procedures- Slim Tower (ST) Chassis 7.3 Hood Sensor 1. Prepare the computer for disassembly (Section 7.1). 2. Remove the computer cover (Section through the slot 2. To install the hood sensor, reverse the removal procedure. Service Reference Guide, dx7200 390812-001 7-5 - HP dx7200 | HP Compaq Business PC dx7200 MT Service Reference Guide, 1st edition - Page 114
Removal and Replacement Procedures- Slim Tower (ST) Chassis 7.4 External Security Devices 7.4.1 Security Clip A special clip is required to secure the computer from the computer to a fixed object. Insert the cable lock in the location shown below. 7-6 390812-001 Service Reference Guide, dx7200 - HP dx7200 | HP Compaq Business PC dx7200 MT Service Reference Guide, 1st edition - Page 115
and Replacement Procedures- Slim Tower (ST) Chassis 7.4.3 Padlock A padlock may be used by itself to secure the computer cover to the computer chassis. A padlock may also be used with a security cable to secure the computer to a fixed object. I Service Reference Guide, dx7200 390812-001 7-7 - HP dx7200 | HP Compaq Business PC dx7200 MT Service Reference Guide, 1st edition - Page 116
Removal and Replacement Procedures- Slim Tower (ST) Chassis 7.5 Computer Cover 1. Prepare the computer for disassembly (Section 7.1). Ä CAUTION: Before removing the off the chassis. To install the computer cover, reverse the removal procedure. 7-8 390812-001 Service Reference Guide, dx7200 - HP dx7200 | HP Compaq Business PC dx7200 MT Service Reference Guide, 1st edition - Page 117
Removal and Replacement Procedures- Slim Tower (ST) Chassis 7.6 Front Drive Bezels 1. Prepare the computer for disassembly (Section 7.1). 2. Remove the computer configuration. 4. Install a bezel or a bezel blank by pushing the bezel into place. Service Reference Guide, dx7200 390812-001 7-9 - HP dx7200 | HP Compaq Business PC dx7200 MT Service Reference Guide, 1st edition - Page 118
Removal and Replacement Procedures- Slim Tower (ST) Chassis There are three drive bezel inserts that are available. Item 1 2 3 Description Diskette drive bezel Hard drive bezel 3.5" drive bezel 7-10 390812-001 Service Reference Guide, dx7200 - HP dx7200 | HP Compaq Business PC dx7200 MT Service Reference Guide, 1st edition - Page 119
Procedures- Slim Tower (ST) Chassis 7.7 Cable Management The Slim Tower chassis is the heatsink. ■ Do not jam cables on top of expansion cards or memory modules. Printed circuit cards like these are not designed to take excessive power supply. Service Reference Guide, dx7200 390812-001 7-11 - HP dx7200 | HP Compaq Business PC dx7200 MT Service Reference Guide, 1st edition - Page 120
Removal and Replacement Procedures- Slim Tower (ST) Chassis 7.8 Memory Ä CAUTION: The memory module sockets have gold metal contacts. When upgrading the memory, it is important to use memory modules with gold metal contacts to prevent corrosion and/or oxidation resulting from having incompatible - HP dx7200 | HP Compaq Business PC dx7200 MT Service Reference Guide, 1st edition - Page 121
Replacement Procedures- Slim Tower (ST) Chassis ✎ The computer automatically recognizes the additional memory when the the computer cover (Section 7.5). 3. Release the slot cover retention latch that secures the PCI slot covers by lifting the green Service Reference Guide, dx7200 390812-001 7-13 - HP dx7200 | HP Compaq Business PC dx7200 MT Service Reference Guide, 1st edition - Page 122
Removal and Replacement Procedures- Slim Tower (ST) Chassis 7.9.2 PCI Expansion Card 1. Prepare the computer for disassembly (Section 7.1). 2. Remove the computer cover (Section 7.5). 3. Identify the slot into which you want to insert the expansion card. 4. Release the slot cover retention latch - HP dx7200 | HP Compaq Business PC dx7200 MT Service Reference Guide, 1st edition - Page 123
Removal and Replacement Procedures- Slim Tower (ST) Chassis 6. Install the expansion card by sliding the card under the slot cover retention latch either an expansion card or slot cover for proper cooling of internal components during operation. Service Reference Guide, dx7200 390812-001 7-15 - HP dx7200 | HP Compaq Business PC dx7200 MT Service Reference Guide, 1st edition - Page 124
Slim Tower (ST) Chassis 7.9.3 PCI Express Expansion Card To remove a PCI Express expansion card: 1. Prepare the computer for disassembly (Section 7.1). 2. Remove the computer cover (Section 7.5). 3. Release of internal components during operation. 7-16 390812-001 Service Reference Guide, dx7200 - HP dx7200 | HP Compaq Business PC dx7200 MT Service Reference Guide, 1st edition - Page 125
Procedures- Slim Tower (ST) Chassis 7.10 Drives A Torx T-15 screwdriver is needed to remove and install the guide screws will need to run the Restore Plus! CD to load the HP factory-installed files. 7.10.1 Drive Positions Drive Positions Item Service Reference Guide, dx7200 390812-001 7-17 - HP dx7200 | HP Compaq Business PC dx7200 MT Service Reference Guide, 1st edition - Page 126
Removal and Replacement Procedures- Slim Tower (ST) Chassis 7.10.2 Optical Drive ✎ An optical drive is a CD-ROM, CD-R/RW, DVD-ROM, DVD+R/RW, or CD-RW/DVD green-tabbed lip. 5. Disconnect the power and data cables from the rear of the optical drive. 7-18 390812-001 Service Reference Guide, dx7200 - HP dx7200 | HP Compaq Business PC dx7200 MT Service Reference Guide, 1st edition - Page 127
Removal and Replacement Procedures- Slim Tower (ST) Chassis 6. Rotate the drive cage down to its normal position before drive rails. Ä CAUTION: Use only 5-mm long screws as guide screws. Longer screws can damage the internal components of the drive. Service Reference Guide, dx7200 390812-001 7-19 - HP dx7200 | HP Compaq Business PC dx7200 MT Service Reference Guide, 1st edition - Page 128
Removal and Replacement Procedures- Slim Tower (ST) Chassis 7.10.3 External 3.5-inch Drive 1. Remove any removable media, such as a diskette, from the drive. 2. Prepare the drive cage down to its normal position before trying to remove the drive. 7-20 390812-001 Service Reference Guide, dx7200 - HP dx7200 | HP Compaq Business PC dx7200 MT Service Reference Guide, 1st edition - Page 129
Procedures- Slim Tower (ST) Chassis 8. Press the green drive retention latch 1 located on the side of the diskette drive to disengage the drive from the drive cage and slide the diskette drive forward approximately 6mm (1/4 inch) 2. 9. Lift the rear of the drive up so that the rear guide screws - HP dx7200 | HP Compaq Business PC dx7200 MT Service Reference Guide, 1st edition - Page 130
Procedures- Slim Tower (ST) Chassis 7.10.4 Primary Hard Drive A Torx T-15 screwdriver is needed to remove and install the guide screws on , you will need to run the Restore Plus! CD to load the HP factory-installed files. Ä CAUTION: To prevent loss of work and damage to Service Reference Guide, dx7200 - HP dx7200 | HP Compaq Business PC dx7200 MT Service Reference Guide, 1st edition - Page 131
Removal and Replacement Procedures- Slim Tower (ST) Chassis 4. Remove the security clip that secures the backwall to the power supply. 5. Rotate the power supply to its full upright position. Service Reference Guide, dx7200 390812-001 7-23 - HP dx7200 | HP Compaq Business PC dx7200 MT Service Reference Guide, 1st edition - Page 132
Removal and Replacement Procedures- Slim Tower (ST) Chassis 6. Disconnect the power 1 and data 2 cables from the back of the hard drive. 7. Pull be connected to the blue connector labeled P60 SATA 0 first to avoid any hard drive performance problems. 7-24 390812-001 Service Reference Guide, dx7200 - HP dx7200 | HP Compaq Business PC dx7200 MT Service Reference Guide, 1st edition - Page 133
Removal and Replacement Procedures- Slim Tower (ST) Chassis ✎ When replacing the hard drive, transfer the four screws from the old drive to the new one. The screws take the place of drive rails. You will need a Torx T-15 screwdriver to remove and re-install the guide screws. HP has provided four - HP dx7200 | HP Compaq Business PC dx7200 MT Service Reference Guide, 1st edition - Page 134
Removal and Replacement Procedures- Slim Tower (ST) Chassis 7.11 Fan Shroud 1. Prepare the computer for disassembly (Section 7.1). 2. Remove the computer cover (Section 7.5). 3. Lift not get caught on the wires from either the fan or the speaker. 7-26 390812-001 Service Reference Guide, dx7200 - HP dx7200 | HP Compaq Business PC dx7200 MT Service Reference Guide, 1st edition - Page 135
Removal and Replacement Procedures- Slim Tower (ST) Chassis 7.12 Chassis Fan 1. Prepare the computer for disassembly (Section 7.1). 2. Remove the computer cover (Section 7.5). 3. arrows on the side of the fan housing for proper air flow orientation. Service Reference Guide, dx7200 390812-001 7-27 - HP dx7200 | HP Compaq Business PC dx7200 MT Service Reference Guide, 1st edition - Page 136
Removal and Replacement Procedures- Slim Tower (ST) Chassis 7.13 Front I/O Devices 1. Prepare the computer for disassembly (Section 7.1). 2. Remove the computer cover (Section . To reinstall the front I/O device, reverse the removal procedure. 7-28 390812-001 Service Reference Guide, dx7200 - HP dx7200 | HP Compaq Business PC dx7200 MT Service Reference Guide, 1st edition - Page 137
Removal and Replacement Procedures- Slim Tower (ST) Chassis 7.14 Power Switch Assembly 1. Prepare the computer for disassembly (Section 7.1). 2. Remove the computer cover chassis. To install the power switch and LEDs, reverse the removal procedure. Service Reference Guide, dx7200 390812-001 7-29 - HP dx7200 | HP Compaq Business PC dx7200 MT Service Reference Guide, 1st edition - Page 138
Removal and Replacement Procedures- Slim Tower (ST) Chassis 7.15 Heatsink 1. Prepare the computer for disassembly (Section 7.1). 2. Remove the computer cover (Section 7.5). 3. Remove to install the fan shroud may cause the computer to overheat. 7-30 390812-001 Service Reference Guide, dx7200 - HP dx7200 | HP Compaq Business PC dx7200 MT Service Reference Guide, 1st edition - Page 139
Removal and Replacement Procedures- Slim Tower (ST) Chassis 7.16 Processor 1. Prepare the computer for disassembly (Section 7.1). 2. Remove the computer cover (Section 7.5). 3. the top of the processor from the syringe supplied in the spares kit. Service Reference Guide, dx7200 390812-001 7-31 - HP dx7200 | HP Compaq Business PC dx7200 MT Service Reference Guide, 1st edition - Page 140
Replacement Procedures- Slim Tower (ST) Chassis 4. Apply update the system ROM to ensure that the latest version of the BIOS is being used on the computer. The latest system BIOS can be found on the Web at: http://h18000.www1.hp.com/support/files. 7-32 390812-001 Service Reference Guide, dx7200 - HP dx7200 | HP Compaq Business PC dx7200 MT Service Reference Guide, 1st edition - Page 141
- Slim Tower (ST) Chassis 7.17 Speaker 1. Prepare the computer for disassembly (Section 7.1). 2. Remove the computer cover (Section 7.5). 3. Remove the fan shroud (Section 7.11). 4. Remove the heatsink control cable and the heatsink from the system board (Section 7.15). 5. Remove any memory modules - HP dx7200 | HP Compaq Business PC dx7200 MT Service Reference Guide, 1st edition - Page 142
Slim Tower (ST Release the power supply cable from the cable retaining clips on the bottom of the chassis under the drive cage. 7. Disconnect the hood sensor from the system board and remove the sensor from the power supply if required (Section 7.3). 7-34 390812-001 Service Reference Guide, dx7200 - HP dx7200 | HP Compaq Business PC dx7200 MT Service Reference Guide, 1st edition - Page 143
Removal and Replacement Procedures- Slim Tower (ST) Chassis 8. Rotate the power supply to its full upright position 1, then lift the power supply straight up and so they are not cut by the drive cage and are not pinched by the rotating power supply. Service Reference Guide, dx7200 390812-001 7-35 - HP dx7200 | HP Compaq Business PC dx7200 MT Service Reference Guide, 1st edition - Page 144
Procedures- Slim Tower (ST) Chassis 7.19 System Board 1. Prepare the computer for disassembly (Section 7.1). 2. Remove the computer cover (Section 7.5). 3. Remove all PCI and PCI Express expansion boards data and power cables from the system board. 7-36 390812-001 Service Reference Guide, dx7200 - HP dx7200 | HP Compaq Business PC dx7200 MT Service Reference Guide, 1st edition - Page 145
and Replacement Procedures- Slim Tower (ST) Chassis 8. Disconnect the serial port from the system board. 9. Disconnect the balance of the cables from the system board. 10. Remove the long mounting screw that secures the system board tray to the chassis. Service Reference Guide, dx7200 390812-001 - HP dx7200 | HP Compaq Business PC dx7200 MT Service Reference Guide, 1st edition - Page 146
Removal and Replacement Procedures- Slim Tower (ST) Chassis 11. Slide the system board tray assembly towards the front of the chassis, about 1/4 inch and lift the so they do not interfere with the rotation of the drive cage or power supply. 7-38 390812-001 Service Reference Guide, dx7200 - HP dx7200 | HP Compaq Business PC dx7200 MT Service Reference Guide, 1st edition - Page 147
Replacement Procedures- Slim Tower (ST) Chassis 7.20 or dispose of in fire or water. ■ Replace the battery only with the HP spare designated for this product. Ä CAUTION: Before replacing the battery, it is instructions to replace the battery: Service Reference Guide, dx7200 390812-001 7-39 - HP dx7200 | HP Compaq Business PC dx7200 MT Service Reference Guide, 1st edition - Page 148
Removal and Replacement Procedures- Slim Tower (ST) Chassis 7.20.1 Type 1 Battery Holder 1. Lift the Reset the date and time, your passwords, and any special system setups, using Computer Setup. Refer to the Computer Setup (F10) Utility Guide. 7-40 390812-001 Service Reference Guide, dx7200 - HP dx7200 | HP Compaq Business PC dx7200 MT Service Reference Guide, 1st edition - Page 149
Removal and Replacement Procedures- Slim Tower (ST) Chassis 7.20.2 Type 2 Battery Holder 1. To release the battery from its the date and time, your passwords, and any special system setups, using Computer Setup. Refer to the Computer Setup (F10) Utility Guide. Service Reference Guide, dx7200 - HP dx7200 | HP Compaq Business PC dx7200 MT Service Reference Guide, 1st edition - Page 150
Removal and Replacement Procedures- Slim Tower (ST) Chassis 7.20.3 Type 3 Battery Holder 1. Pull back on 5. Reset the date and time, your passwords, and any special system setups, using Computer Setup. Refer to the Computer Setup (F10) Utility Guide. 7-42 390812-001 Service Reference Guide, dx7200 - HP dx7200 | HP Compaq Business PC dx7200 MT Service Reference Guide, 1st edition - Page 151
connectors. Some of these connectors may not be used on the product being serviced. Keyboard Connector and Icon Pin Signal 1 Data 2 Unused 3 Ground 4 Unused Ethernet BNC Connector and Icon Pin 1 (Center) 2 (Shield) Signal Data Ground Service Reference Guide, dx7200 390812-001 A-1 - HP dx7200 | HP Compaq Business PC dx7200 MT Service Reference Guide, 1st edition - Page 152
AUI Differential Receive Pin Signal 9 Positive AUI Differential Receive 10 +12V 11 Ground 12 Ground 13 Unused 14 Unused 15 Unused 16 Unused A-2 390812-001 Service Reference Guide, dx7200 - HP dx7200 | HP Compaq Business PC dx7200 MT Service Reference Guide, 1st edition - Page 153
Indicator (5V if powered) USB Connector and Icon Pin Signal 1 +5 VDC 2 - Data 3 + Data 4 Ground Microphone Connector and Icon (1/8" miniphone) 1 23 Pin 1 (Tip) 2 (Ring) 3 (Shield) Signal Audio Power Ground Service Reference Guide, dx7200 390812-001 A-3 - HP dx7200 | HP Compaq Business PC dx7200 MT Service Reference Guide, 1st edition - Page 154
) 1 23 Pin 1 (Tip) 2 (Ring) 3 (Shield) Signal Audio_In_Left Audio_In_Right Ground Line-Out Audio Connector and Icon (1/8" miniphone) 1 23 Pin 1 (Tip) 2 (Ring) 3 (Shield) Signal 60 -MSG 61 -SEL 62 -C/D 63 -REQ 64 -I/O 65 -D 66 -D 67 -D 68 -D A-4 390812-001 Service Reference Guide, dx7200 - HP dx7200 | HP Compaq Business PC dx7200 MT Service Reference Guide, 1st edition - Page 155
7 Ground 8 Ground 9 +5V (fused) 10 Ground Pin Signal 11 Not used 12 DDC Serial Data 13 Horizontal Sync 14 Vertical Sync 15 DDC Serial Clock Service Reference Guide, dx7200 390812-001 A-5 - HP dx7200 | HP Compaq Business PC dx7200 MT Service Reference Guide, 1st edition - Page 156
A_GROUND_I 63 FP16 47 audio_r 64 FP17 48 FP01 65 FP18 49 FP02 66 FP19 50 FP03 51 FP04 67 FP20 68 FP21 A-6 390812-001 Service Reference Guide, dx7200 - HP dx7200 | HP Compaq Business PC dx7200 MT Service Reference Guide, 1st edition - Page 157
12 Fan-CMD 4-Pin Power (for CPU) Connector and Icon 1 Pin Signal 13 +12 V 14 +5 V Sense 15 GND 16 +5 V 17 +5 V 18 +3.3 V Pin Signal 1 GND 2 GND 3 +12 V CPU 4 -12 V CPU Pin Signal 19 GND 20 +3.3 Sense 21 +3.3 V 22 +3.3 V 23 GND 24 -12 V Service Reference Guide, dx7200 390812-001 A-7 - HP dx7200 | HP Compaq Business PC dx7200 MT Service Reference Guide, 1st edition - Page 158
Connector and Icon 4 6 Pin Signal 1 GND 2 GND 3 GND 4 12 V CPU 5 12 V CPU 6 +12 V SATA Data and Power Drive Connector Pin Signal Pin Signal S1 Ground S5 B- P11 Reserved P15 V 12 Pin Signal S4 Ground P4 Ground P8 V 5 P12 Ground A-8 390812-001 Service Reference Guide, dx7200 - HP dx7200 | HP Compaq Business PC dx7200 MT Service Reference Guide, 1st edition - Page 159
82 GND Pin B information is on the next page Notes: x1 PCI Express uses pins 1-18 x4 PCI Express uses pins 1-32 x8 PCI Express uses pins 1-49 x16 PCI Express uses pins 1-82 Pin Signal 16 PERp0 17 PERn0 18 GND 19 72 PERp13 73 PERn13 74 GND 75 GND Service Reference Guide, dx7200 390812-001 A-9 - HP dx7200 | HP Compaq Business PC dx7200 MT Service Reference Guide, 1st edition - Page 160
78 PETp15 79 PETn15 80 GND 81 PRSNT2# 82 RSVD Notes: x1 PCI Express uses pins 1-18 x4 PCI Express uses pins 1-32 x8 PCI Express uses pins 1-49 x16 PCI Express uses pins 1-82 Pin Signal 11 WAKE# 12 RSVD 13 GND 14 72 GND 73 GND 74 PETp14 75 PETn14 A-10 390812-001 Service Reference Guide, dx7200 - HP dx7200 | HP Compaq Business PC dx7200 MT Service Reference Guide, 1st edition - Page 161
15 Ground (for +5V) 16 Hot Plug Detect 17 T.M.D.S. Data018 T.M.D.S. Data0+ 19 T.M.D.S. Data0/5 Shield 20 T.M.D.S. Data5- 21 T.M.D.S. Data5+ 22 T.M.D.S. Data Shield 23 T.M.D.S. Clock+ 24 T.M.D.S. Clock- Service Reference Guide, dx7200 390812-001 A-11 - HP dx7200 | HP Compaq Business PC dx7200 MT Service Reference Guide, 1st edition - Page 162
Connector Pin Assignments A-12 390812-001 Service Reference Guide, dx7200 - HP dx7200 | HP Compaq Business PC dx7200 MT Service Reference Guide, 1st edition - Page 163
Japan, use only the power cord received with this product. Ä CAUTION: Do not use the power cord received with this product on any other products. Service Reference Guide, dx7200 390812-001 B-1 - HP dx7200 | HP Compaq Business PC dx7200 MT Service Reference Guide, 1st edition - Page 164
Power Cord Set Requirements Country-Specific Requirements Additional requirements specific to a country are shown in parentheses and explained below. Country Accrediting Agency with a Japanese Industrial Standard C8303 (7A, 125V) configuration. B-2 390812-001 Service Reference Guide, dx7200 - HP dx7200 | HP Compaq Business PC dx7200 MT Service Reference Guide, 1st edition - Page 165
. 110-Out of Memory Space for Option ROMs Recently added PCI expansion card contains an option ROM too large to download during POST. Recommended Action Verify the correct ROM. Flash the ROM if needed. If an expansion card was recently added, remove it and see if the problem remains. Clear CMOS - HP dx7200 | HP Compaq Business PC dx7200 MT Service Reference Guide, 1st edition - Page 166
modules are installed correctly. Verify proper memory module type. Remove and replace the identified faulty memory module(s). If the error persists after replacing memory modules, replace the system board. Replace memory modules with matched sets. C-2 390812-001 Service Reference Guide, dx7200 - HP dx7200 | HP Compaq Business PC dx7200 MT Service Reference Guide, 1st edition - Page 167
for memory support information. Reconnect keyboard with computer turned off. Check connector for bent or missing pins. Ensure that none of the keys are depressed. Replace keyboard. Reconnect keyboard with computer turned off. Replace the system board. Service Reference Guide, dx7200 390812 - HP dx7200 | HP Compaq Business PC dx7200 MT Service Reference Guide, 1st edition - Page 168
Audio Interrupt Conflict 411-Network latest BIOS image Reseat CPU or chassis fan. Reseat fan cable. Replace CPU or chassis fan. Run Computer Setup (F10 Setup). Check and/or replace cables. Clear CMOS. Replace diskette drive. Replace the system board. C-4 390812-001 Service Reference Guide, dx7200 - HP dx7200 | HP Compaq Business PC dx7200 MT Service Reference Guide, 1st edition - Page 169
audio harness has been detached or unseated from the system board. Front USB harness has been detached or unseated from system board. Riser card has been removed or has not been reinstalled properly in the system. There is an incompatibility/problem with this device and the system or PCI Express - HP dx7200 | HP Compaq Business PC dx7200 MT Service Reference Guide, 1st edition - Page 170
2000 or Windows XP, change "SATA Emulation" to "Separate IDE Controller" in Computer Setup. If not using Windows 2000 or Windows XP, relocate the affected devices to SATA 0 or SATA 2 (if available). Remove the affected devices from SATA 1 and SATA 3. C-6 390812-001 Service Reference Guide, dx7200 - HP dx7200 | HP Compaq Business PC dx7200 MT Service Reference Guide, 1st edition - Page 171
If Setup already has data in the field or will not allow the serial number to be entered, download from http://www.hp.com and run SP5572.EXE (SNZERO.EXE). Run Computer Setup and try to enter serial number under Security, System ID, then save changes. Service Reference Guide, dx7200 390812-001 C-7 - HP dx7200 | HP Compaq Business PC dx7200 MT Service Reference Guide, 1st edition - Page 172
Attached Probable Cause Keyboard failure while Network Server Mode enabled. Parity Check 2 System will not boot without fan. Parity RAM failure. CPU fan not installed or disconnected in VSFF but does not spin, replace the heatsink-fan assembly. C-8 390812-001 Service Reference Guide, dx7200 - HP dx7200 | HP Compaq Business PC dx7200 MT Service Reference Guide, 1st edition - Page 173
LED flashes three times, once every second, followed by a two second pause. Beeps None None 2 3 Possible Cause Computer on. Computer in Suspend to RAM reseller or service provider. Check to see that the processor is present. Reseat the processor. Service Reference Guide, dx7200 390812-001 - HP dx7200 | HP Compaq Business PC dx7200 MT Service Reference Guide, 1st edition - Page 174
isolate the faulty module. Replace third-party memory with HP memory. Replace the system board. For systems BIOS image. See the "ROM Flash" section of the Desktop Management Guide on the Documentation and Diagnostics CD. Replace the system board. C-10 390812-001 Service Reference Guide, dx7200 - HP dx7200 | HP Compaq Business PC dx7200 MT Service Reference Guide, 1st edition - Page 175
Panel LEDs and Audible Codes (Continued) Activity Red Power LED flashes nine times, once every second, followed by a two second pause. Red Power LED flashes ten times, once every second, followed by a two second pause. System does not power on and LEDs are not flashing. Beeps 9 10 None Possible - HP dx7200 | HP Compaq Business PC dx7200 MT Service Reference Guide, 1st edition - Page 176
POST Error Messages C-12 390812-001 Service Reference Guide, dx7200 - HP dx7200 | HP Compaq Business PC dx7200 MT Service Reference Guide, 1st edition - Page 177
troubleshooting video sources (embedded, PCI, or PCI-Express adapters) installed (embedded hold any key. If the system beeps, then the keyboard is operating the necessary device drivers installed? ■ Have all printer drivers been installed for Service Reference Guide, dx7200 390812-001 D-1 - HP dx7200 | HP Compaq Business PC dx7200 MT Service Reference Guide, 1st edition - Page 178
replaced. 1. Reset the date and time under Control Panel. 2. Replace the RTC battery. Computer appears to pause periodically. Network driver is loaded and no network connection is established. Establish a network connection, or use Computer Setup or Microsoft Windows Device Manager to disable - HP dx7200 | HP Compaq Business PC dx7200 MT Service Reference Guide, 1st edition - Page 179
Troubleshooting Without Diagnostics Solving Minor Problems (Continued) Problem Cause Poor performance is experienced. (continued) Program previously accessed did not release reserved memory that the fan is properly connected to the system board. Service Reference Guide, dx7200 390812-001 D-3 - HP dx7200 | HP Compaq Business PC dx7200 MT Service Reference Guide, 1st edition - Page 180
Troubleshooting Without Diagnostics Solving Minor Problems (Continued) Problem Cause System does not power on and the LEDs on the front of the computer are not flashing. System unable to power on. the power supply. 6. Replace the system board. D-4 390812-001 Service Reference Guide, dx7200 - HP dx7200 | HP Compaq Business PC dx7200 MT Service Reference Guide, 1st edition - Page 181
Troubleshooting Without Diagnostics Solving Power Supply Problems Solving Power Supply Problems Problem the computer beeps four times. Beeps continue for five iterations after which the LED flashes will continue until the problem is resolved. board. Service Reference Guide, dx7200 390812-001 D-5 - HP dx7200 | HP Compaq Business PC dx7200 MT Service Reference Guide, 1st edition - Page 182
Troubleshooting Without Diagnostics Solving Diskette Problems Solving Diskette Problems Problem Cause write-protected. Diskette write control is enabled. Solution In Microsoft Windows XP, right-click Start, click Explore, and select a drive. D-6 390812-001 Service Reference Guide, dx7200 - HP dx7200 | HP Compaq Business PC dx7200 MT Service Reference Guide, 1st edition - Page 183
media boot has been disabled in Computer Setup. Network server mode is enabled in Computer Setup. Solution In Windows XP, right-click Start, click Explore, and select Run Computer Setup and disable Network Server Mode in Security > Password Options. Service Reference Guide, dx7200 390812-001 D-7 - HP dx7200 | HP Compaq Business PC dx7200 MT Service Reference Guide, 1st edition - Page 184
Now. In Windows XP, right-click Start, click Explore, and select a drive. Select File > Properties > Tools. Under Error-checking, click Check Now. Check cable connections. 1. Check to see if the device is listed within Computer Setup. If it is listed, the probable cause is a driver problem. If it - HP dx7200 | HP Compaq Business PC dx7200 MT Service Reference Guide, 1st edition - Page 185
the beeps and LED lights on the front of the computer. See Appendix C "POST Error Messages". 1. Attempt the normal Windows "Shut Down" procedure. 2. Press the power button for four or more seconds to turn off the power. 3. Restart the computer using the power button. Service Reference Guide, dx7200 - HP dx7200 | HP Compaq Business PC dx7200 MT Service Reference Guide, 1st edition - Page 186
Troubleshooting Without Diagnostics Solving MultiBay Problems Solving MultiBay Problems Problem Cause Drive not found. You attempted to hot plug a removable hard drive that has DriveLock security enabled. (This feature supported unsaved data. D-10 390812-001 Service Reference Guide, dx7200 - HP dx7200 | HP Compaq Business PC dx7200 MT Service Reference Guide, 1st edition - Page 187
third-party memory with HP memory. 4. Replace the system board. For systems with a graphics card: 1. Reseat the graphics card. 2. Replace the graphics card. 3. Replace the system board. For systems with integrated graphics, replace the system board. Service Reference Guide, dx7200 390812-001 - HP dx7200 | HP Compaq Business PC dx7200 MT Service Reference Guide, 1st edition - Page 188
Troubleshooting Without Diagnostics Solving Display Problems (Continued) Problem Cause Blank screen and the power LED flashes Red seven times, once every second, followed by a two second pause, and the computer beeps seven times. Beeps continue for five iterations after which the LED flashes - HP dx7200 | HP Compaq Business PC dx7200 MT Service Reference Guide, 1st edition - Page 189
Troubleshooting Without Diagnostics Solving Display Problems (Continued) Problem Mode. Change the settings to a supported setting then restart the computer so that Manually synchronize the Clock and Clock Phase on-screen display functions. Download Service Reference Guide, dx7200 390812-001 D-13 - HP dx7200 | HP Compaq Business PC dx7200 MT Service Reference Guide, 1st edition - Page 190
Troubleshooting Without Diagnostics Solving Audio Problems Solving Audio Problems Problem Cause Errors when installing audio drivers. The HP audio codec requirs that Microsoft Universal Architecture (UAA) drivers, which provide support for the HD audio bus, to be installed before the audio - HP dx7200 | HP Compaq Business PC dx7200 MT Service Reference Guide, 1st edition - Page 191
Troubleshooting Without Diagnostics Solving Audio Problems (Continued) Problem Cause Solution Sound does not come out of the speaker or headphones. (continued) External speakers plugged into the wrong audio jack. See the sound card documentation for proper speaker connection. Digital CD - HP dx7200 | HP Compaq Business PC dx7200 MT Service Reference Guide, 1st edition - Page 192
Troubleshooting Without Diagnostics Solving Printer Problems Solving Printer Problems Problem Cause Printer will not print. Printer is not turned on and online. The correct printer driver for the using the mouse and then restart the computer. D-16 390812-001 Service Reference Guide, dx7200 - HP dx7200 | HP Compaq Business PC dx7200 MT Service Reference Guide, 1st edition - Page 193
Troubleshooting Without Diagnostics Solving Keyboard and Mouse Problems (Continued) Problem Cause Solution Keyboard commands and typing are not recognized by the computer. (continued) roller ball cover from the bottom of the mouse and clean it. Service Reference Guide, dx7200 390812-001 D-17 - HP dx7200 | HP Compaq Business PC dx7200 MT Service Reference Guide, 1st edition - Page 194
came with the system to determine if you are using the correct memory modules and to verify the proper installation. 2. Observe the beeps and LED lights on the front of the computer. See Appendix C "POST Error Messages" to determine possible causes. D-18 390812-001 Service Reference Guide, dx7200 - HP dx7200 | HP Compaq Business PC dx7200 MT Service Reference Guide, 1st edition - Page 195
memory with HP memory. 4. Replace the system board. Power LED flashes Red six times, once every second, followed by a two second pause, and the computer beeps six times. Beeps continue for five iterations after which the LED flashes will continue until the problem is resolved. Power LED flashes - HP dx7200 | HP Compaq Business PC dx7200 MT Service Reference Guide, 1st edition - Page 196
Troubleshooting Without Diagnostics Solving Network Problems These guidelines do not discuss the process of debugging the network cabling. Solving Network Problems Problem Cause Wake-on-LAN feature is not functioning. Wake-on-LAN is not enabled. Network driver does not detect network - HP dx7200 | HP Compaq Business PC dx7200 MT Service Reference Guide, 1st edition - Page 197
working, industry-standard NIC, or change the boot sequence to boot from another source. Verify Network Connectivity, that a DHCP Server is present, and that the Remote System Installation Server contains the NIC drivers for your NIC. Flash the ROM. Service Reference Guide, dx7200 390812-001 D-21 - HP dx7200 | HP Compaq Business PC dx7200 MT Service Reference Guide, 1st edition - Page 198
Troubleshooting Without Diagnostics Solving Memory Problems Ä CAUTION: For those systems that support ECC memory, HP does not support mixing ECC and non-ECC memory. Otherwise, the system will not boot the operating system. Solving Memory Problems Problem Cause System will not boot or does not - HP dx7200 | HP Compaq Business PC dx7200 MT Service Reference Guide, 1st edition - Page 199
Network Server Mode in Security > Password Options. Run Computer Setup and change boot sequence in Storage > Boot Order. 1. Reconnect power and data cables to the drive. 2. Install correct device driver. See the documentation that came with the DVD drive. Service Reference Guide, dx7200 390812 - HP dx7200 | HP Compaq Business PC dx7200 MT Service Reference Guide, 1st edition - Page 200
Troubleshooting Without Diagnostics Solving CD-ROM and DVD Problems (Continued) Problem the device in question. 2. Restart the computer and let Windows detect the device. Recording audio CDs is difficult or impossible. Wrong or poor quality media 24 390812-001 Service Reference Guide, dx7200 - HP dx7200 | HP Compaq Business PC dx7200 MT Service Reference Guide, 1st edition - Page 201
Troubleshooting Without Diagnostics Solving Drive Key Problems Solving Drive Key Problems Problem Cause Drive Key is not seen as a drive letter in Windows XP. The drive letter after the last physical drive is not available. The computer boots to DOS after making a bootable Drive Key. Drive - HP dx7200 | HP Compaq Business PC dx7200 MT Service Reference Guide, 1st edition - Page 202
modem will be on.) Contact the ISP for the correct IP address. Windows XP 1. Select Start > Control Panel. 2. Double-click Internet Options. 3. On the General tab, click the Delete Cookies button. Log on to the ISP and launch the desired program. D-26 390812-001 Service Reference Guide, dx7200 - HP dx7200 | HP Compaq Business PC dx7200 MT Service Reference Guide, 1st edition - Page 203
, then click Properties. 7. Under Device status, verify that the modem is working properly. 8. Under Device usage, verify the modem is enabled. 9. If there are further problems, click the Troubleshoot button and follow the on-screen instructions. Service Reference Guide, dx7200 390812-001 D-27 - HP dx7200 | HP Compaq Business PC dx7200 MT Service Reference Guide, 1st edition - Page 204
Troubleshooting Without Diagnostics D-28 390812-001 Service Reference Guide, dx7200 - HP dx7200 | HP Compaq Business PC dx7200 MT Service Reference Guide, 1st edition - Page 205
jack Stacked RJ45/Dual USB Quad stacked USB First IEEE 1394 connector Second IEEE 1394 connector SPDIF input SPDIF output PCI slots PCI extender slot (male) PCI Express slots Primary SCSI connector Secondary SCSI connector Stacked parallel/SCSI connector AGP slot x16 PCI Express slot for graphics - HP dx7200 | HP Compaq Business PC dx7200 MT Service Reference Guide, 1st edition - Page 206
VRM module footprint AUI connector Fan command/fan sink header (may be 2 or 4 pin) Digital audio expansion header SPDIF internal input header SPDIF internal output header Primary IDE connector Secondary IDE/MultiBay connector Header for NEWCARD E-2 390812-001 Service Reference Guide, dx7200 - HP dx7200 | HP Compaq Business PC dx7200 MT Service Reference Guide, 1st edition - Page 207
audio Header for front panel USB Internal USB connector 1 Internal USB connector 2 MultiBay header SCSI LED connector PCI extender slot (female) Blade PC graphics connector (outboard) Blade PC Primary (CPU) fan header for fansink Secondary CPU fan Service Reference Guide, dx7200 390812-001 E-3 - HP dx7200 | HP Compaq Business PC dx7200 MT Service Reference Guide, 1st edition - Page 208
Clock chip 64 bit Bridge LOM1 LOM1 EEPROM LOM1 PHY Audio Codec Audio amplifier LOM2 LOM2 EEPROM LOM2 PHY SPI ROM Fan port power switch Battery retainer Memory slot. DIMM1 or RIMM1 populated and tested Following memory slots Primary processor socket Secondary Service Reference Guide, dx7200 - HP dx7200 | HP Compaq Business PC dx7200 MT Service Reference Guide, 1st edition - Page 209
not supported DIMM Sockets There are four DIMM sockets on the system board, with two sockets per channel. The sockets are labeled XMM1, XMM2, XMM3, and XMM4. Sockets XMM1 and XMM2 operate in memory channel A. Sockets XMM3 and XMM4 operate in memory channel B. Service Reference Guide, dx7200 390812 - HP dx7200 | HP Compaq Business PC dx7200 MT Service Reference Guide, 1st edition - Page 210
Black White Black White The system will automatically operate in single channel mode, dual channel Asymmetric mode, or a a higher-performing dual dual channel Asymmetric mode if the total memory capacity of the DIMMs in Channel A is not equal to the total memory Service Reference Guide, dx7200 - HP dx7200 | HP Compaq Business PC dx7200 MT Service Reference Guide, 1st edition - Page 211
A-8 A access panel MT removal and replacement 6-4 ST removal and replacement 7-8 Altiris 3-2 Deployment Solution Agent 3-2 HP Client Management Solutions 3-4 A-1 to A-7 country-specific power cord set requirements B-2 cover lock, smart 3-22 Service Reference Guide, dx7200 390812-001 Index-1 - HP dx7200 | HP Compaq Business PC dx7200 MT Service Reference Guide, 1st edition - Page 212
Retrospect Express 3-5 date and time display problems D-2 DDR2 memory F-1 deleting password 3-19 delimiter characters, table 3-20 device drivers, installing/upgrading 1-1 diagnostic tool for hard drives 3-24 diagnostics utility 2-14 DIMMs F-1 disassembly preparation MT 6-1 ST 7-1 diskette drive MT - HP dx7200 | HP Compaq Business PC dx7200 MT Service Reference Guide, 1st edition - Page 213
blinking power C-9 blinking PS/2 keyboard C-9 line-in audio pin assignments A-4 line-out audio pin assignments A-4 Local Recovery 3-2 locking Smart Cover Lock 3-23 M memory DDR2 specifications F-1 MT removal and replacement 6-10 socket assignments F-2 ST removal and replacement 7-12 microphone pin - HP dx7200 | HP Compaq Business PC dx7200 MT Service Reference Guide, 1st edition - Page 214
memory 6-10 MT padlock 6-3 MT PCI expansion card 6-13 MT PCI Express expansion card 6-14 MT power supply 6-30 MT power switch assembly 6-25 MT processor 6-27 MT speaker 6-29 MT system board 6-32 ST battery 7-40 ST cable lock 7-6 ST chassis fan 7-28 ST computer cover 7-8 Index-4 390812-001 Service - HP dx7200 | HP Compaq Business PC dx7200 MT Service Reference Guide, 1st edition - Page 215
17 Setup (F10) 3-14 serial interface pin assignments A-3 service considerations 5-7 setup software 1-2 Windows 1-1 setup password changing 3-19 deleting 3-19 entering 3-18 setting 3-17 Slim Tower. See ST Smart Cover Lock locking 3-23 ST removal and replacement 7-3 unlocking 3-23 Smart Cover Sensor - HP dx7200 | HP Compaq Business PC dx7200 MT Service Reference Guide, 1st edition - Page 216
Deployment 3-1 Proactive Change Notification 3-6 Remote ROM Flash 3-7 replicating setup, BIOS utility 3-10 ROM Flash 3-7 security 3-24 Subscriber's Choice 3-6 support software 3-13 support software CD subscription 1-1 wrench, tamper-resistant 7-3 Index-6 390812-001 Service Reference Guide, dx7200
-
 1
1 -
 2
2 -
 3
3 -
 4
4 -
 5
5 -
 6
6 -
 7
7 -
8
-
9
-
10
-
11
-
12
-
13
-
14
-
15
-
16
-
17
-
18
-
19
-
20
-
21
-
22
-
23
-
24
-
25
-
26
-
27
-
28
-
29
-
30
-
31
-
32
-
33
-
34
-
35
-
36
-
37
-
38
-
39
-
40
-
41
-
42
-
43
-
44
-
45
-
46
-
47
-
48
-
49
-
50
-
51
-
52
-
53
-
54
-
55
-
56
-
57
-
58
-
59
-
60
-
61
-
62
-
63
-
64
-
65
-
66
-
67
-
68
-
69
-
70
-
71
-
72
-
73
-
74
-
75
-
76
-
77
-
78
-
79
-
80
-
81
-
82
-
83
-
84
-
85
-
86
-
87
-
88
-
89
-
90
-
91
-
92
-
93
-
94
-
95
-
96
-
97
-
98
-
99
-
100
-
101
-
102
-
103
-
104
-
105
-
106
-
107
-
108
-
109
-
110
-
111
-
112
-
113
-
114
-
115
-
116
-
117
-
118
-
119
-
120
-
121
-
122
-
123
-
124
-
125
-
126
-
127
-
128
-
129
-
130
-
131
-
132
-
133
-
134
-
135
-
136
-
137
-
138
-
139
-
140
-
141
-
142
-
143
-
144
-
145
-
146
-
147
-
148
-
149
-
150
-
151
-
152
-
153
-
154
-
155
-
156
-
157
-
158
-
159
-
160
-
161
-
162
-
163
-
164
-
165
-
166
-
167
-
168
-
169
-
170
-
171
-
172
-
173
-
174
-
175
-
176
-
177
-
178
-
179
-
180
-
181
-
182
-
183
-
184
-
185
-
186
-
187
-
188
-
189
-
190
-
191
-
192
-
193
-
194
-
195
-
196
-
197
-
198
-
199
-
200
-
201
-
202
-
203
-
204
-
205
-
206
-
207
-
208
-
209
-
210
-
211
-
212
-
213
-
214
-
215
-
216
 |
 |

service reference guide
HP Compaq Business PC dx7200 Series
1st Edition
This document provides information on the removal and replacement of all
parts as well as information on troubleshooting, Desktop Management, setup
utilities, PATA and SATA drives, safety, routine care, connector pin
assignments, POST error messages, and diagnostic indicator lights.
Document Part Number 390812-001