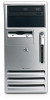
HP dx7200 HP Compaq Business PC dx7200 MT Service Reference Guide, 1st edition - Page 40
Creating a Bootable Device, Supported USB Flash Media Device - bios flash
 |
View all HP dx7200 manuals
Add to My Manuals
Save this manual to your list of manuals |
Page 40 highlights
Desktop Management 8. Download a BIOS utility for replicating setup (repset.exe) and copy it onto the configuration diskette or USB flash media device. To obtain this utility, go to http://www.hp.com/support/files and enter the model number of the computer. 9. On the configuration diskette or USB flash media device, create an autoexec.bat file containing the following command: repset.exe 10. Turn off the computer to be configured. Insert the configuration diskette or USB flash media device and turn the computer on. The configuration utility will run automatically. 11. Restart the computer when the configuration is complete. Creating a Bootable Device Supported USB Flash Media Device Supported devices have a preinstalled image to simplify the process of making them bootable. All HP or Compaq and most other USB flash media devices have this preinstalled image. If the USB flash media device being used does not have this image, use the procedure later in this section (see "Unsupported USB Flash Media Device"). To create a bootable USB flash media device, you must have: ■ A supported USB flash media device. ■ A bootable DOS diskette with the FDISK and SYS programs. (If SYS is not available, FORMAT may be used, but all existing files on the USB flash media device will be lost.) ■ A PC that is bootable from a USB flash media device. Ä CAUTION: Not all computers can be booted from a USB flash media device. If the default boot order in the Computer Setup (F10) Utility lists the USB device before the hard drive, the computer can be booted from a USB flash media device. Otherwise, a bootable diskette must be used. 1. Turn off the computer. 2. Insert the USB flash media device into one of the computer's USB ports and remove all other USB storage devices except USB diskette drives. 3. Insert a bootable DOS diskette with FDISK.COM and either SYS.COM or FORMAT.COM into a diskette drive and turn on the computer to boot to the DOS diskette. 4. Run FDISK from the A:\ prompt by typing FDISK and pressing Enter. If prompted, click Yes (Y) to enable large disk support. 5. Enter Choice [5] to display the drives in the system. The USB flash media device will be the drive that closely matches the size of one of the drives listed. It will usually be the last drive in the list. Note the letter of the drive. USB flash media device drive: __________ Ä CAUTION: If a drive does not match the USB flash media device, do not proceed. Data loss can occur. Check all USB ports for additional storage devices. If any are found, remove them, reboot the computer, and proceed from step 4. If none are found, either the system does not support the USB flash media device or the USB flash media device is defective. DO NOT proceed in attempting to make the USB flash media device bootable. 6. Exit FDISK by pressing the Esc key to return to the A:\ prompt. 3-10 390812-001 Service Reference Guide, dx7200
-
 1
1 -
2
-
3
-
4
-
5
-
6
-
7
-
8
-
9
-
10
-
11
-
12
-
13
-
14
-
15
-
16
-
17
-
18
-
19
-
20
-
21
-
22
-
23
-
24
-
25
-
26
-
27
-
28
-
29
-
30
-
31
-
32
-
33
-
34
-
 35
35 -
 36
36 -
 37
37 -
 38
38 -
 39
39 -
 40
40 -
 41
41 -
 42
42 -
 43
43 -
 44
44 -
 45
45 -
46
-
47
-
48
-
49
-
50
-
51
-
52
-
53
-
54
-
55
-
56
-
57
-
58
-
59
-
60
-
61
-
62
-
63
-
64
-
65
-
66
-
67
-
68
-
69
-
70
-
71
-
72
-
73
-
74
-
75
-
76
-
77
-
78
-
79
-
80
-
81
-
82
-
83
-
84
-
85
-
86
-
87
-
88
-
89
-
90
-
91
-
92
-
93
-
94
-
95
-
96
-
97
-
98
-
99
-
100
-
101
-
102
-
103
-
104
-
105
-
106
-
107
-
108
-
109
-
110
-
111
-
112
-
113
-
114
-
115
-
116
-
117
-
118
-
119
-
120
-
121
-
122
-
123
-
124
-
125
-
126
-
127
-
128
-
129
-
130
-
131
-
132
-
133
-
134
-
135
-
136
-
137
-
138
-
139
-
140
-
141
-
142
-
143
-
144
-
145
-
146
-
147
-
148
-
149
-
150
-
151
-
152
-
153
-
154
-
155
-
156
-
157
-
158
-
159
-
160
-
161
-
162
-
163
-
164
-
165
-
166
-
167
-
168
-
169
-
170
-
171
-
172
-
173
-
174
-
175
-
176
-
177
-
178
-
179
-
180
-
181
-
182
-
183
-
184
-
185
-
186
-
187
-
188
-
189
-
190
-
191
-
192
-
193
-
194
-
195
-
196
-
197
-
198
-
199
-
200
-
201
-
202
-
203
-
204
-
205
-
206
-
207
-
208
-
209
-
210
-
211
-
212
-
213
-
214
-
215
-
216
 |
 |