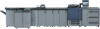
Konica Minolta AccurioPress C2070 IC-314 User Guide - Page 29
Setting up printing in Mac OS X
 |
View all Konica Minolta AccurioPress C2070 manuals
Add to My Manuals
Save this manual to your list of manuals |
Page 29 highlights
Setting up printing in Mac OS X 19 26. In the Devices and Printers dialog box, right-click the newly created printer, and select Printer Properties. 27. Click the Print Driver tab. 28. Click the Server Hostname, and type the host name of the Creo server. 29. Click Apply, and then click OK. 30. When you send a job to print via the Print Driver software, note that the Print Driver is Online. You have successfully installed a TCP/IP printer for the IC-314 print controller and are ready to start printing. Setting up printing in Mac OS X Installing the Print Driver software in Mac OS X 10.7 (64 bit) and later During the installation of the Print Driver software, the PPD file is automatically copied to your computer. 1. From the Go menu, select Connect to Server. 2. In the Server Address box, type your server address, and click Connect. 3. In the Connect as area, select Guest. 4. Click Connect. 5. Select Utilities and click OK. 6. Select the Mac Utilities folder. 7. Double-click the IC-314_ColorServerPrintDriverInstaller.dmg file. 8. Double-click the IC-314_ColorServerPrintDriverInstaller icon. The Welcome screen appears. 9. Click Continue. 10. In the message window, click Continue. 11. In the Software License Agreement window, click Continue. 12. Click Agree to agree to the terms and continue with the installation procedure. 13. In the Select Destination area, select the destination volume in which you want to install the Print Driver software, and click Continue.
-
 1
1 -
2
-
3
-
4
-
5
-
6
-
7
-
8
-
9
-
10
-
11
-
12
-
13
-
14
-
15
-
16
-
17
-
18
-
19
-
20
-
21
-
22
-
23
-
 24
24 -
 25
25 -
 26
26 -
 27
27 -
 28
28 -
 29
29 -
 30
30 -
 31
31 -
 32
32 -
 33
33 -
 34
34 -
35
-
36
-
37
-
38
-
39
-
40
-
41
-
42
-
43
-
44
-
45
-
46
-
47
-
48
-
49
-
50
-
51
-
52
-
53
-
54
-
55
-
56
-
57
-
58
-
59
-
60
-
61
-
62
-
63
-
64
-
65
-
66
-
67
-
68
-
69
-
70
-
71
-
72
-
73
-
74
-
75
-
76
-
77
-
78
-
79
-
80
-
81
-
82
-
83
-
84
-
85
-
86
-
87
-
88
-
89
-
90
-
91
-
92
-
93
-
94
-
95
-
96
-
97
-
98
-
99
-
100
-
101
-
102
-
103
-
104
-
105
-
106
-
107
-
108
-
109
-
110
-
111
-
112
-
113
-
114
-
115
-
116
-
117
-
118
-
119
-
120
-
121
-
122
-
123
-
124
-
125
-
126
-
127
-
128
-
129
-
130
-
131
-
132
-
133
-
134
-
135
-
136
-
137
-
138
-
139
-
140
-
141
-
142
-
143
-
144
-
145
-
146
-
147
-
148
-
149
-
150
-
151
-
152
-
153
-
154
-
155
-
156
-
157
-
158
-
159
-
160
-
161
-
162
-
163
-
164
-
165
-
166
-
167
-
168
-
169
-
170
-
171
-
172
-
173
-
174
-
175
-
176
-
177
-
178
-
179
-
180
-
181
-
182
-
183
-
184
-
185
-
186
-
187
-
188
-
189
-
190
-
191
-
192
-
193
-
194
-
195
-
196
-
197
-
198
-
199
-
200
-
201
-
202
-
203
-
204
-
205
-
206
-
207
-
208
-
209
-
210
-
211
-
212
-
213
-
214
-
215
-
216
-
217
-
218
-
219
-
220
-
221
-
222
-
223
-
224
-
225
-
226
-
227
-
228
-
229
-
230
-
231
-
232
-
233
-
234
-
235
-
236
-
237
-
238
-
239
-
240
-
241
-
242
-
243
-
244
-
245
-
246
-
247
-
248
-
249
-
250
-
251
-
252
-
253
-
254
-
255
-
256
-
257
-
258
-
259
-
260
-
261
-
262
-
263
-
264
-
265
-
266
-
267
-
268
-
269
-
270
-
271
-
272
-
273
-
274
-
275
-
276
-
277
-
278
-
279
-
280
-
281
-
282
-
283
-
284
-
285
-
286
-
287
-
288
-
289
-
290
-
291
-
292
-
293
-
294
-
295
-
296
-
297
-
298
-
299
-
300
-
301
-
302
-
303
-
304
-
305
 |
 |
