Konica Minolta HP PageWide XL 5000 MFP User Guide - Page 102
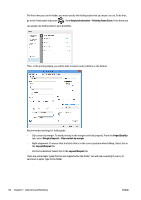
Folder status, Folding styles, Starting, Ready, Paper jam, Cover open, Folder not attached
 |
View all Konica Minolta HP PageWide XL 5000 MFP manuals
Add to My Manuals
Save this manual to your list of manuals |
Page 102 highlights
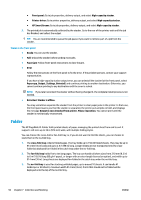
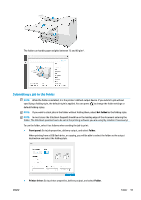
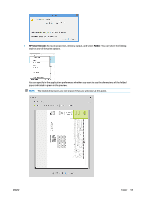
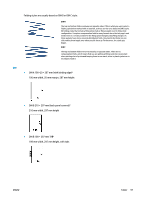
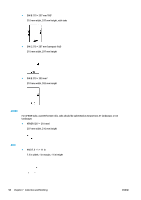
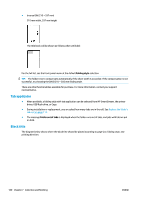
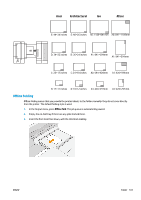
The green rectangle in the preview indicates which part of the page will be on top after folding. If the page contains some header or summary information describing its contents, you may want to ensure that this is in the green rectangle, so that it will be easily visible once the page has been folded. To move the contents of the page, you can use the rotation, alignment, and/or margins options (among the paper source options in the settings pane). The following steps are recommended to check that the required content is in the green rectangle, and to adjust the page if necessary: 1. Set the default alignment between pages and roll in the preferences so that the page is placed on the correct side of the roll. You need to do this only once. 2. Select the first page of the job to see it in the preview. 3. Zoom in on the green rectangle. You may want to maximize the preview. 4. If required, use the E key on the keyboard to rotate the page 90° counterclockwise or the R key to rotate 90° clockwise. 5. Use the down-arrow navigation key to select and preview the next page. Folder status ● Starting: The folder is initializing and not yet ready. ● Ready: The folder is ready to receive jobs, waiting for jobs, or receiving jobs. ● Full: The cross-fold or no-fold tray has reached its full capacity. The printer finishes the current page, then stops printing. ● Error. In these cases, all jobs are put on hold for output. ◦ Paper jam ◦ Cover open ◦ Folder not attached ◦ Communication error (the cable is connected but there is no communication) ◦ Tab applicator empty (if a job is to be folded with tabs) ● Offline folding active ● Disconnected (the cable is not connected) Folder status LED ● White: Ready ● White blinking: Working ● White/yellow blinking: Out of tabs ● Red: Error, needs attention (may be full) Folding styles The folder can fold pages in two different ways: ● Fan fold, in which folds are perpendicular to the printing direction ● Cross fold, in which folds are parallel to the printing direction 96 Chapter 7 Collection and finishing ENWW
-
 1
1 -
2
-
3
-
4
-
5
-
6
-
7
-
8
-
9
-
10
-
11
-
12
-
13
-
14
-
15
-
16
-
17
-
18
-
19
-
20
-
21
-
22
-
23
-
24
-
25
-
26
-
27
-
28
-
29
-
30
-
31
-
32
-
33
-
34
-
35
-
36
-
37
-
38
-
39
-
40
-
41
-
42
-
43
-
44
-
45
-
46
-
47
-
48
-
49
-
50
-
51
-
52
-
53
-
54
-
55
-
56
-
57
-
58
-
59
-
60
-
61
-
62
-
63
-
64
-
65
-
66
-
67
-
68
-
69
-
70
-
71
-
72
-
73
-
74
-
75
-
76
-
77
-
78
-
79
-
80
-
81
-
82
-
83
-
84
-
85
-
86
-
87
-
88
-
89
-
90
-
91
-
92
-
93
-
94
-
95
-
96
-
 97
97 -
 98
98 -
 99
99 -
 100
100 -
 101
101 -
 102
102 -
 103
103 -
 104
104 -
 105
105 -
 106
106 -
 107
107 -
108
-
109
-
110
-
111
-
112
-
113
-
114
-
115
-
116
-
117
-
118
-
119
-
120
-
121
-
122
-
123
-
124
-
125
-
126
-
127
-
128
-
129
-
130
-
131
-
132
-
133
-
134
-
135
-
136
-
137
-
138
-
139
-
140
-
141
-
142
 |
 |
