Konica Minolta HP PageWide XL 5000 MFP User Guide - Page 65
Printhead maintenance, Printhead troubleshooting, Continue
 |
View all Konica Minolta HP PageWide XL 5000 MFP manuals
Add to My Manuals
Save this manual to your list of manuals |
Page 65 highlights
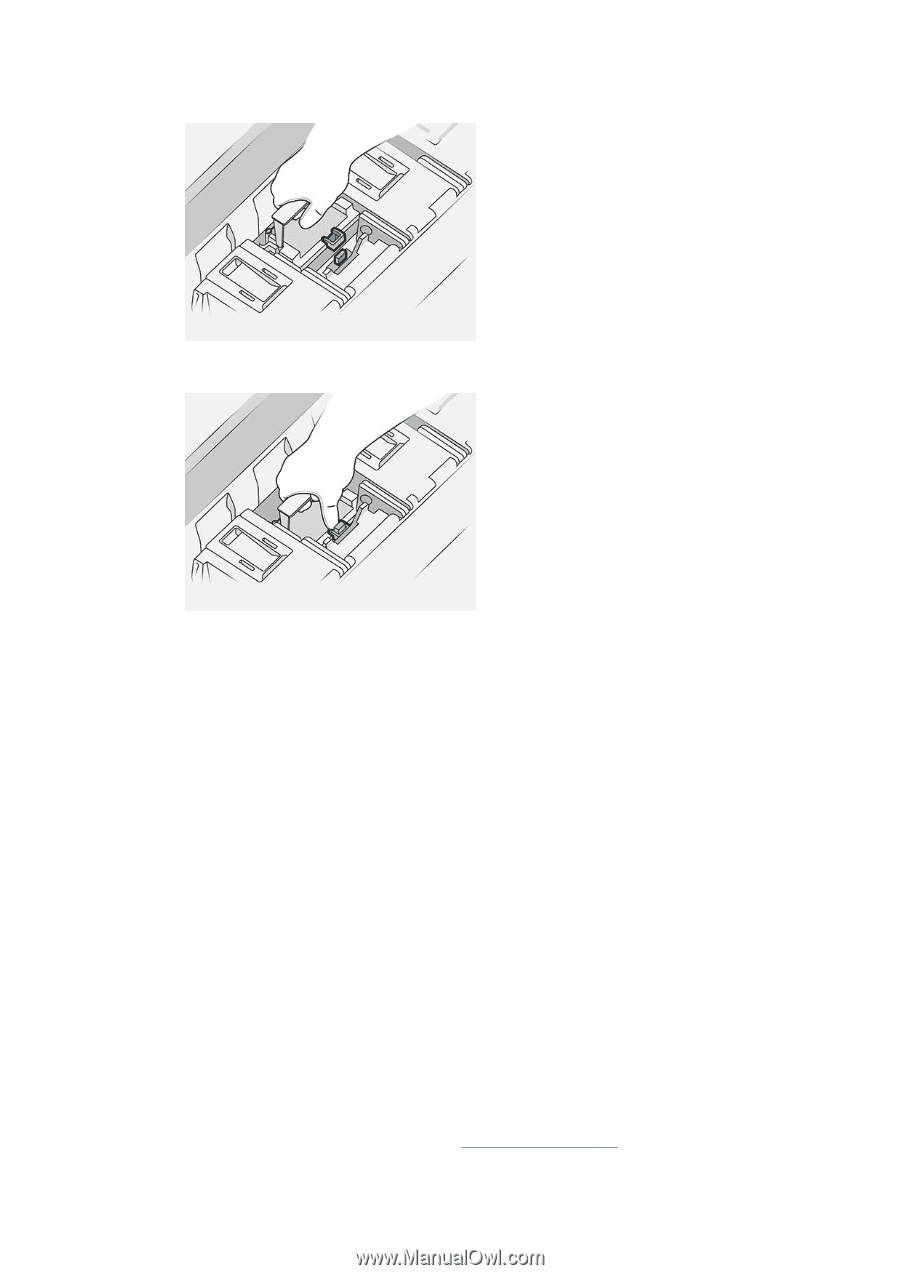
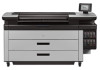
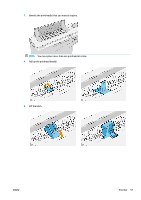
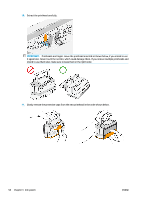
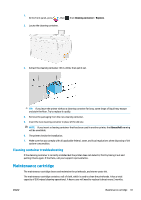
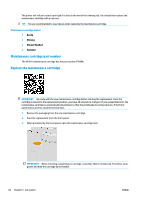
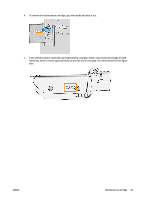
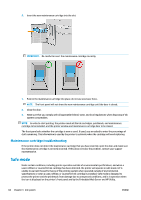
12. Insert the new printhead as shown below. 13. Press it in firmly until you feel resistance. 14. Close the latch. 15. Close the handle. 16. Close the top cover. 17. If you have a top stacker, close it. 18. Press Continue and wait about 32 minutes while the printer performs automatic calibrations and checks. 19. Make sure that you comply with all applicable federal, state, and local regulations when disposing of ink system consumables. Printhead maintenance The printer and the maintenance cartridge clean the printheads automatically. Avoid removing printheads unnecessarily. Printhead troubleshooting 1. Check that you have the correct type of printhead (model number). 2. Check that you have removed the orange protective caps from the printhead. 3. Check that the printhead is correctly oriented: compare it with the others. 4. Check that you have closed and latched the printhead cover. 5. If you still have problems when printing, see Print quality on page 104. ENWW Print bar 59
-
 1
1 -
2
-
3
-
4
-
5
-
6
-
7
-
8
-
9
-
10
-
11
-
12
-
13
-
14
-
15
-
16
-
17
-
18
-
19
-
20
-
21
-
22
-
23
-
24
-
25
-
26
-
27
-
28
-
29
-
30
-
31
-
32
-
33
-
34
-
35
-
36
-
37
-
38
-
39
-
40
-
41
-
42
-
43
-
44
-
45
-
46
-
47
-
48
-
49
-
50
-
51
-
52
-
53
-
54
-
55
-
56
-
57
-
58
-
59
-
 60
60 -
 61
61 -
 62
62 -
 63
63 -
 64
64 -
 65
65 -
 66
66 -
 67
67 -
 68
68 -
 69
69 -
 70
70 -
71
-
72
-
73
-
74
-
75
-
76
-
77
-
78
-
79
-
80
-
81
-
82
-
83
-
84
-
85
-
86
-
87
-
88
-
89
-
90
-
91
-
92
-
93
-
94
-
95
-
96
-
97
-
98
-
99
-
100
-
101
-
102
-
103
-
104
-
105
-
106
-
107
-
108
-
109
-
110
-
111
-
112
-
113
-
114
-
115
-
116
-
117
-
118
-
119
-
120
-
121
-
122
-
123
-
124
-
125
-
126
-
127
-
128
-
129
-
130
-
131
-
132
-
133
-
134
-
135
-
136
-
137
-
138
-
139
-
140
-
141
-
142
 |
 |