Konica Minolta ProJet 160 Cube3 User Guide - Page 14
cartridges with your printer°
 |
View all Konica Minolta ProJet 160 manuals
Add to My Manuals
Save this manual to your list of manuals |
Page 14 highlights
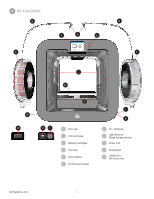
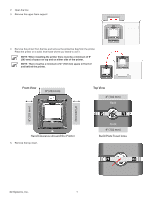
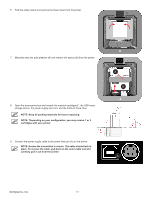
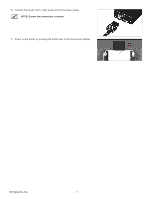
6. Fold the sides inward and remove the lower insert from the printer. 7. Manually raise the print platform (A) and remove the spacer (B) from the printer. 8. Open the accessories box and unpack the material cartridge(s)*, the USB mass storage device, the power supply and cord, and the bottle of Cube Glue. NOTE: Keep all packing materials for future repacking. NOTE: *Depending on your configuration, you may receive 1 or 2 cartridges with your printer. 9. Connect the power supply cable to the power inlet port (A) on the printer. NOTE: Ensure the connection is secure. The cable should lock in place. To remove the cable, pull back on the outer cable end and carefully pull it out from the printer. A B A 3D Systems, Inc. 10
-
 1
1 -
2
-
3
-
4
-
5
-
6
-
7
-
8
-
 9
9 -
 10
10 -
 11
11 -
 12
12 -
 13
13 -
 14
14 -
 15
15 -
 16
16 -
 17
17 -
 18
18 -
 19
19 -
20
-
21
-
22
-
23
-
24
-
25
-
26
-
27
-
28
-
29
-
30
-
31
-
32
-
33
-
34
-
35
-
36
-
37
-
38
-
39
-
40
-
41
-
42
-
43
-
44
-
45
-
46
-
47
-
48
-
49
-
50
-
51
-
52
-
53
-
54
-
55
-
56
-
57
-
58
-
59
-
60
-
61
-
62
-
63
-
64
-
65
-
66
-
67
-
68
-
69
-
70
-
71
-
72
-
73
-
74
-
75
-
76
-
77
-
78
-
79
-
80
-
81
-
82
-
83
-
84
-
85
-
86
-
87
-
88
-
89
-
90
-
91
-
92
-
93
-
94
-
95
-
96
-
97
-
98
-
99
-
100
-
101
-
102
 |
 |
10
3D Systems, Inc
.
6°
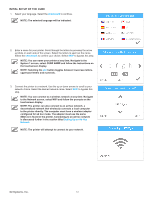
Fold the sides inward and remove the lower insert from the printer°
7°
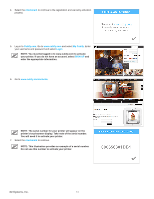
Manually raise the print platform (A) and remove the spacer (B) from the printer°
8°
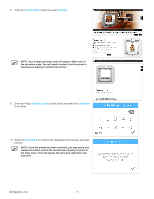
Open the accessories box and unpack the material cartridge(s)*, the USB mass
storage device, the power supply and cord, and the bottle of Cube Glue°
NOTE: Keep all packing materials for future repacking°
NOTE: *Depending on your configuration, you may receive 1 or 2
cartridges with your printer°
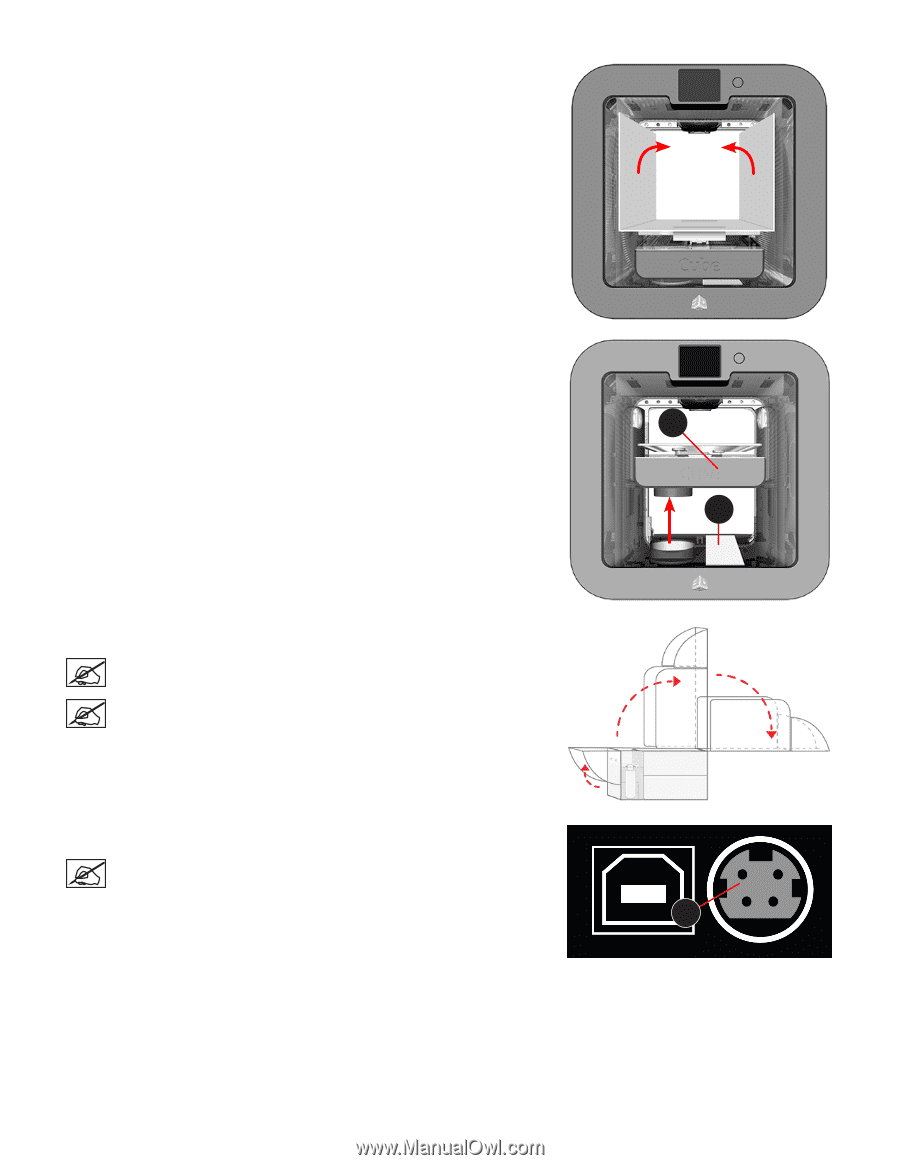
9°
Connect the power supply cable to the power inlet port (A) on the printer°
NOTE: Ensure the connection is secure° The cable should lock in
place° To remove the cable, pull back on the outer cable end and
carefully pull it out from the printer°
A
A
B