Konica Minolta ProJet 160 Cube3 User Guide - Page 67
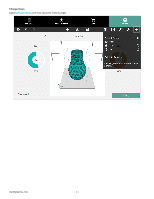
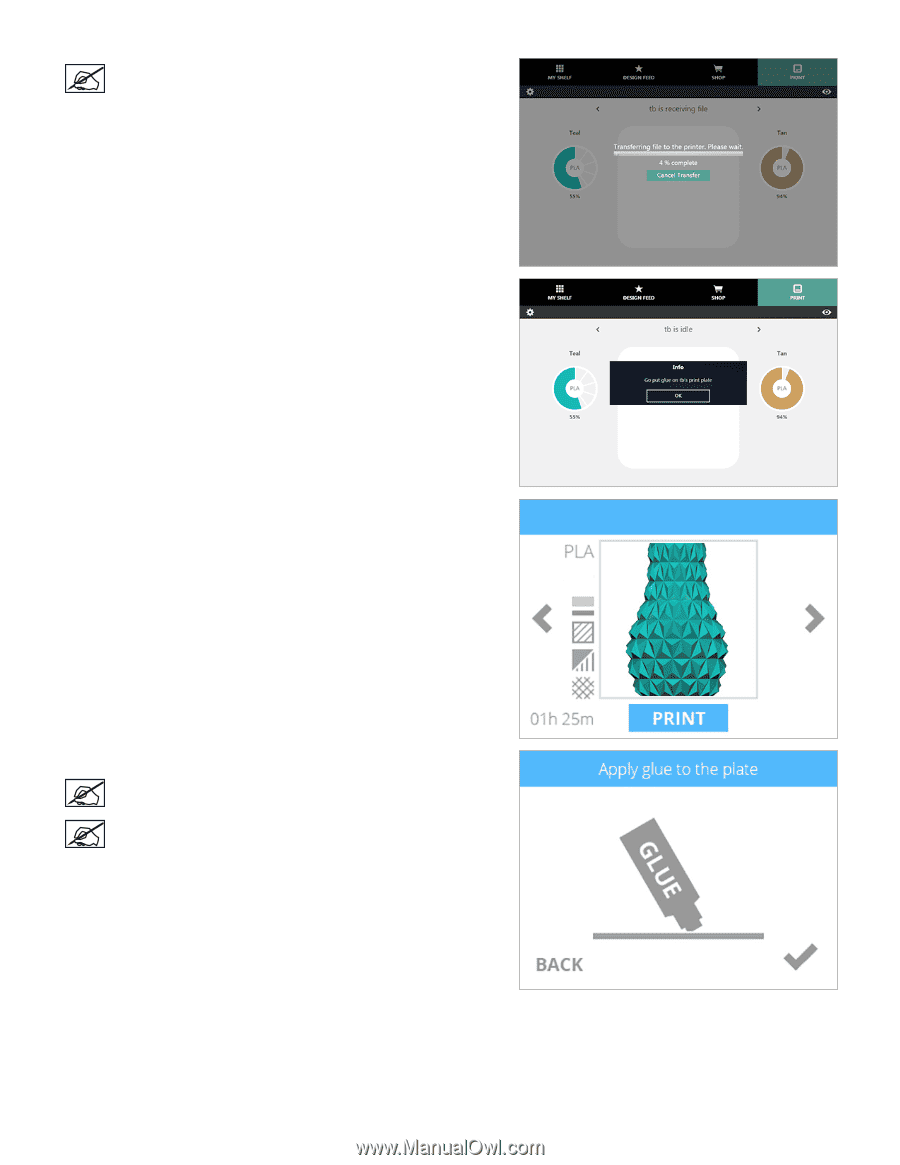
NOTE: Cubify will transfer the file to the printer.
 |
View all Konica Minolta ProJet 160 manuals
Add to My Manuals
Save this manual to your list of manuals |
Page 67 highlights
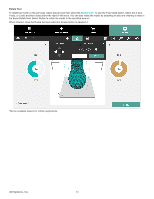
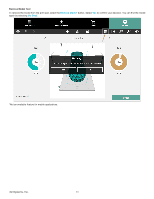
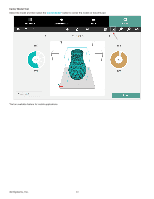
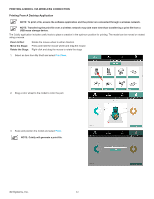
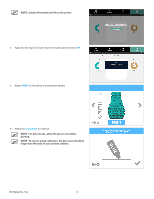
NOTE: Cubify will transfer the file to the printer. 4. Apply two thin layers of Cube Glue to the print pad and select OK. 5. Select PRINT on the printer's touchscreen display. 6. Select the checkmark to continue. NOTE: For best results, allow the glue to dry before printing. NOTE: To ensure proper adhesion, the glue area should be larger than the base of your printed creation. 3D Systems, Inc. 63
-
 1
1 -
2
-
3
-
4
-
5
-
6
-
7
-
8
-
9
-
10
-
11
-
12
-
13
-
14
-
15
-
16
-
17
-
18
-
19
-
20
-
21
-
22
-
23
-
24
-
25
-
26
-
27
-
28
-
29
-
30
-
31
-
32
-
33
-
34
-
35
-
36
-
37
-
38
-
39
-
40
-
41
-
42
-
43
-
44
-
45
-
46
-
47
-
48
-
49
-
50
-
51
-
52
-
53
-
54
-
55
-
56
-
57
-
58
-
59
-
60
-
61
-
 62
62 -
 63
63 -
 64
64 -
 65
65 -
 66
66 -
 67
67 -
 68
68 -
 69
69 -
 70
70 -
 71
71 -
 72
72 -
73
-
74
-
75
-
76
-
77
-
78
-
79
-
80
-
81
-
82
-
83
-
84
-
85
-
86
-
87
-
88
-
89
-
90
-
91
-
92
-
93
-
94
-
95
-
96
-
97
-
98
-
99
-
100
-
101
-
102
 |
 |
63
3D Systems, Inc
.
NOTE: Cubify will transfer the file to the printer.
4°
Apply two thin layers of Cube Glue to the print pad and select
OK
°
5°
Select
PRINT
on the printer’s touchscreen display°
6°
Select the
checkmark
to continue°
NOTE: For best results, allow the glue to dry before
printing°
NOTE: To ensure proper adhesion, the glue area should be
larger than the base of your printed creation°