Konica Minolta ProJet 160 Cube3 User Guide - Page 99
NOTE: The top insert is designed to keep the sides of the lower, insert pressed outward°
 |
View all Konica Minolta ProJet 160 manuals
Add to My Manuals
Save this manual to your list of manuals |
Page 99 highlights
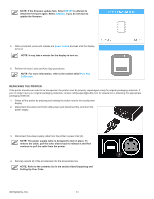
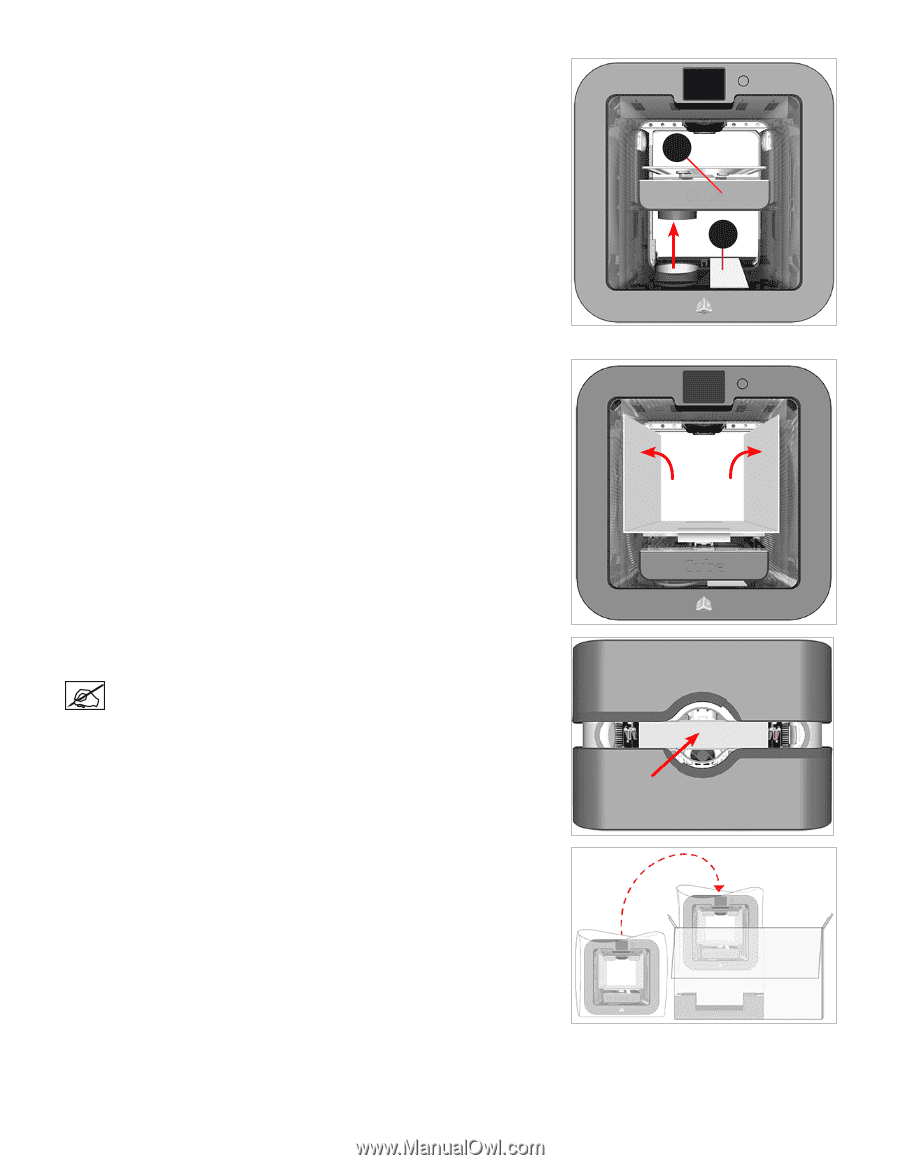
5. Carefully lift the print platform (A) and tape the spacer (B) to the printer in the location shown. 6. Remove the print pad from the printer. 7. Place the lower insert on top of the print pad and fold the sides outward. A B 8. Move the print jet mount to the center of the printer and place the top insert over the mount. NOTE: The top insert is designed to keep the sides of the lower insert pressed outward. 9. Place the printer in the protective bag and then place it in the lower foam support in the box. 3D Systems, Inc. 95
-
 1
1 -
2
-
3
-
4
-
5
-
6
-
7
-
8
-
9
-
10
-
11
-
12
-
13
-
14
-
15
-
16
-
17
-
18
-
19
-
20
-
21
-
22
-
23
-
24
-
25
-
26
-
27
-
28
-
29
-
30
-
31
-
32
-
33
-
34
-
35
-
36
-
37
-
38
-
39
-
40
-
41
-
42
-
43
-
44
-
45
-
46
-
47
-
48
-
49
-
50
-
51
-
52
-
53
-
54
-
55
-
56
-
57
-
58
-
59
-
60
-
61
-
62
-
63
-
64
-
65
-
66
-
67
-
68
-
69
-
70
-
71
-
72
-
73
-
74
-
75
-
76
-
77
-
78
-
79
-
80
-
81
-
82
-
83
-
84
-
85
-
86
-
87
-
88
-
89
-
90
-
91
-
92
-
93
-
 94
94 -
 95
95 -
 96
96 -
 97
97 -
 98
98 -
 99
99 -
 100
100 -
 101
101 -
 102
102
 |
 |
95
3D Systems, Inc
.
5°
Carefully lift the print platform (A) and tape the spacer (B) to the printer in the
location shown°
6°
Remove the print pad from the printer°
7°
Place the lower insert on top of the print pad and fold the sides outward°
8°
Move the print jet mount to the center of the printer and place the top insert over
the mount°
NOTE: The top insert is designed to keep the sides of the lower
insert pressed outward°
9°
Place the printer in the protective bag and then place it in the lower foam support
in the box°
A
B