Konica Minolta ProJet 160 Cube3 User Guide - Page 58
Connecting Cubify To Your Printer, Connecting Cubify To Your Printer Manually
 |
View all Konica Minolta ProJet 160 manuals
Add to My Manuals
Save this manual to your list of manuals |
Page 58 highlights
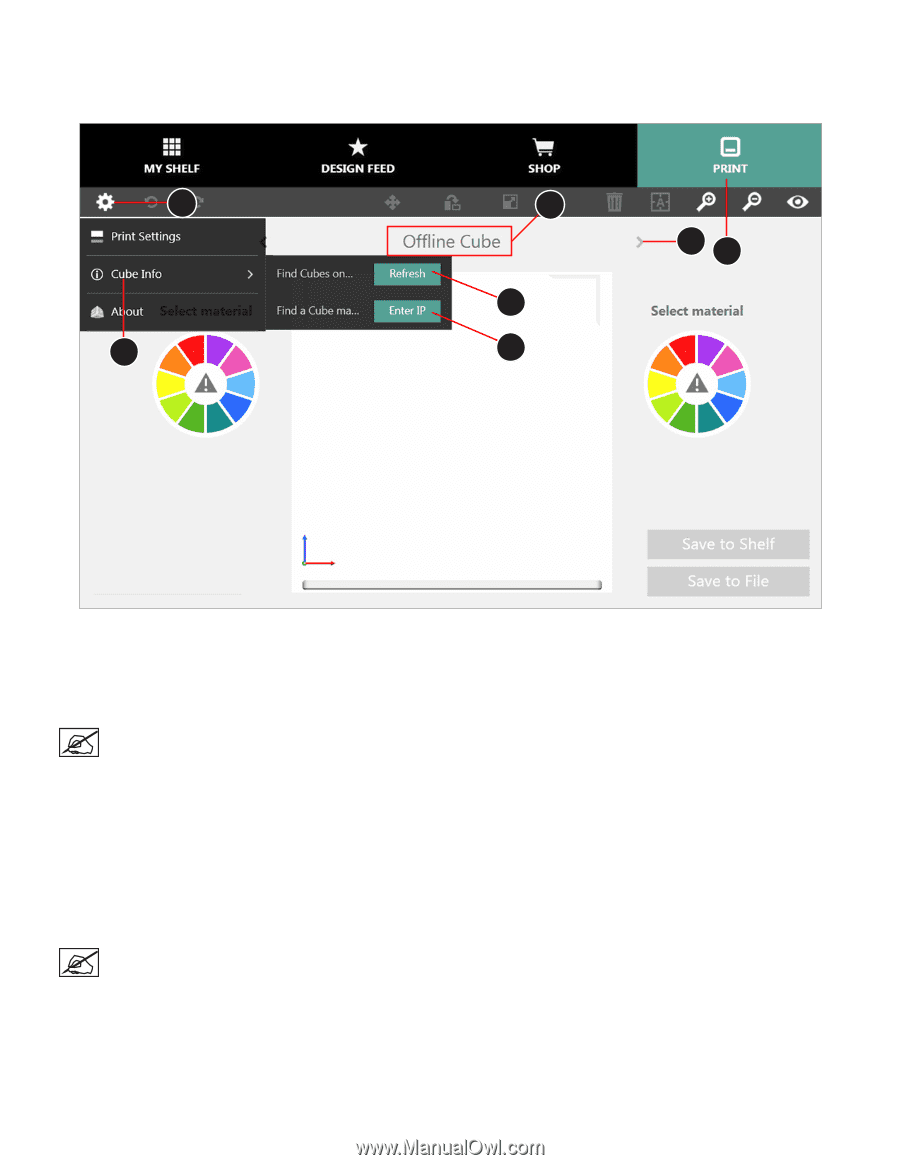
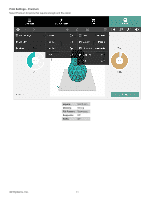
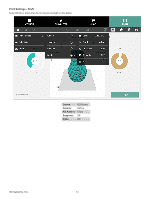
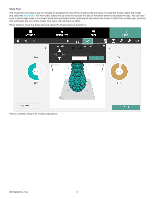
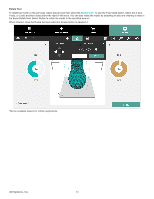
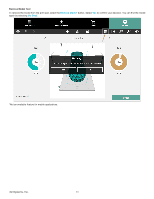
Connecting Cubify To Your Printer Your printer must be connected to the same wireless network as your computer or mobile device to transfer print files wirelessly or to view the printer properties. B C D E G FA 1. Select the PRINT tab (A). 2. Select Settings (B). 3. Select Cube Info (C) from the pop out menu. 4. If the name of your printer does not appear in the Printer Name (D) area, select Refresh (E) from the pop out menu. NOTE: The name of the printer should appear in the Printer Name location (D). If multiple printers are connected to the same wireless network, use the arrows (F) to navigate to the name of your printer. 5. Once the printer name appears, you are connected to that printer. Connecting Cubify To Your Printer Manually 1. Select the PRINT tab (A). 2. Select Settings (B). 3. Select Cube Info (C) from the pop out menu. 4. If the name of your printer does not appear in the Printer Name (D) area, select Enter IP (G) from the pop out menu. 5. Enter the IP address for your printer and select Add. The Printer Name (D) should appear. NOTE: To find the IP address of your printer, navigate to the Network screen in the touchscreen display and select WIFI. If the printer is connected to your network, the IP address will appear on the display. 3D Systems, Inc. 54
-
 1
1 -
2
-
3
-
4
-
5
-
6
-
7
-
8
-
9
-
10
-
11
-
12
-
13
-
14
-
15
-
16
-
17
-
18
-
19
-
20
-
21
-
22
-
23
-
24
-
25
-
26
-
27
-
28
-
29
-
30
-
31
-
32
-
33
-
34
-
35
-
36
-
37
-
38
-
39
-
40
-
41
-
42
-
43
-
44
-
45
-
46
-
47
-
48
-
49
-
50
-
51
-
52
-
 53
53 -
 54
54 -
 55
55 -
 56
56 -
 57
57 -
 58
58 -
 59
59 -
 60
60 -
 61
61 -
 62
62 -
 63
63 -
64
-
65
-
66
-
67
-
68
-
69
-
70
-
71
-
72
-
73
-
74
-
75
-
76
-
77
-
78
-
79
-
80
-
81
-
82
-
83
-
84
-
85
-
86
-
87
-
88
-
89
-
90
-
91
-
92
-
93
-
94
-
95
-
96
-
97
-
98
-
99
-
100
-
101
-
102
 |
 |