Konica Minolta ProJet 160 Cube3 User Guide - Page 87
Checkmark, Auto Level, Plate, Maintenance, Manual Gap, Adjustment
 |
View all Konica Minolta ProJet 160 manuals
Add to My Manuals
Save this manual to your list of manuals |
Page 87 highlights
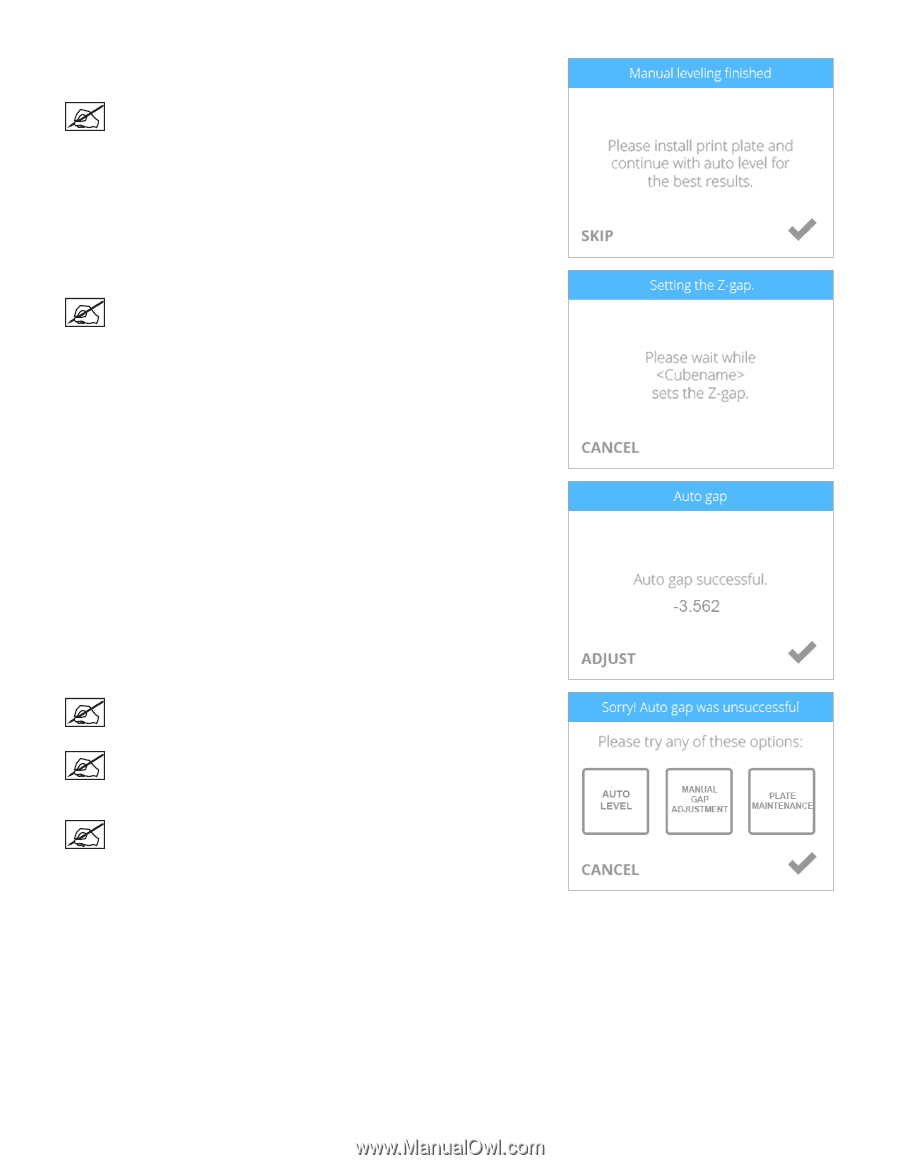
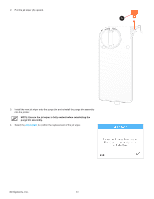
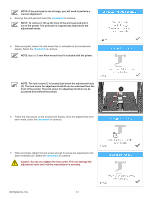
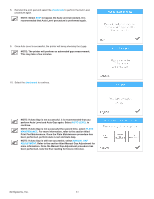
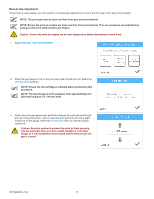
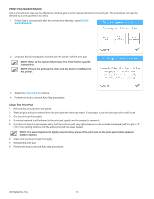
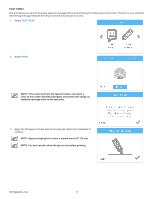
8. Reinstall the print pad and select the checkmark to perform the Auto Level procedure again. NOTE: Select SKIP to bypass the Auto Level procedure. It is recommended that Auto Level procedure is performed again. 9. Once Auto Level is successful, the printer will being checking the Z-gap. NOTE: The printer will perform an automated gap measurement. This may take a few minutes. 10. Select the checkmark to continue. NOTE: If Auto Gap is not successful, it is recommended that you perform Auto Level and Auto Gap again. Select AUTO LEVEL to continue. NOTE: If Auto Gap is not successful the second time, select PLATE MAINTENANCE. For more information, refer to the section titled Print Pad Maintenance. Once the Plate Maintenance procedure has been performed, perform Auto Level and Auto Gap. NOTE: If Auto Gap is still not successful, select MANUAL GAP ADJUSTMENT. Refer to the section titled Manual Gap Adjustment for more information. Once the Manual Gap Adjustment procedure has been performed, note the final reading for future reference. 3D Systems, Inc. 83
-
 1
1 -
2
-
3
-
4
-
5
-
6
-
7
-
8
-
9
-
10
-
11
-
12
-
13
-
14
-
15
-
16
-
17
-
18
-
19
-
20
-
21
-
22
-
23
-
24
-
25
-
26
-
27
-
28
-
29
-
30
-
31
-
32
-
33
-
34
-
35
-
36
-
37
-
38
-
39
-
40
-
41
-
42
-
43
-
44
-
45
-
46
-
47
-
48
-
49
-
50
-
51
-
52
-
53
-
54
-
55
-
56
-
57
-
58
-
59
-
60
-
61
-
62
-
63
-
64
-
65
-
66
-
67
-
68
-
69
-
70
-
71
-
72
-
73
-
74
-
75
-
76
-
77
-
78
-
79
-
80
-
81
-
 82
82 -
 83
83 -
 84
84 -
 85
85 -
 86
86 -
 87
87 -
 88
88 -
 89
89 -
 90
90 -
 91
91 -
 92
92 -
93
-
94
-
95
-
96
-
97
-
98
-
99
-
100
-
101
-
102
 |
 |