Konica Minolta ProJet 160 Cube3 User Guide - Page 35
Finishing Your Creation
 |
View all Konica Minolta ProJet 160 manuals
Add to My Manuals
Save this manual to your list of manuals |
Page 35 highlights
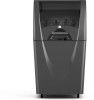
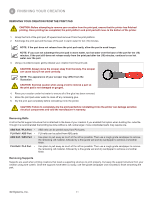
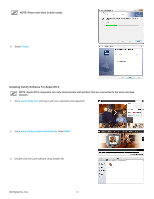
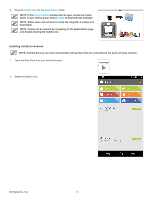
8 FINISHING YOUR CREATION REMOVING YOUR CREATION FROM THE PRINT PAD CAUTION: Before attempting to remove your creation from the print pad, ensure that the printer has finished printing. Once printing has completed, the print platform and print pad will move to the bottom of the printer. 1. Grasp the front of the print pad, lift upward and remove it from the print platform. 2. Submerge the print pad and the base of the part in warm water for ten (10) minutes. NOTE: If the part does not release from the print pad easily, allow the part to soak longer. NOTE: IF you can not submerge the print pad in warm water, run hot water over the base of the part for ten (10) minutes. If the part still does not release easily from the print pad after ten (10) minutes, continue to run hot water over the part. 3. Using a rounded scraper, gently release your creation from the print pad. CAUTION: Always move the scraper away from the body. The scraper can cause injury if not used correctly. NOTE: The appearance of your scraper may differ from the illustration. CAUTION: Exercise caution when using a tool to remove a part so the print pad is not damaged or gouged. 4. Rinse your creation under hot water to ensure all of the glue has been removed. 5. Rinse the print pad under water to clean off any remaining glue. 6. Dry the print pad completely before reinstalling it into the printer. CAUTION: Failure to completely dry the print pad before reinstalling it into the printer can damage sensitive electrical components and void the manufacturer's warranty. Removing Rafts A raft is the flat support structure that is attached to the base of your creation if you enabled that option when building the .cube file. Though it is recommended that printing be done without a raft, some larger, more complicated parts may require one. ABS Raft / PLA Part • PLA Raft / ABS Part • ABS Raft / ABS Part • PLA Raft / PLA Part • ABS rafts can be peeled away from PLA parts. PLA rafts can be pulled from ABS parts Use pliers to pull away as much of the raft as possible. Then use a rough-grade sandpaper to remove the remaining raft material, followed by a fine-grade wet and dry sandpaper to achieve a smoother finish. Use pliers to pull away as much of the raft as possible. Then use a rough-grade sandpaper to remove the remaining raft material, followed by a fine-grade wet and dry sandpaper to achieve a smoother finish. Removing Supports Supports are used when printing creations that need a supporting structure to print properly. Cut away the support structure from your creation using wire cutters. Once the supports have been cut away, use fine-grade sandpaper (not included) to finish smoothing the part. 3D Systems, Inc. 31
-
 1
1 -
2
-
3
-
4
-
5
-
6
-
7
-
8
-
9
-
10
-
11
-
12
-
13
-
14
-
15
-
16
-
17
-
18
-
19
-
20
-
21
-
22
-
23
-
24
-
25
-
26
-
27
-
28
-
29
-
 30
30 -
 31
31 -
 32
32 -
 33
33 -
 34
34 -
 35
35 -
 36
36 -
 37
37 -
 38
38 -
 39
39 -
 40
40 -
41
-
42
-
43
-
44
-
45
-
46
-
47
-
48
-
49
-
50
-
51
-
52
-
53
-
54
-
55
-
56
-
57
-
58
-
59
-
60
-
61
-
62
-
63
-
64
-
65
-
66
-
67
-
68
-
69
-
70
-
71
-
72
-
73
-
74
-
75
-
76
-
77
-
78
-
79
-
80
-
81
-
82
-
83
-
84
-
85
-
86
-
87
-
88
-
89
-
90
-
91
-
92
-
93
-
94
-
95
-
96
-
97
-
98
-
99
-
100
-
101
-
102
 |
 |