LG LX400 Owner's Manual - Page 118
Video Mode Options, to the Sprint Picture Mail Web site
 |
View all LG LX400 manuals
Add to My Manuals
Save this manual to your list of manuals |
Page 118 highlights
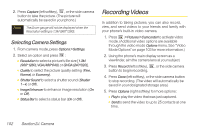
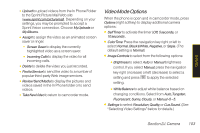
Camera Ⅲ Uploadto upload videos from the In Phone Folder to the Sprint Picture Mail Web site (www.sprint.com/picturemail). Depending on your settings, you may be prompted to accept a Sprint Vision connection. Choose MyUploads or My Albums. Ⅲ Assignto assign the video as an animated screen saver or ringer. Ⅲ Screen Saver to display the currently highlighted video as a screen saver. Ⅲ IncomingCalls to display the video for all incoming calls. Ⅲ Delete to delete the video you just recorded. Ⅲ Post toServiceto send the video to a number of popular third-party Web image services. Ⅲ Review/SendMediato display the pictures and videos saved in the In Phone folder or to send videos. Ⅲ TakeNewVideoto return to camcorder mode. Video Mode Options When the phone is open and in camcorder mode, press Options (right softkey) to display additional camera options: ⅷ SelfTimer to activate the timer (Off, 5seconds, or 10 seconds). ⅷ ColorTone: Press the navigation key right or left to select Normal, Black&White, Negative, or Sepia. (The default setting is Normal.) ⅷ ImageControls to select from the following options: Ⅲ Brightness to select Auto or Manual brightness control. If you select Manual, press the navigation key right (increase) or left (decrease) to select a setting and press to apply the selected setting. Ⅲ WhiteBalance to adjust white balance based on changing conditions. Select from Auto,Tungsten, Fluorescent, Sunny, Cloudy, or Manual -5~5. ⅷ Settings to select Resolution, Quality, or CueSound. (See "Selecting Video Settings" below for details.) Section 2J. Camera 103
-
 1
1 -
2
-
3
-
4
-
5
-
6
-
7
-
8
-
9
-
10
-
11
-
12
-
13
-
14
-
15
-
16
-
17
-
18
-
19
-
20
-
21
-
22
-
23
-
24
-
25
-
26
-
27
-
28
-
29
-
30
-
31
-
32
-
33
-
34
-
35
-
36
-
37
-
38
-
39
-
40
-
41
-
42
-
43
-
44
-
45
-
46
-
47
-
48
-
49
-
50
-
51
-
52
-
53
-
54
-
55
-
56
-
57
-
58
-
59
-
60
-
61
-
62
-
63
-
64
-
65
-
66
-
67
-
68
-
69
-
70
-
71
-
72
-
73
-
74
-
75
-
76
-
77
-
78
-
79
-
80
-
81
-
82
-
83
-
84
-
85
-
86
-
87
-
88
-
89
-
90
-
91
-
92
-
93
-
94
-
95
-
96
-
97
-
98
-
99
-
100
-
101
-
102
-
103
-
104
-
105
-
106
-
107
-
108
-
109
-
110
-
111
-
112
-
 113
113 -
 114
114 -
 115
115 -
 116
116 -
 117
117 -
 118
118 -
 119
119 -
 120
120 -
 121
121 -
 122
122 -
 123
123 -
124
-
125
-
126
-
127
-
128
-
129
-
130
-
131
-
132
-
133
-
134
-
135
-
136
-
137
-
138
-
139
-
140
-
141
-
142
-
143
-
144
-
145
-
146
-
147
-
148
-
149
-
150
-
151
-
152
-
153
-
154
-
155
-
156
-
157
-
158
-
159
-
160
-
161
-
162
-
163
-
164
-
165
-
166
-
167
-
168
-
169
-
170
-
171
-
172
-
173
-
174
-
175
-
176
-
177
-
178
-
179
-
180
-
181
 |
 |
