Nokia 3520 Nokia 3520 User Guide in English - Page 29
Change contacts view, . Caller groups, . Memory status, Details > Options > Caller
 |
UPC - 844602105455
View all Nokia 3520 manuals
Add to My Manuals
Save this manual to your list of manuals |
Page 29 highlights
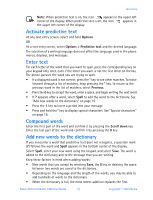
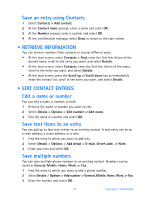
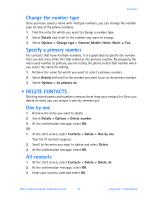
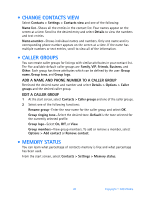
• CHANGE CONTACTS VIEW Select Contacts > Settings > Contacts view and one of the following: Name list-Shows all the entries in the contact list. Four names appear on the screen at a time. Scroll to the desired entry and select Details to view the numbers and text entries. Name+number-Shows individual names and numbers. Only one name and its corresponding phone number appears on the screen at a time. If the name has multiple numbers or text entries, scroll to view all of the information. • CALLER GROUPS You can create caller groups for listings with similar attributes in your contact list. The five available default caller groups are Family, VIP, Friends, Business, and Other. Each group has three attributes which can be defined by the user: Group name, Group tone, and Group logo. ADD A NAME AND PHONE NUMBER TO A CALLER GROUP Retrieved the desired name and number and select Details > Options > Caller groups and the desired caller group. EDIT A CALLER GROUP 1 At the start screen, select Contacts > Caller groups and one of the caller groups. 2 Select one of the following functions: Rename group-Enter the new name for the caller group and select OK. Group ringing tone-Select the desired tone. Default is the tone selected for the currently selected profile. Group logo-Select On, Off, or View. Group members-View group members. To add or remove a member, select Options > Add contact or Remove contact. • MEMORY STATUS You can learn what percentage of contacts memory is free and what percentage has been used. From the start screen, select Contacts > Settings > Memory status. 20 Copyright © 2004 Nokia
-
 1
1 -
2
-
3
-
4
-
5
-
6
-
7
-
8
-
9
-
10
-
11
-
12
-
13
-
14
-
15
-
16
-
17
-
18
-
19
-
20
-
21
-
22
-
23
-
 24
24 -
 25
25 -
 26
26 -
 27
27 -
 28
28 -
 29
29 -
 30
30 -
 31
31 -
 32
32 -
 33
33 -
 34
34 -
35
-
36
-
37
-
38
-
39
-
40
-
41
-
42
-
43
-
44
-
45
-
46
-
47
-
48
-
49
-
50
-
51
-
52
-
53
-
54
-
55
-
56
-
57
-
58
-
59
-
60
-
61
-
62
-
63
-
64
-
65
-
66
-
67
-
68
-
69
-
70
-
71
-
72
-
73
-
74
-
75
-
76
-
77
-
78
-
79
-
80
-
81
-
82
-
83
-
84
-
85
-
86
-
87
-
88
-
89
-
90
-
91
-
92
-
93
-
94
-
95
-
96
-
97
-
98
-
99
-
100
-
101
-
102
-
103
-
104
-
105
-
106
-
107
-
108
-
109
-
110
-
111
-
112
-
113
-
114
-
115
-
116
-
117
-
118
-
119
-
120
-
121
 |
 |
