Sharp MX 4501N Quick Start Guide - Page 14
Using The Touch Panel
 |
View all Sharp MX 4501N manuals
Add to My Manuals
Save this manual to your list of manuals |
Page 14 highlights
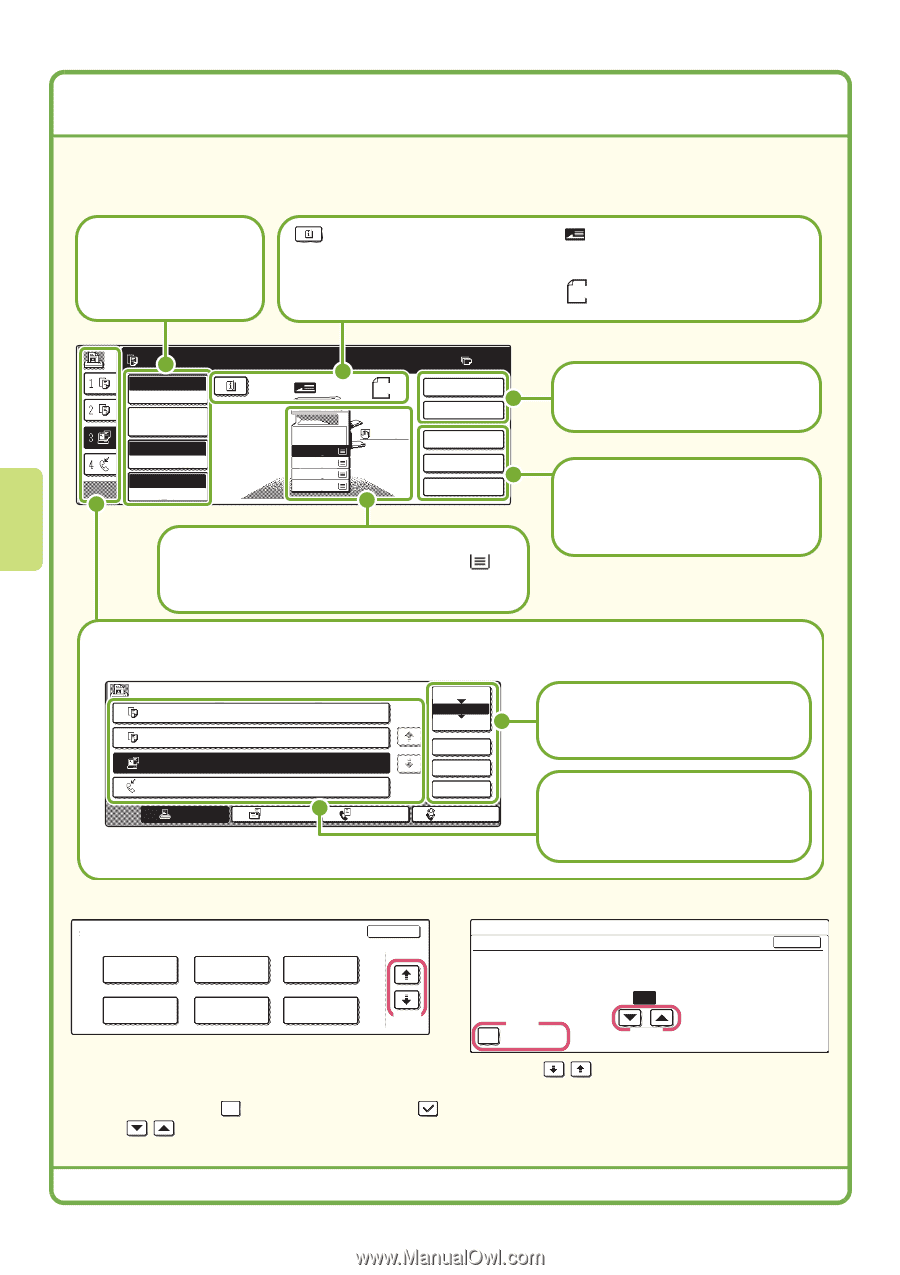
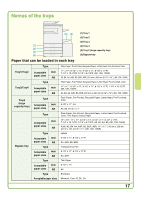
USING THE TOUCH PANEL The touch keys that appear in the touch panel are grouped for easy operation. The layout and functions of the touch keys are explained below. Settings related to the original are generally grouped together on the left side of the base screen. This appears when one or more special modes are selected. Touch the icon to check what modes are selected. This indicates that an original has been placed in the automatic document feeder. 81/2x11The size of the original appears automatically. Ready to scan for copy. Full Color Color Mode Job Detail Settings Auto Exposure 100% Copy Ratio Original 81/2x11 1. 81/2x11 2. 81/2x11R 3. 81/2x14 4. 11x17 Plain 81/2x11 0 2-Sided Copy Output Special Modes File Quick File This shows the status of the paper trays on the machine. You can check the paper size, paper type and amount of paper remaining. The currently selected tray is highlighted. Settings related to output are generally grouped together on the top right side of the base screen. Advanced settings are grouped here. You can have frequently used touch keys displayed as shortcuts in this position. The job status screen normally appears behind the base screen of the currently selected mode. Only the left edge of the job status screen appears, and this can be touched to bring the screen to the front. Job Queue 1 Copy 2 Copy 3 Computer01 4 0312345678 Sets / Progress Status 020 / 001 Copying 020 / 000 Waiting 020 / 000 Waiting 002 / 000 Waiting Spool 1/1 Job Queue Complete Detail Priority Stop/Delete Print Job Scan to Fax Job Internet Fax A selected job can be given priority and run ahead of other jobs, or a job waiting in the queue can be canceled. Jobs are displayed as a list of touch keys. The job keys appear in the order that they will be run. A job key can be touched to select it. Using general keys Special Modes OK System Settings Auto Clear Setting OK 2/4 Transparency Covers/Inserts Inserts Multi Shot Set the time for auto clear. Book Copy Tab Copy Card Shot (1) (2) Cancel Timer 60 (10~240) sec. (3) (1) When the displayed screen is one of two or more screens, use the keys to switch through the screens. (2) When a checkbox is touched, a checkmark will appear to indicate that the setting is enabled. (3) The keys can be used to increase or decrease a value. To make a value change quickly, keep your finger on the key. 12
-
 1
1 -
2
-
3
-
4
-
5
-
6
-
7
-
8
-
 9
9 -
 10
10 -
 11
11 -
 12
12 -
 13
13 -
 14
14 -
 15
15 -
 16
16 -
 17
17 -
 18
18 -
 19
19 -
20
-
21
-
22
-
23
-
24
-
25
-
26
-
27
-
28
-
29
-
30
-
31
-
32
-
33
-
34
-
35
-
36
-
37
-
38
-
39
-
40
-
41
-
42
-
43
-
44
-
45
-
46
-
47
-
48
-
49
-
50
-
51
-
52
-
53
-
54
-
55
-
56
-
57
-
58
-
59
-
60
-
61
-
62
-
63
-
64
-
65
-
66
-
67
-
68
-
69
-
70
-
71
-
72
-
73
-
74
-
75
-
76
-
77
-
78
-
79
-
80
-
81
-
82
-
83
-
84
-
85
-
86
-
87
-
88
 |
 |