Sharp MX 4501N Quick Start Guide - Page 64
Storing A Destination - scanner guide
 |
View all Sharp MX 4501N manuals
Add to My Manuals
Save this manual to your list of manuals |
Page 64 highlights
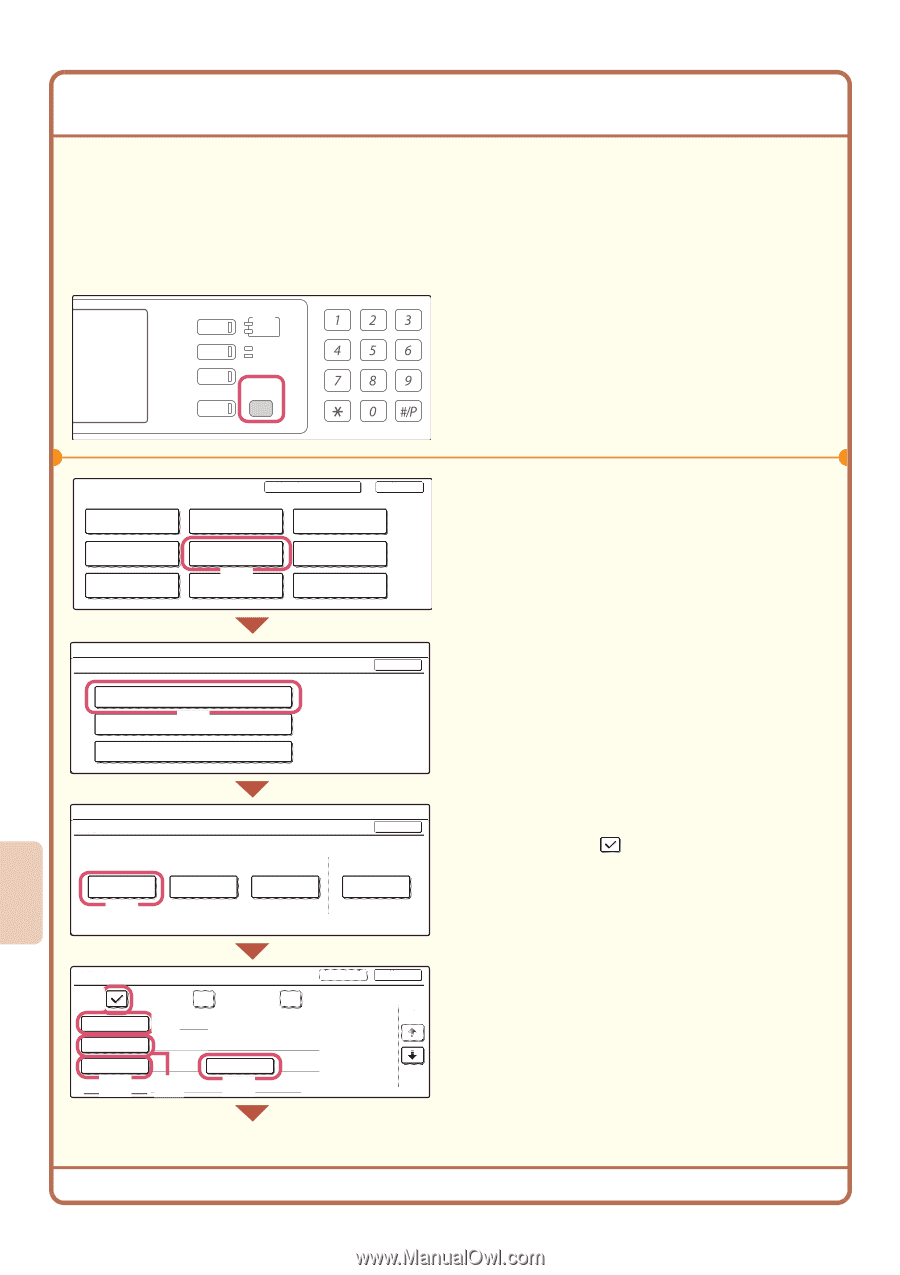
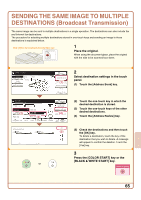
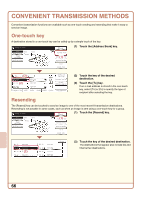
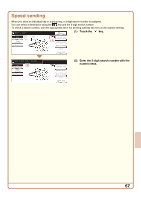
STORING A DESTINATION The procedure for storing e-mail addresses in one-touch keys for Scan to E-mail is explained below. Stored e-mail addresses can be entered quickly and easily. If you frequently send images to the same group of destinations, the e-mail addresses of those destinations can be stored as a group. To store destinations for the other modes of the network scanner function, see "STORING DESTINATION ADDRESSES FOR EACH SCAN MODE IN THE ADDRESS BOOK" in the Scanner Guide. Storing a individual key DOCUMENT FILING IMAGE SEND PRINT READY DATA LINE DATA COPY SYSTEM JOB STATUS SETTINGS 1 Press the [SYSTEM SETTINGS] key. LOGOUT System Settings Total Count Paper Tray Settings Printer Condition Settings Admin Password Exit Default Settings Address Control (1) Document Filing Control List Print (User) Fax Data Receive/Forward USB-Device Check 2 Store the Scan to E-mail destination in the touch panel. (1) Touch the [Address Control] key. System Settings Address Control Direct Address / Program (2) F-Code Memory Box Custom Index (2) Touch the [Direct Address / Program] OK key. (3) Touch the [Individual] key. System Settings Direct Address / Program Individual (3) Store Group OK Program Modify/Delete Direct Address / Individual (4) E-mail (5) Search Number 001 Internet Fax Name AAA AAA Initial A Index (7) Address (6) (8) Next Fax Exit 1/2 62 (4) Select the [E-mail] checkbox so that a checkmark appears. (5) Touch the [Search Number] key. The "Search Number" is automatically assigned. The search number can be changed in the screen that appears when the [Search Number] key is touched. However, a number that is already in use cannot be used. (6) Touch the [Name] key. A text entry screen appears. Enter the name of the destination (max. of 36 characters). To enter text, see "6. ENTERING TEXT" in the User's Guide. (7) Touch the [Initial] key. A text entry screen appears. Enter initials for the destination (max. of 10 characters). (8) Touch the [Index] key.
-
 1
1 -
2
-
3
-
4
-
5
-
6
-
7
-
8
-
9
-
10
-
11
-
12
-
13
-
14
-
15
-
16
-
17
-
18
-
19
-
20
-
21
-
22
-
23
-
24
-
25
-
26
-
27
-
28
-
29
-
30
-
31
-
32
-
33
-
34
-
35
-
36
-
37
-
38
-
39
-
40
-
41
-
42
-
43
-
44
-
45
-
46
-
47
-
48
-
49
-
50
-
51
-
52
-
53
-
54
-
55
-
56
-
57
-
58
-
 59
59 -
 60
60 -
 61
61 -
 62
62 -
 63
63 -
 64
64 -
 65
65 -
 66
66 -
 67
67 -
 68
68 -
 69
69 -
70
-
71
-
72
-
73
-
74
-
75
-
76
-
77
-
78
-
79
-
80
-
81
-
82
-
83
-
84
-
85
-
86
-
87
-
88
 |
 |