Sharp MX 4501N Quick Start Guide - Page 59
Scanning An Original
 |
View all Sharp MX 4501N manuals
Add to My Manuals
Save this manual to your list of manuals |
Page 59 highlights
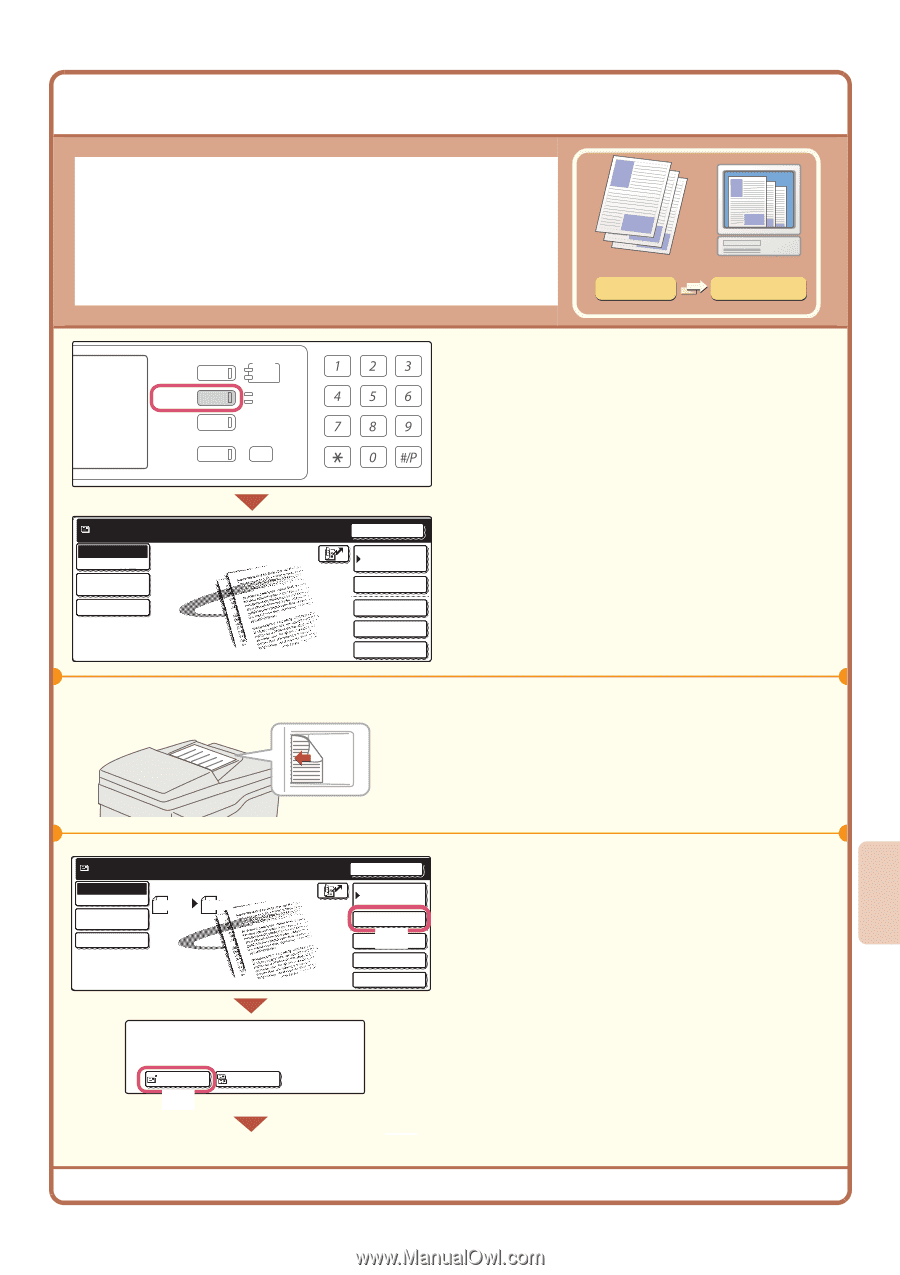
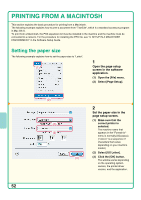
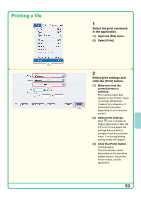
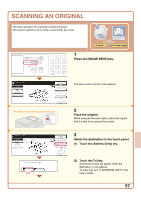
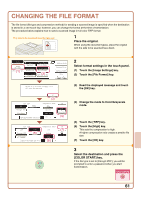
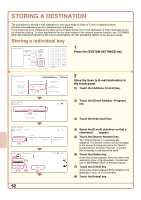
SCANNING AN ORIGINAL The basic operation for scanning is explained below. This section explains how to send a scanned file by e-mail. DOCUMENT FILING IMAGE SEND PRINT READY DATA LINE DATA COPY SYSTEM JOB STATUS SETTINGS Ready to send. Scan Mode Switch Image Settings Send Settings LOGOUT Resend Address Book Address Entry Special Modes File Quick File The side to be scanned must be face up! Scan transmission Original Scanned image 1 Press the [IMAGE SEND] key. The base screen of scan mode appears. 2 Place the original. When using the document glass, place the original with the side to be scanned face down. Ready to send. Scan Mode Switch Image Settings Scan 81/2x11 Send Settings Send Auto Select addressee type. To Cc (2) Resend Address Book Address Entry (1) Special Modes File Quick File 3 Select the destination in the touch panel. (1) Touch the [Address Entry] key. (2) Touch the [To] key. A text entry screen will appear. Enter the destination e-mail address. To enter text, see "6. ENTERING TEXT" in the User's Guide. 57
-
 1
1 -
2
-
3
-
4
-
5
-
6
-
7
-
8
-
9
-
10
-
11
-
12
-
13
-
14
-
15
-
16
-
17
-
18
-
19
-
20
-
21
-
22
-
23
-
24
-
25
-
26
-
27
-
28
-
29
-
30
-
31
-
32
-
33
-
34
-
35
-
36
-
37
-
38
-
39
-
40
-
41
-
42
-
43
-
44
-
45
-
46
-
47
-
48
-
49
-
50
-
51
-
52
-
53
-
 54
54 -
 55
55 -
 56
56 -
 57
57 -
 58
58 -
 59
59 -
 60
60 -
 61
61 -
 62
62 -
 63
63 -
 64
64 -
65
-
66
-
67
-
68
-
69
-
70
-
71
-
72
-
73
-
74
-
75
-
76
-
77
-
78
-
79
-
80
-
81
-
82
-
83
-
84
-
85
-
86
-
87
-
88
 |
 |