Sharp UX-4000M Service Manual - Page 62
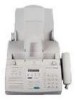
Paper feed solenoid, Sleeve release lever, PE lever Paper Empty lever, lever, Notch
 |
View all Sharp UX-4000M manuals
Add to My Manuals
Save this manual to your list of manuals |
Page 62 highlights
UX-4000MU FO-2950MU/C 12. Paper feed solenoid 1 Remove connector. 2 Remove lever release spring which is attached to sleeve release lever. 3 Remove one screw. 4 Slide paper feed solenoid and remove it from between curved mirror ass'y and the upper frame. Note: At that time, do not disassemble curved mirror ass'y. (Never loosen the fixing screw.) If it is removed or shifted, precise adjustments are required, which cannot be performed in the market. Note for assembly • When lever release spring is completely removed, and when it is at- tached again, hang the one side of lever release spring on paper feed solenoid before attaching paper feed solenoid to the upper frame. • When attaching the paper feed solenoid, refer to the above figure for the correct fixing position. • Be careful that the arm of paper feed solenoid is under sleeve release lever. 13. Sleeve release lever 1 Rotate sleeve release lever in the direction (A) and remove the shaft of sleeve release lever from the notch of the upper frame and remove it from the upper frame. Sleeve release lever 1 (A) 1 Notch Fig. 22 1 Curved mirror 3 Paper feed Never loosen ass'y solenoid 4 2 Lever release spring Paper feed solenoid Arm Sleeve release lever Sleeve release lever Be careful to the direction of the hook Spring 14. PE lever (Paper Empty lever) 1 Slightly turn the PE lever in the direction of arrow (A) , and slide it in 2 the direction of arrow (B). Remove the notch section of PE lever shaft from the notch section of the upper frame as shown in arrow (C) , and remove PE lever. PE lever 1 (C) (A) (B) Notch section 2 Fig. 23 Sleeve release Arm lever Fig. 21 3 - 19 manuals4you.com
-
 1
1 -
2
-
3
-
4
-
5
-
6
-
7
-
8
-
9
-
10
-
11
-
12
-
13
-
14
-
15
-
16
-
17
-
18
-
19
-
20
-
21
-
22
-
23
-
24
-
25
-
26
-
27
-
28
-
29
-
30
-
31
-
32
-
33
-
34
-
35
-
36
-
37
-
38
-
39
-
40
-
41
-
42
-
43
-
44
-
45
-
46
-
47
-
48
-
49
-
50
-
51
-
52
-
53
-
54
-
55
-
56
-
 57
57 -
 58
58 -
 59
59 -
 60
60 -
 61
61 -
 62
62 -
 63
63 -
 64
64 -
 65
65 -
 66
66 -
 67
67 -
68
-
69
-
70
-
71
-
72
-
73
-
74
-
75
-
76
-
77
-
78
-
79
-
80
-
81
-
82
-
83
-
84
-
85
-
86
-
87
-
88
-
89
-
90
-
91
-
92
-
93
-
94
-
95
-
96
-
97
-
98
-
99
-
100
-
101
-
102
-
103
-
104
-
105
-
106
-
107
-
108
-
109
-
110
-
111
-
112
-
113
-
114
-
115
-
116
-
117
-
118
-
119
-
120
-
121
-
122
-
123
-
124
-
125
-
126
-
127
-
128
-
129
-
130
-
131
-
132
-
133
-
134
-
135
-
136
-
137
-
138
-
139
-
140
-
141
-
142
-
143
-
144
-
145
-
146
-
147
-
148
-
149
-
150
-
151
-
152
-
153
-
154
-
155
-
156
-
157
-
158
-
159
-
160
-
161
-
162
-
163
-
164
-
165
-
166
-
167
-
168
-
169
-
170
-
171
-
172
-
173
-
174
-
175
-
176
-
177
-
178
-
179
-
180
-
181
-
182
-
183
-
184
-
185
-
186
-
187
-
188
-
189
-
190
-
191
-
192
-
193
-
194
-
195
-
196
-
197
-
198
-
199
-
200
-
201
-
202
-
203
-
204
-
205
-
206
-
207
-
208
-
209
-
210
-
211
-
212
-
213
-
214
-
215
-
216
-
217
-
218
-
219
-
220
-
221
-
222
-
223
-
224
-
225
-
226
-
227
-
228
-
229
-
230
-
231
-
232
 |
 |
