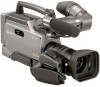
Sony DSR 250 Operating Instructions - Page 88
Dubbing only desired scenes, Digital, program editing
 |
UPC - 027242579514
View all Sony DSR 250 manuals
Add to My Manuals
Save this manual to your list of manuals |
Page 88 highlights
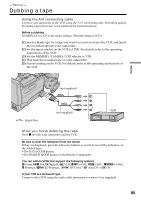
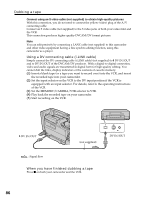
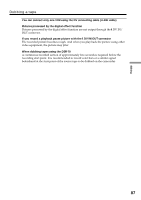
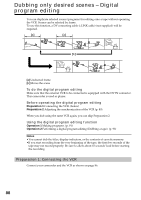
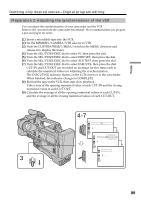
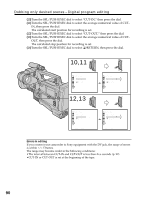
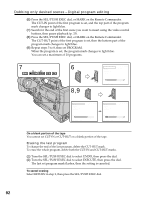
Dubbing only desired scenes - Digital program editing You can duplicate selected scenes (programs) for editing onto a tape without operating the VCR. Scenes can be selected by frame. To use this function, a DV connecting cable (i.LINK cable) (not supplied) will be required. [a] [a] [b] [a] Undesired frame [b]Moves the scene To do the digital program editing Make sure that the external VCR to be connected is equipped with the DV IN connector. This camcorder is used as player. Before operating the digital program editing Preparation 1 Connecting the VCR. (below) Preparation 2 Adjusting the synchronization of the VCR (p. 89). When you dub using the same VCR again, you can skip Preparation 2. Using the digital program editing function Operation 1 Making programs. (p. 91) Operation 2 Performing a digital program editing (Dubbing a tape). (p. 93) Notes •You cannot dub the titles, display indicators, or the contents of cassette memory. •If you start recording from the very beginning of the tape, the first few seconds of the tape may not record properly. Be sure to allow about 10 seconds' lead before starting the recording. Preparation 1: Connecting the VCR Connect your camcorder and the VCR as shown on page 86. 88
-
 1
1 -
2
-
3
-
4
-
5
-
6
-
7
-
8
-
9
-
10
-
11
-
12
-
13
-
14
-
15
-
16
-
17
-
18
-
19
-
20
-
21
-
22
-
23
-
24
-
25
-
26
-
27
-
28
-
29
-
30
-
31
-
32
-
33
-
34
-
35
-
36
-
37
-
38
-
39
-
40
-
41
-
42
-
43
-
44
-
45
-
46
-
47
-
48
-
49
-
50
-
51
-
52
-
53
-
54
-
55
-
56
-
57
-
58
-
59
-
60
-
61
-
62
-
63
-
64
-
65
-
66
-
67
-
68
-
69
-
70
-
71
-
72
-
73
-
74
-
75
-
76
-
77
-
78
-
79
-
80
-
81
-
82
-
 83
83 -
 84
84 -
 85
85 -
 86
86 -
 87
87 -
 88
88 -
 89
89 -
 90
90 -
 91
91 -
 92
92 -
 93
93 -
94
-
95
-
96
-
97
-
98
-
99
-
100
-
101
-
102
-
103
-
104
-
105
-
106
-
107
-
108
-
109
-
110
-
111
-
112
-
113
-
114
-
115
-
116
-
117
-
118
-
119
-
120
-
121
-
122
-
123
-
124
-
125
-
126
-
127
-
128
-
129
-
130
-
131
-
132
-
133
-
134
-
135
-
136
-
137
-
138
-
139
-
140
-
141
-
142
-
143
-
144
-
145
-
146
-
147
-
148
-
149
-
150
-
151
-
152
-
153
-
154
-
155
-
156
-
157
-
158
-
159
-
160
-
161
-
162
-
163
-
164
-
165
-
166
-
167
-
168
-
169
-
170
-
171
-
172
-
173
-
174
-
175
-
176
-
177
-
178
-
179
-
180
-
181
-
182
-
183
-
184
-
185
-
186
-
187
-
188
-
189
-
190
-
191
-
192
 |
 |
