Sony PDWF75 User Manual (PDW-F75 Professional Disc Recorder Operating Manual f - Page 44
Loading and Unloading a Disc, Formatting a Disc, To cancel a disc format
 |
View all Sony PDWF75 manuals
Add to My Manuals
Save this manual to your list of manuals |
Page 44 highlights
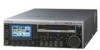
Chapter 3 Recording and Playback Lower surface of the disc Write Inhibit tab To format a recorded disc, load the disc into the unit, then proceed as follows. Note When a recorded disc is formatted, all the data on the disc is erased. (Locked clips (see page 59) are also erased.) SAVE 1 2,7 3,4,5 Slide in the direction of the arrow Write Inhibit tab settings SAVE SAVE Recording enabled Recording disabled You can also write protect individual clips. For details, see "Locking (Write-Protecting) Clips" (page 59). Loading and Unloading a Disc When the on/standby switch indicator is lit green, you can load and unload a disc as shown in the following figure. On/standby switch and indicator To unload Press the EJECT button. To load Insert a disc face up. The disc is drawn in. The disc slot indicator flashes orange when you insert a disc, and lights blue when the disc is completely loaded. The indicator flashes blue when you eject a disc, and goes out when the disc is completely ejected. Formatting a Disc Unused discs are formatted automatically when they are loaded into this unit. ACCESS NETWORK LOCAL REMOTE LEVEL PHONES CH 1 CH 2 CH 3 F1 F2 CH 4 F3 F4 CHAPTER MENU MARK1 F5 EXPAND PAGE DISPLAY SUB THUMB IN CLIP NAIL SET RESET VARIABLE REC PRESET PB KEY INHI CLIP ESSENCE MENU MARK PREV PLAY NEXT MARK2 STOP SHIFT TOP F REV F FWD END STANDBY OUT REC VAR JOG SHUTTLE EJECT 6 1 Press the DISPLAY button to maximize the monitor video section. 2 Press the MENU button. The system menu appears on the display. 3 Select "DISC MENU" using the M/MARK1 button or m/MARK2 button, then press the ,/OUT button. 4 Select "FORMAT" using the m/MARK2 button, then press the ,/OUT button. The menu item QUICK FORMAT is selected. 5 Press the ,/OUT button. The message "QUICK FORMAT OK?" appears. To cancel a disc format Press the RESET button to return to the state of step 3. To clear the menu from the screen, carry out step 7. 6 Press the SET button. The format starts. The message "FORMAT COMPLETED." appears when formatting of the disc is completed. If you want to continue by formatting another disc When the message "FORMAT COMPLETED." appears, press the EJECT button to eject the disc. Insert the next disc to format, and press the SET button when the message "QUICK FORMAT OK?" appears. 7 Press the MENU button to clear the menu from the screen. 44 Handling Discs
-
 1
1 -
2
-
3
-
4
-
5
-
6
-
7
-
8
-
9
-
10
-
11
-
12
-
13
-
14
-
15
-
16
-
17
-
18
-
19
-
20
-
21
-
22
-
23
-
24
-
25
-
26
-
27
-
28
-
29
-
30
-
31
-
32
-
33
-
34
-
35
-
36
-
37
-
38
-
 39
39 -
 40
40 -
 41
41 -
 42
42 -
 43
43 -
 44
44 -
 45
45 -
 46
46 -
 47
47 -
 48
48 -
 49
49 -
50
-
51
-
52
-
53
-
54
-
55
-
56
-
57
-
58
-
59
-
60
-
61
-
62
-
63
-
64
-
65
-
66
-
67
-
68
-
69
-
70
-
71
-
72
-
73
-
74
-
75
-
76
-
77
-
78
-
79
-
80
-
81
-
82
-
83
-
84
-
85
-
86
-
87
-
88
-
89
-
90
-
91
-
92
-
93
-
94
-
95
-
96
-
97
-
98
-
99
-
100
-
101
-
102
-
103
-
104
-
105
-
106
-
107
-
108
-
109
-
110
-
111
-
112
-
113
-
114
-
115
-
116
-
117
-
118
-
119
-
120
-
121
-
122
-
123
-
124
-
125
-
126
-
127
-
128
-
129
-
130
-
131
-
132
-
133
-
134
-
135
 |
 |
