Sony PDWF75 User Manual (PDW-F75 Professional Disc Recorder Operating Manual f - Page 52
Playback Operation, Normal playback, Playback in jog mode
 |
View all Sony PDWF75 manuals
Add to My Manuals
Save this manual to your list of manuals |
Page 52 highlights
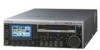
Chapter 3 Recording and Playback Note This function is not available when the Write Inhibit tab of the disc is set to the recording disabled position, and when REC INH on page P1 of the function menu is set to "ON". The REC INH indicator may light when neither of the above is true if the format of recorded sections on the disc is not the same as the recording settings of this unit. In this case, the playback position can be saved to the disc. Playback Operation This section describes the following types of playback: Normal playback: Playback at normal speed Playback in jog mode: Variable-speed playback, with the speed determined by the speed of turning the jog dial Playback in shuttle mode: Variable-speed playback, with the speed determined by the angular position of the shuttle dial Playback in variable-speed mode: Variable-speed playback, with the speed finely determined by the angular position of the shuttle dial Normal playback First insert a disc. For details of how to insert a disc, see "Loading and Unloading a Disc" on page 44. To jump to the next or previous clip, then start playback Use the PREV button, NEXT button, jog dial, or shuttle dial. To stop playback Press the STOP button. If you play back to the end of the last clip, playback automatically stops. If, in this state, you press the PLAY button, the message "ALARM DISC END." appears on the display. To carry out playback again, move back to the desired clip using the PREV button, jog dial or shuttle dial. To set shot marks While playing back a disc, you can set essence marks such as SHOT MARK1 and SHOT MARK2 in desired frames. To set a SHOT MARK1 or SHOT MARK2, hold down the M/MARK1 or m/MARK2 button and press the SET button. To delete or change essence marks, use the supplied PDZ1 Proxy Browsing Software. See "Using PDZ-1 Proxy Browsing Software" in Chapter 4 (page 79) for more information about installing the PDZ-1 software. See the online help of PDZ-1 for more information about using PDZ-1. You can delete SHOT MARK1 and SHOT MARK2 in the CHAPTER screen. For details, see "To delete shot marks at chapter positions" (page 57). ACCESS NETWORK LOCAL REMOTE LEVEL PHONES CH 1 CH 2 CH 3 F1 F2 CH 4 F3 F4 CHAPTER MENU MARK1 F5 EXPAND PAGE DISPLAY SUB THUMB IN CLIP NAIL SET RESET VARIABLE REC PRESET PB KEY INHI CLIP ESSENCE MENU MARK PREV PLAY NEXT MARK2 STOP SHIFT TOP F REV F FWD END STANDBY OUT REC VAR JOG SHUTTLE EJECT PREV button PLAY button NEXT button STOP button M/MARK1 button and m/MARK2 button Jog dial Shuttle dial To start playback Press the PLAY button. Playback starts. When two or more clips are recorded on the disc, they are played back continuously. Note No audio is output when non-audio signals are played back. Playback in jog mode In jog mode, you can control the speed of playback by the speed of turning the jog dial. The playback speed range is -1 to +2 times normal speed. To carry out playback in jog mode, proceed as follows. ACCESS NETWORK LOCAL REMOTE LEVEL PHONES CH 1 CH 2 CH 3 F1 F2 CH 4 F3 F4 CHAPTER MENU MARK1 F5 EXPAND PAGE DISPLAY SUB THUMB IN CLIP NAIL SET RESET VARIABLE REC PRESET PB KEY INHI CLIP ESSENCE MENU MARK PREV PLAY NEXT MARK2 STOP SHIFT TOP F REV F FWD END STANDBY OUT REC VAR JOG SHUTTLE EJECT 1 2,3 1 Press the JOG button, turning it on. 2 Turn the jog dial in the desired direction, at the speed corresponding to the desired playback speed. Playback in jog mode starts. 3 To stop playback in jog mode, stop turning the jog dial. 52 Playback
-
 1
1 -
2
-
3
-
4
-
5
-
6
-
7
-
8
-
9
-
10
-
11
-
12
-
13
-
14
-
15
-
16
-
17
-
18
-
19
-
20
-
21
-
22
-
23
-
24
-
25
-
26
-
27
-
28
-
29
-
30
-
31
-
32
-
33
-
34
-
35
-
36
-
37
-
38
-
39
-
40
-
41
-
42
-
43
-
44
-
45
-
46
-
 47
47 -
 48
48 -
 49
49 -
 50
50 -
 51
51 -
 52
52 -
 53
53 -
 54
54 -
 55
55 -
 56
56 -
 57
57 -
58
-
59
-
60
-
61
-
62
-
63
-
64
-
65
-
66
-
67
-
68
-
69
-
70
-
71
-
72
-
73
-
74
-
75
-
76
-
77
-
78
-
79
-
80
-
81
-
82
-
83
-
84
-
85
-
86
-
87
-
88
-
89
-
90
-
91
-
92
-
93
-
94
-
95
-
96
-
97
-
98
-
99
-
100
-
101
-
102
-
103
-
104
-
105
-
106
-
107
-
108
-
109
-
110
-
111
-
112
-
113
-
114
-
115
-
116
-
117
-
118
-
119
-
120
-
121
-
122
-
123
-
124
-
125
-
126
-
127
-
128
-
129
-
130
-
131
-
132
-
133
-
134
-
135
 |
 |
