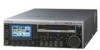
Sony PDWF75 User Manual (PDW-F75 Professional Disc Recorder Operating Manual f - Page 75
Saving the Current Clip List to Disc
 |
View all Sony PDWF75 manuals
Add to My Manuals
Save this manual to your list of manuals |
Page 75 highlights
Chapter 4 Scene Selection However, if you press the SUB CLIP button to turn it off, and then press it again to light it, the playback start position is reset to the start of the clip list. With the SUB CLIP button lit, press the PLAY button. You can repeat playback of the current clip list by setting SET UP >OPERATIONAL FUNCTION >REPEAT MODE to ON. Saving the Current Clip List to Disc Notes • Edited clip list data is not saved unless you carry out this operation. If you are going to use the created or edited clip list data later on, be sure to save it to disc. • If the Write Inhibit tab on the disc is set to the recording disabled position, you cannot save the current clip list to the disc. • It may not be possible to record because of some other reason, for example not enough free capacity on the disc. 2 2,3 ACCESS NETWORK LOCAL REMOTE LEVEL PHONES 0 0 -12 -12 -20 -20 -30 -30 -40 -40 -60 1 2 -60 3 4 4CH 16 BIT 3+4 MPEG HD SP 1080 60I VITC COOO1 REM:077M 00: 00 .00: 00 TCG EXT TC MODE PRESET RUN MODE REC RUN TC/VITC VITC DF/NDF NDF P2 CH 1 CH 2 CH 3 CH 4 F1 F2 F3 F4 CHAPTER MENU MARK1 F5 EXPAND PAGE DISPLAY SUB THUMB IN CLIP NAIL SET RESET VARIABLE REC PRESET PB KEY INHI CLIP ESSENCE MENU MARK PREV PLAY NEXT MARK2 STOP SHIFT TOP F REV F FWD END STANDBY OUT REC VAR JOG SHUTTLE EJECT Proceed as follows. 1 Display the CLIP menu. See "Displaying the CLIP menu" (page 76). 2 Use the M/MARK1 or m/MARK2 button to move the cursor to "SAVE CLIP LIST", and then press the SET button. A list of clip lists appears. The date of creation or the title is displayed for each clip list. "NEW FILE" is displayed for clip lists without any saved data. To switch between title display and date of creation display Press the ,/OUT button. For details, see "To select the type of clip list information to display" (page 68). 3 Use the M/MARK1 or m/MARK2 button or jog dial to select the desired clip list, and then press the ,/OUT button. The current clip list is saved to disc. To cancel the save Press the MENU button. To assign a title to a clip list 75 Saving the Current Clip List to Disc
-
 1
1 -
2
-
3
-
4
-
5
-
6
-
7
-
8
-
9
-
10
-
11
-
12
-
13
-
14
-
15
-
16
-
17
-
18
-
19
-
20
-
21
-
22
-
23
-
24
-
25
-
26
-
27
-
28
-
29
-
30
-
31
-
32
-
33
-
34
-
35
-
36
-
37
-
38
-
39
-
40
-
41
-
42
-
43
-
44
-
45
-
46
-
47
-
48
-
49
-
50
-
51
-
52
-
53
-
54
-
55
-
56
-
57
-
58
-
59
-
60
-
61
-
62
-
63
-
64
-
65
-
66
-
67
-
68
-
69
-
 70
70 -
 71
71 -
 72
72 -
 73
73 -
 74
74 -
 75
75 -
 76
76 -
 77
77 -
 78
78 -
 79
79 -
 80
80 -
81
-
82
-
83
-
84
-
85
-
86
-
87
-
88
-
89
-
90
-
91
-
92
-
93
-
94
-
95
-
96
-
97
-
98
-
99
-
100
-
101
-
102
-
103
-
104
-
105
-
106
-
107
-
108
-
109
-
110
-
111
-
112
-
113
-
114
-
115
-
116
-
117
-
118
-
119
-
120
-
121
-
122
-
123
-
124
-
125
-
126
-
127
-
128
-
129
-
130
-
131
-
132
-
133
-
134
-
135
 |
 |
