Sony PFM-510A1WU Operating Instructions - Page 6
Location and Function of Parts and Controls, Front / Sides
 |
View all Sony PFM-510A1WU manuals
Add to My Manuals
Save this manual to your list of manuals |
Page 6 highlights
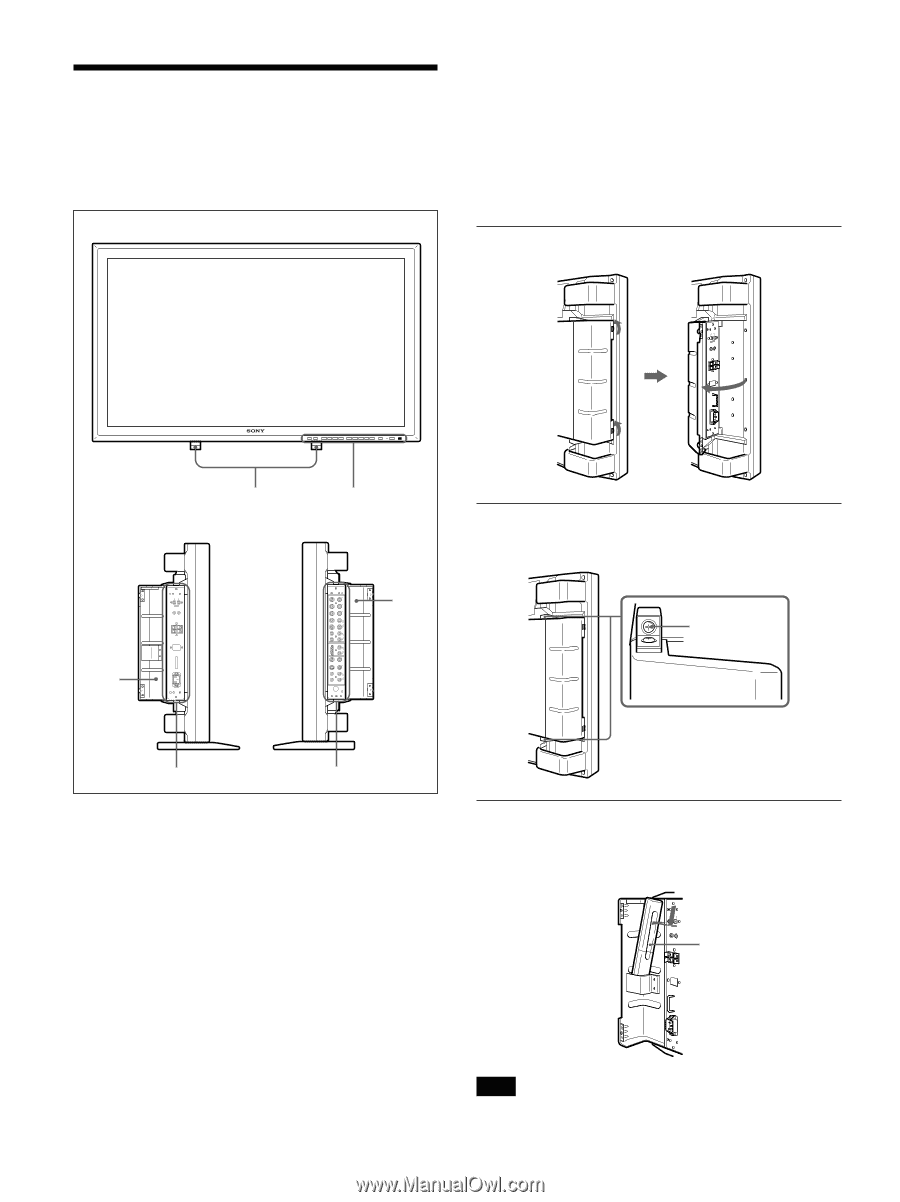
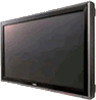
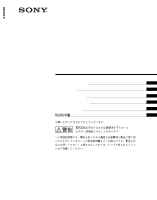
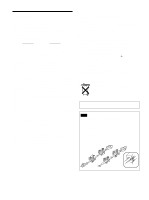
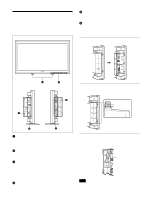
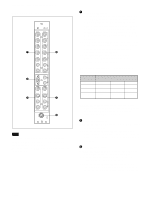
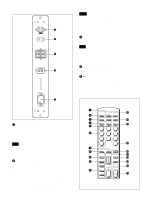
Location and Function of Parts and Controls Location and Function of Parts and Controls Front / Sides Front 5 Right connector panel For details on the right connector panel, see "Right Connector Panel" on page 8 (GB). 6 Right panel cover Open it when using the right connector panel. For details on opening the panel cover, see the below on this page. To open the panel cover Loosen the screws counterclockwise and open the cover. Left side 3 1 2 Right side 6 To take off the panel cover Loosen the screws as illustrated below and take off the panel cover. Screws 4 5 1 Retractable feet Use for setting the monitor on the floor. For details on using the retractable feet, see "Using the Retractable Feet" on page 12 (GB). 2 Control panel For details on the control panel, see "Control Panel" on page 7 (GB). 3 Left panel cover Open it when using the left connector panel. You can install the Remote Commander in the back of this cover. For details on opening the panel cover, see the right on this page. 4 Left connector panel For details on the left connector panel, see "Left Connector Panel" on page 10 (GB). 6 (GB) To install the Remote Commander in the panel cover Install the Remote Commander in the back of the left panel cover as illustrated below. Remote Commander Note When housing the Remote Commander, make sure that the top of the Remote Commander faces upward and rear faces outside.
-
 1
1 -
 2
2 -
 3
3 -
 4
4 -
 5
5 -
 6
6 -
 7
7 -
 8
8 -
 9
9 -
 10
10 -
 11
11 -
 12
12 -
13
-
14
-
15
-
16
-
17
-
18
-
19
-
20
-
21
-
22
-
23
-
24
-
25
-
26
-
27
-
28
-
29
-
30
-
31
-
32
-
33
-
34
-
35
-
36
-
37
-
38
-
39
-
40
-
41
-
42
-
43
-
44
-
45
-
46
-
47
-
48
-
49
-
50
-
51
-
52
-
53
-
54
-
55
-
56
-
57
-
58
-
59
-
60
-
61
-
62
-
63
-
64
-
65
-
66
-
67
-
68
-
69
-
70
-
71
-
72
-
73
-
74
-
75
-
76
-
77
-
78
-
79
-
80
-
81
-
82
-
83
-
84
-
85
-
86
-
87
-
88
-
89
-
90
-
91
-
92
-
93
-
94
-
95
-
96
-
97
-
98
-
99
-
100
-
101
-
102
-
103
-
104
-
105
-
106
-
107
-
108
-
109
-
110
-
111
-
112
-
113
-
114
-
115
-
116
-
117
-
118
-
119
-
120
-
121
-
122
-
123
-
124
-
125
-
126
-
127
-
128
-
129
-
130
-
131
-
132
-
133
-
134
-
135
-
136
-
137
-
138
-
139
-
140
-
141
-
142
-
143
-
144
-
145
-
146
-
147
-
148
-
149
-
150
-
151
-
152
-
153
-
154
-
155
-
156
-
157
-
158
-
159
-
160
-
161
-
162
-
163
-
164
-
165
-
166
-
167
-
168
-
169
-
170
-
171
-
172
-
173
-
174
-
175
-
176
-
177
-
178
-
179
-
180
-
181
-
182
-
183
-
184
 |
 |