Stihl MS 251 Instruction Manual - Page 33
Engine, 6.1 Muffler, Always replace components - carburetor
 |
View all Stihl MS 251 manuals
Add to My Manuals
Save this manual to your list of manuals |
Page 33 highlights
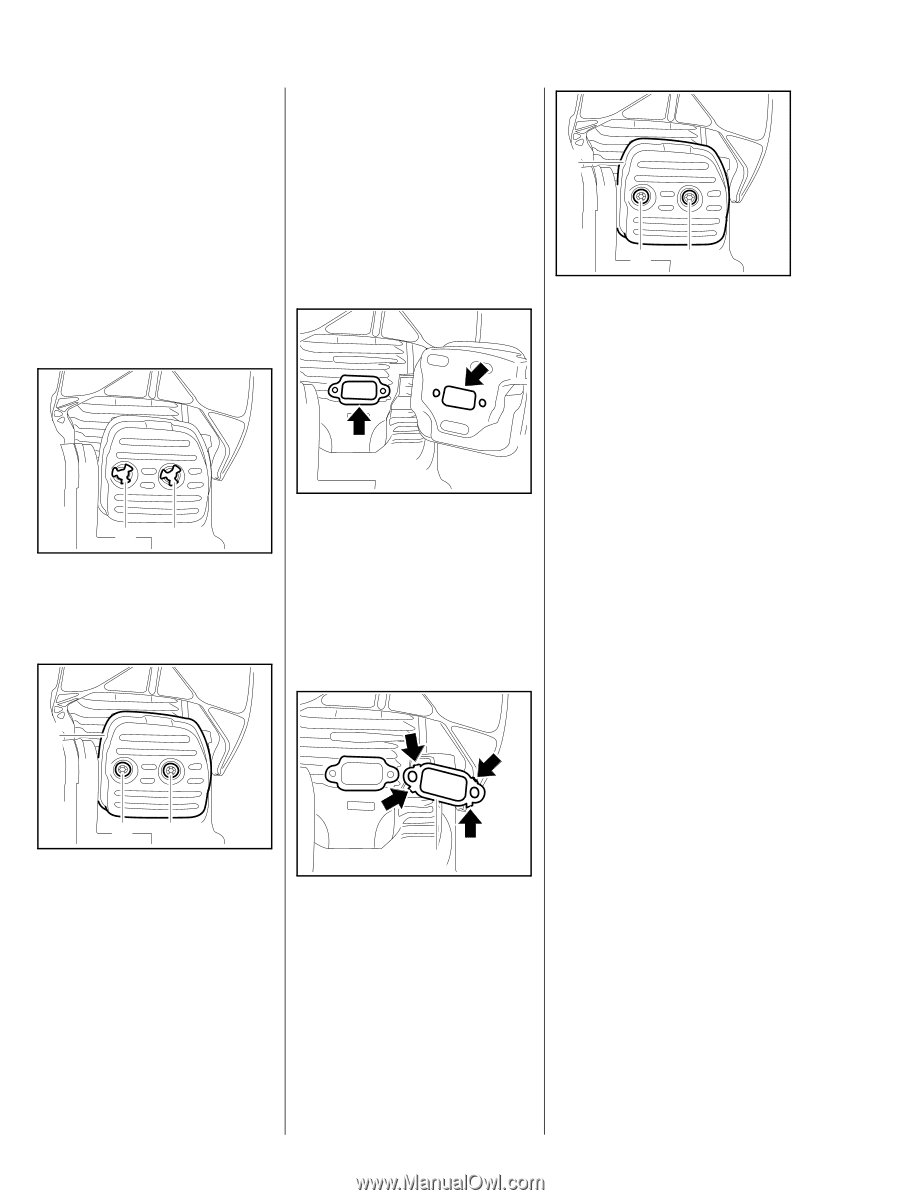
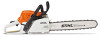
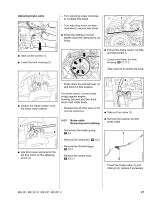
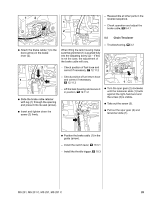
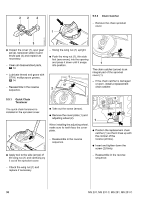
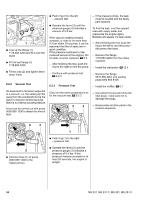
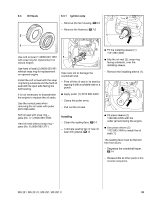
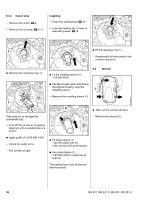
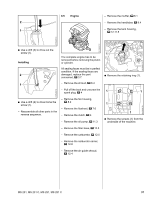
6. Engine 2310RA071 TG 6.1 Muffler Always check and, if necessary, repair the fuel system, carburetor, air filter and ignition system before looking for faults on the engine. - Troubleshooting, b 3.7 - Remove the shroud, b 6.4 Before removing the muffler, set the piston to top dead center to ensure that no dirt falls into the cylinder. - Remove and install the spark arresting screen, if fitted - see instruction manual. Installing - Cover the exhaust port. Remove any dirt from around the cylinder and exhaust port. 1 22 : Carefully place the muffler (1) in position. : Check the position of the gasket and fit the screws (2). : Insert and tighten down the screws (2) firmly. 2310RA069 TG 11 : Pry out the plugs (1) - do not re-use plugs that have been removed. 2310RA067 TG : Check and clean the sealing faces (arrows), remove any gasket residue - make sure there is no gasket residue or dirt in the exhaust port. - Use a blunt tool to push home the new plugs squarely and uniformly - take care not to damage the plugs. Always replace components with damaged sealing faces. 2 2310RA068 TG 2310RA070 TG 11 : Take out the screws (1). : Remove the muffler (2), check and replace if necessary. - Remove the exhaust gasket - always install a new exhaust gasket. 1 - Position the new exhaust gasket (1) so that the tabs (arrows) point towards the cylinder. : Fit the new exhaust gasket (1) and use the tabs (arrows) to line it up on the cylinder. 32 MS 231, MS 231 C, MS 251, MS 251 C
-
 1
1 -
2
-
3
-
4
-
5
-
6
-
7
-
8
-
9
-
10
-
11
-
12
-
13
-
14
-
15
-
16
-
17
-
18
-
19
-
20
-
21
-
22
-
23
-
24
-
25
-
26
-
27
-
 28
28 -
 29
29 -
 30
30 -
 31
31 -
 32
32 -
 33
33 -
 34
34 -
 35
35 -
 36
36 -
 37
37 -
 38
38 -
39
-
40
-
41
-
42
-
43
-
44
-
45
-
46
-
47
-
48
-
49
-
50
-
51
-
52
-
53
-
54
-
55
-
56
-
57
-
58
-
59
-
60
-
61
-
62
-
63
-
64
-
65
-
66
-
67
-
68
-
69
-
70
-
71
-
72
-
73
-
74
-
75
-
76
-
77
-
78
-
79
-
80
-
81
-
82
-
83
-
84
-
85
-
86
-
87
-
88
-
89
-
90
-
91
-
92
-
93
-
94
-
95
-
96
-
97
-
98
-
99
-
100
-
101
-
102
-
103
-
104
-
105
-
106
-
107
-
108
-
109
-
110
-
111
-
112
-
113
-
114
 |
 |