Stihl MS 251 Instruction Manual - Page 37
Clutch side, 6.4 Shroud, 893 2405 with
 |
View all Stihl MS 251 manuals
Add to My Manuals
Save this manual to your list of manuals |
Page 37 highlights
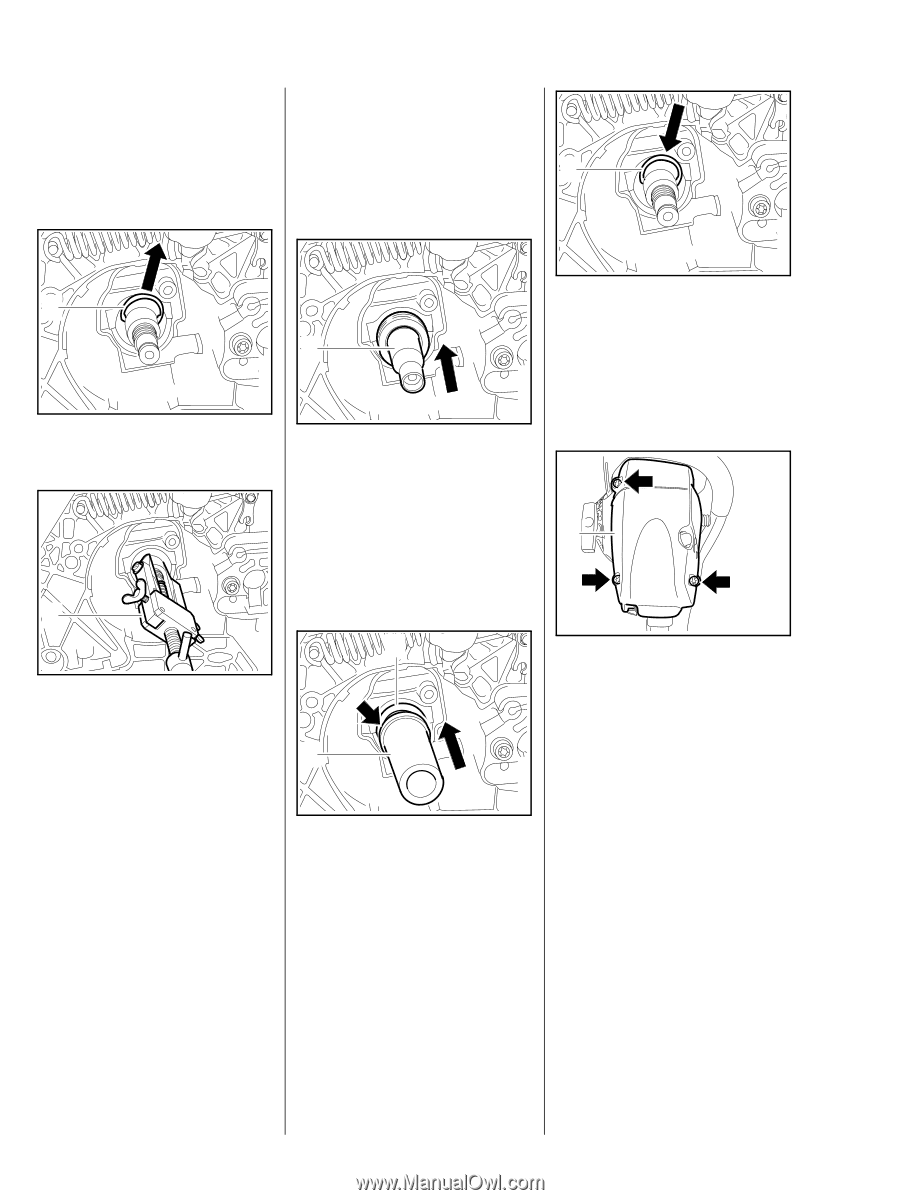
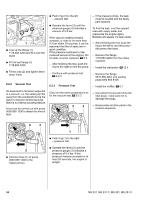
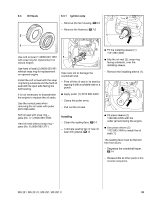
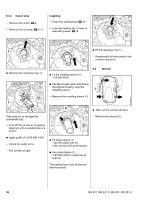
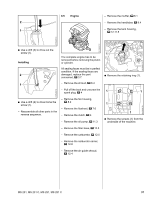
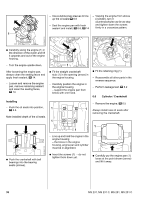
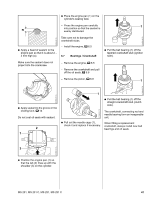
6.3.2 Clutch side Installing - Remove the clutch, b 4 - Clean the sealing face, b 14 - Remove the oil pump, b 11.3 - Lubricate sealing lips of new oil seal with grease, b 14 1 2310RA087 TG 1 : Fit the retaining ring (1). 1 - Reassemble all other parts in the reverse sequence. 2310RA085 TG 2310RA083 TG 2310RA088 TG : Remove the retaining ring (1). : Fit the installing sleeve (1) 1118 893 4602. 6.4 Shroud : Slip the oil seal, open side facing the engine housing, over the installing sleeve. 1 2310RA084 TG - Remove the installing sleeve (1). 1 2 : Take out the screws (arrows). Take care not to damage the crankshaft stub. - Free off the oil seal in its seat by 1 tapping it with a suitable tube or a punch. - Remove the shroud (1). 2310RA086 TG : Apply puller (1) 5910 890 4400. - Clamp the puller arms. - Pull out the oil seal. : Fit press sleeve (1) 1122 893 2405 with the collar (arrow) facing the engine. : Use press sleeve (1) 1122 893 2405 to install the oil seal (2). The seating face must be flat and free from burrs. 36 MS 231, MS 231 C, MS 251, MS 251 C
-
 1
1 -
2
-
3
-
4
-
5
-
6
-
7
-
8
-
9
-
10
-
11
-
12
-
13
-
14
-
15
-
16
-
17
-
18
-
19
-
20
-
21
-
22
-
23
-
24
-
25
-
26
-
27
-
28
-
29
-
30
-
31
-
 32
32 -
 33
33 -
 34
34 -
 35
35 -
 36
36 -
 37
37 -
 38
38 -
 39
39 -
 40
40 -
 41
41 -
 42
42 -
43
-
44
-
45
-
46
-
47
-
48
-
49
-
50
-
51
-
52
-
53
-
54
-
55
-
56
-
57
-
58
-
59
-
60
-
61
-
62
-
63
-
64
-
65
-
66
-
67
-
68
-
69
-
70
-
71
-
72
-
73
-
74
-
75
-
76
-
77
-
78
-
79
-
80
-
81
-
82
-
83
-
84
-
85
-
86
-
87
-
88
-
89
-
90
-
91
-
92
-
93
-
94
-
95
-
96
-
97
-
98
-
99
-
100
-
101
-
102
-
103
-
104
-
105
-
106
-
107
-
108
-
109
-
110
-
111
-
112
-
113
-
114
 |
 |