TP-Link Archer MR200 Archer MR200 V1 User Guide - Page 19
Use Quick Setup Wizard, 4. 2. Create a Connection Profile, Quick Setup, Advanced, Network
 |
View all TP-Link Archer MR200 manuals
Add to My Manuals
Save this manual to your list of manuals |
Page 19 highlights
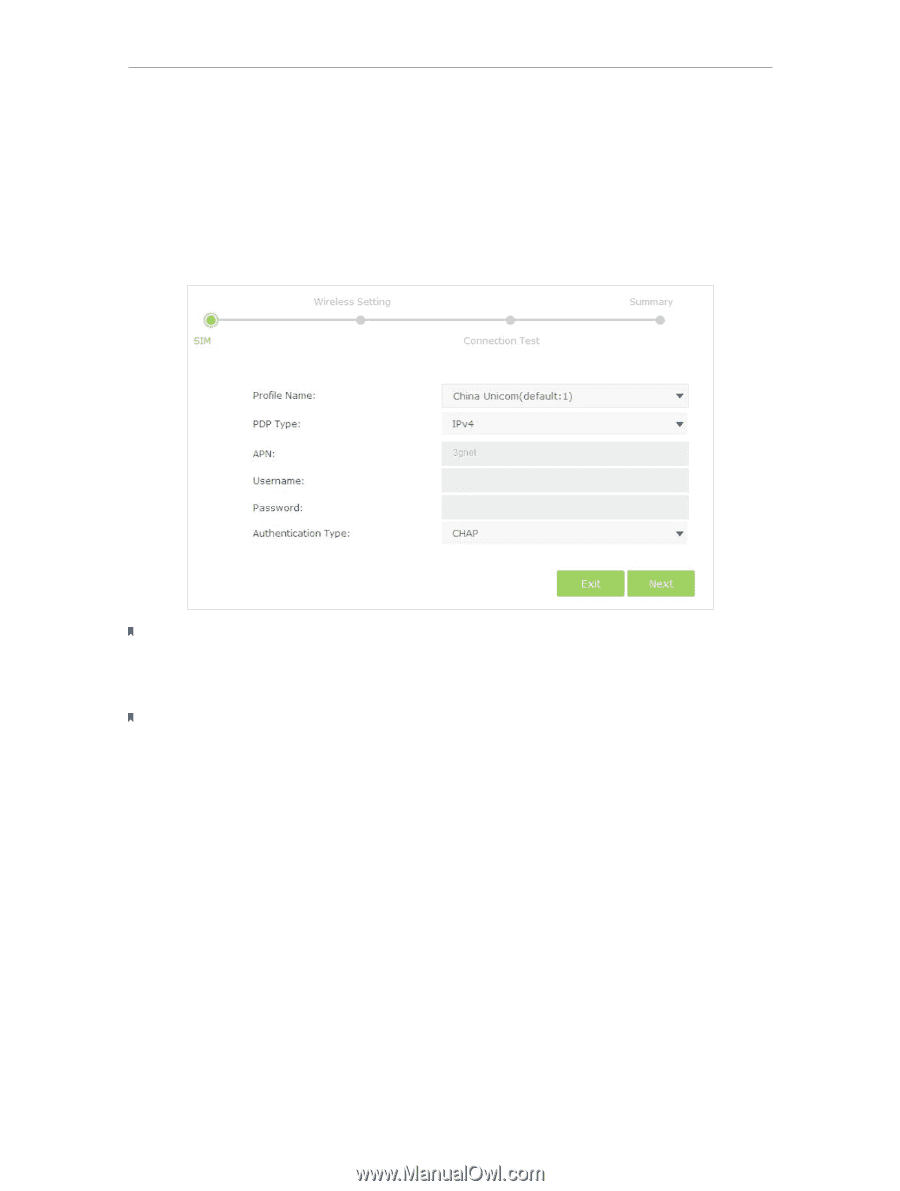
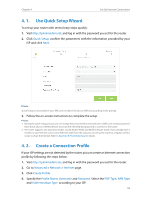
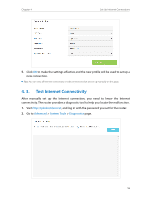
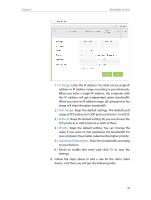
Chapter 4 Set Up Internet Connections 4. 1. Use Quick Setup Wizard To set up your router with several easy steps quickly: 1. Visit http://tplinkmodem.net, and log in with the password you set for the router. 2. Click Quick Setup, confirm the parameters with the information provided by your ISP and click Next. Note: Quick Setup is not available if your SIM card is locked. Unlock your SIM card according to the prompt. 3. Follow the on-screen instructions to complete the setup. Note: 1. During the quick setup process, you can change the preset wireless network name (SSID) and wireless password. Once done, all your wireless devices must use the new SSID and password to connect to the router. 2. The router supports two operation modes, 3G/4G Router Mode and Wireless Router mode. If you already have a modem or your Internet comes via an Ethernet cable from the wall, you can set up the router as a regular wireless router to share the Internet. Refer to Appendix B: Troubleshooting for details. 4. 2. Create a Connection Profile If your ISP settings are not detected by the router, you can create an Internet connection profile by following the steps below: 1. Visit http://tplinkmodem.net, and log in with the password you set for the router. 2. Go to Advanced > Network > Internet page. 3. Click Create Profile. 4. Specify the Profile Name, Username and Password. Select the PDP Type, APN Type and Authentication Type according to your ISP. 15
-
 1
1 -
2
-
3
-
4
-
5
-
6
-
7
-
8
-
9
-
10
-
11
-
12
-
13
-
 14
14 -
 15
15 -
 16
16 -
 17
17 -
 18
18 -
 19
19 -
 20
20 -
 21
21 -
 22
22 -
 23
23 -
 24
24 -
25
-
26
-
27
-
28
-
29
-
30
-
31
-
32
-
33
-
34
-
35
-
36
-
37
-
38
-
39
-
40
-
41
-
42
-
43
-
44
-
45
-
46
-
47
-
48
-
49
-
50
-
51
-
52
-
53
-
54
-
55
-
56
-
57
-
58
-
59
-
60
-
61
-
62
-
63
-
64
-
65
-
66
-
67
-
68
-
69
-
70
-
71
-
72
-
73
-
74
-
75
-
76
-
77
-
78
-
79
-
80
-
81
-
82
-
83
-
84
-
85
-
86
-
87
-
88
-
89
-
90
-
91
-
92
-
93
-
94
-
95
-
96
-
97
-
98
-
99
-
100
 |
 |