TP-Link Archer MR200 Archer MR200 V1 User Guide - Page 61
Advanced Wireless Settings
 |
View all TP-Link Archer MR200 manuals
Add to My Manuals
Save this manual to your list of manuals |
Page 61 highlights
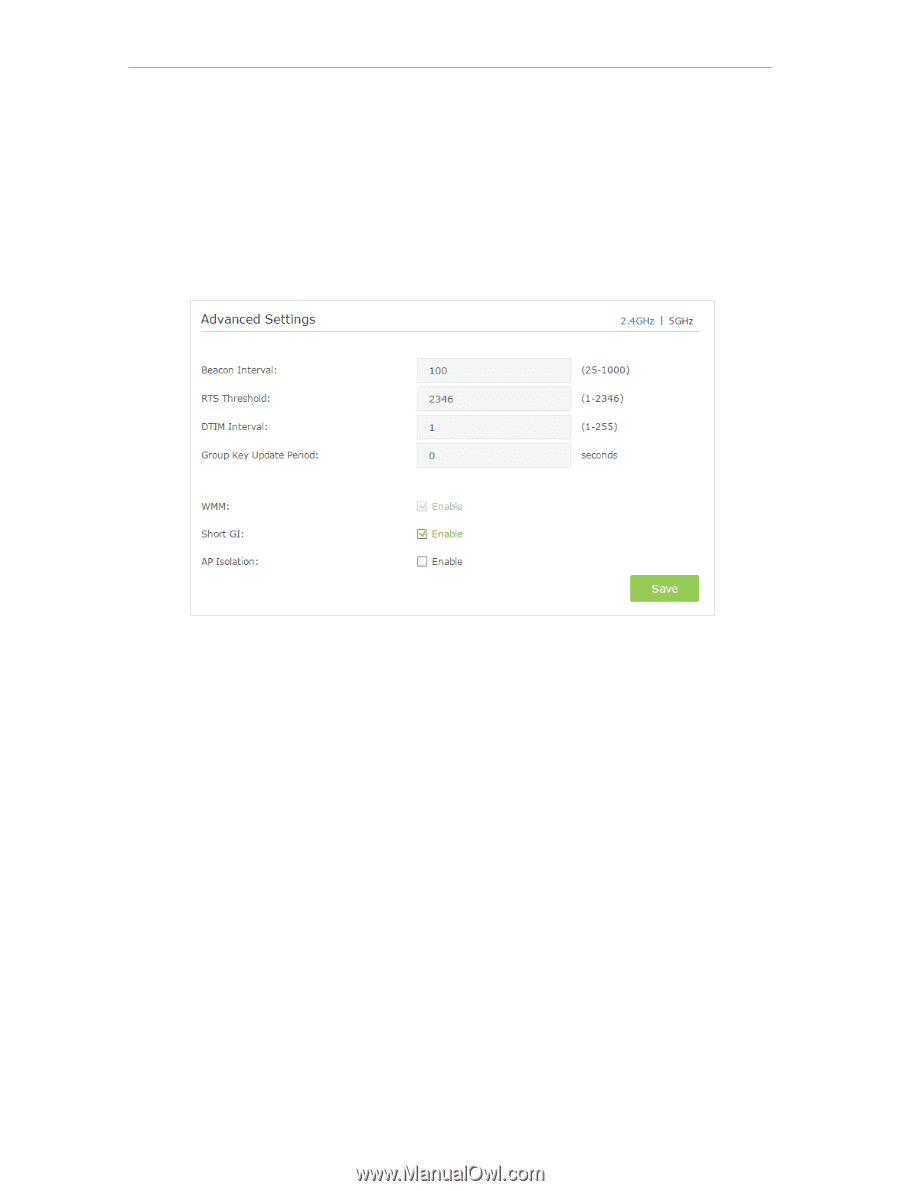
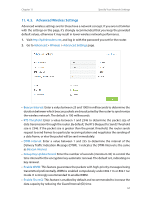
Chapter 11 Specify Your Network Settings 11. 4. 5. Advanced Wireless Settings Advanced wireless settings are for those have a network concept. If you are not familiar with the settings on this page, it's strongly recommended that you keep the provided default values; otherwise it may result in lower wireless network performance. 1. Visit http://tplinkmodem.net, and log in with the password you set for the router. 2. Go to Advanced > Wireless > Advanced Settings page. • Beacon Interval: Enter a value between 25 and 1000 in milliseconds to determine the duration between which beacon packets are broadcasted by the router to synchronize the wireless network. The default is 100 milliseconds. • RTS Threshold: Enter a value between 1 and 2346 to determine the packet size of data transmission through the router. By default, the RTS (Request to Send) Threshold size is 2346. If the packet size is greater than the preset threshold, the router sends request to send frames to a particular receiving station and negotiates the sending of a data frame, or else the packet will be sent immediately. • DTIM Interval: Enter a value between 1 and 255 to determine the interval of the Delivery Traffic Indication Message (DTIM). 1 indicates the DTIM Interval is the same as Beacon Interval. • Group Key Update Period: Enter the number of seconds (minimum 30) to control the time interval for the encryption key automatic renewal. The default is 0, indicating no key renewal. • Enable WMM: This feature guarantees the packets with high-priority messages being transmitted preferentially. WMM is enabled compulsively under 802.11n or 802.11ac mode. It is strongly recommended to enable WMM. • Enable Short GI: This feature is enabled by default and recommended to increase the data capacity by reducing the Guard Interval (GI) time. 57
-
 1
1 -
2
-
3
-
4
-
5
-
6
-
7
-
8
-
9
-
10
-
11
-
12
-
13
-
14
-
15
-
16
-
17
-
18
-
19
-
20
-
21
-
22
-
23
-
24
-
25
-
26
-
27
-
28
-
29
-
30
-
31
-
32
-
33
-
34
-
35
-
36
-
37
-
38
-
39
-
40
-
41
-
42
-
43
-
44
-
45
-
46
-
47
-
48
-
49
-
50
-
51
-
52
-
53
-
54
-
55
-
 56
56 -
 57
57 -
 58
58 -
 59
59 -
 60
60 -
 61
61 -
 62
62 -
 63
63 -
 64
64 -
 65
65 -
 66
66 -
67
-
68
-
69
-
70
-
71
-
72
-
73
-
74
-
75
-
76
-
77
-
78
-
79
-
80
-
81
-
82
-
83
-
84
-
85
-
86
-
87
-
88
-
89
-
90
-
91
-
92
-
93
-
94
-
95
-
96
-
97
-
98
-
99
-
100
 |
 |