Xerox PE220 User Guide - Page 63
Up or 4 Up Copying, Poster Copying, Enter, Start, Stop/Clear, Reduce/Enlarge
 |
UPC - 095205221152
View all Xerox PE220 manuals
Add to My Manuals
Save this manual to your list of manuals |
Page 63 highlights
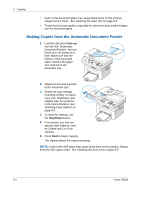
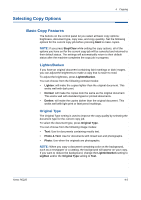
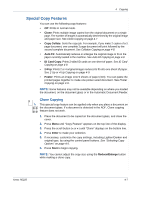
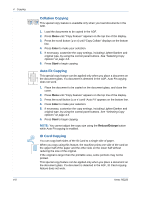
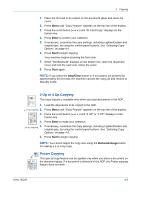
4 Copying 1. Place the ID Card to be copied on the document glass and close the cover. 2. Press Menu until "Copy Feature" appears on the top line of the display. 3. Press the scroll button ( or ) until "ID Card Copy" displays on the bottom line. 4. Press Enter to confirm your selection. 5. If necessary, customize the copy settings, including Lighten/Darken and original type, by using the control panel buttons. See "Selecting Copy Options" on page 4-5. 6. Press Start to begin copying. Your machine begins scanning the front side. 7. When "Set Backside" displays on the bottom line, open the document cover and turn the card over. Close the cover. 8. Press Start again. NOTE: If you press the Stop/Clear button or if no buttons are pressed for approximately 30 seconds, the machine cancels the copy job and returns to Standby mode. 2 Up or 4 Up Copying This copy feature is available only when you load documents in the ADF. 2 1. Load the documents to be copied in the ADF. 1 2-up copying 2. Press Menu until "Copy Feature" appears on the top line of the display. 1 2 3. Press the scroll button ( or ) until "2 UP" or "4 UP" displays on the bottom line. 3 4 4. Press Enter to make your selection. 4-up copying 5. If necessary, customize the copy settings, including Lighten/Darken and original type, by using the control panel buttons. See "Selecting Copy Options" on page 4-5. 6. Press Start to begin copying. NOTE: You cannot adjust the copy size using the Reduce/Enlarge button for making a 2 or 4 Up copy. Poster Copying This special copy feature can be applied only when you place a document on the document glass. If a document is detected in the ADF, the Poster copying feature does not work. Xerox PE220 4-9
-
 1
1 -
2
-
3
-
4
-
5
-
6
-
7
-
8
-
9
-
10
-
11
-
12
-
13
-
14
-
15
-
16
-
17
-
18
-
19
-
20
-
21
-
22
-
23
-
24
-
25
-
26
-
27
-
28
-
29
-
30
-
31
-
32
-
33
-
34
-
35
-
36
-
37
-
38
-
39
-
40
-
41
-
42
-
43
-
44
-
45
-
46
-
47
-
48
-
49
-
50
-
51
-
52
-
53
-
54
-
55
-
56
-
57
-
 58
58 -
 59
59 -
 60
60 -
 61
61 -
 62
62 -
 63
63 -
 64
64 -
 65
65 -
 66
66 -
 67
67 -
 68
68 -
69
-
70
-
71
-
72
-
73
-
74
-
75
-
76
-
77
-
78
-
79
-
80
-
81
-
82
-
83
-
84
-
85
-
86
-
87
-
88
-
89
-
90
-
91
-
92
-
93
-
94
-
95
-
96
-
97
-
98
-
99
-
100
-
101
-
102
-
103
-
104
-
105
-
106
-
107
-
108
-
109
-
110
-
111
-
112
-
113
-
114
-
115
-
116
-
117
-
118
-
119
-
120
-
121
-
122
-
123
-
124
-
125
-
126
-
127
-
128
-
129
-
130
-
131
-
132
-
133
-
134
-
135
-
136
-
137
-
138
-
139
-
140
-
141
-
142
-
143
-
144
-
145
-
146
-
147
-
148
-
149
-
150
-
151
-
152
-
153
-
154
-
155
-
156
-
157
-
158
-
159
-
160
-
161
-
162
-
163
-
164
-
165
-
166
-
167
-
168
-
169
-
170
-
171
-
172
-
173
-
174
-
175
-
176
-
177
-
178
-
179
-
180
-
181
-
182
-
183
-
184
-
185
-
186
-
187
-
188
-
189
-
190
-
191
-
192
-
193
-
194
-
195
-
196
-
197
-
198
-
199
-
200
 |
 |
