Brother International MFC 7440N Users Manual - English - Page 115
skewed, Ghost, Wrinkles or creases, Poor fixing, Improve Toner Fixing, Media Type - toner replacement
 |
UPC - 012502620631
View all Brother International MFC 7440N manuals
Add to My Manuals
Save this manual to your list of manuals |
Page 115 highlights
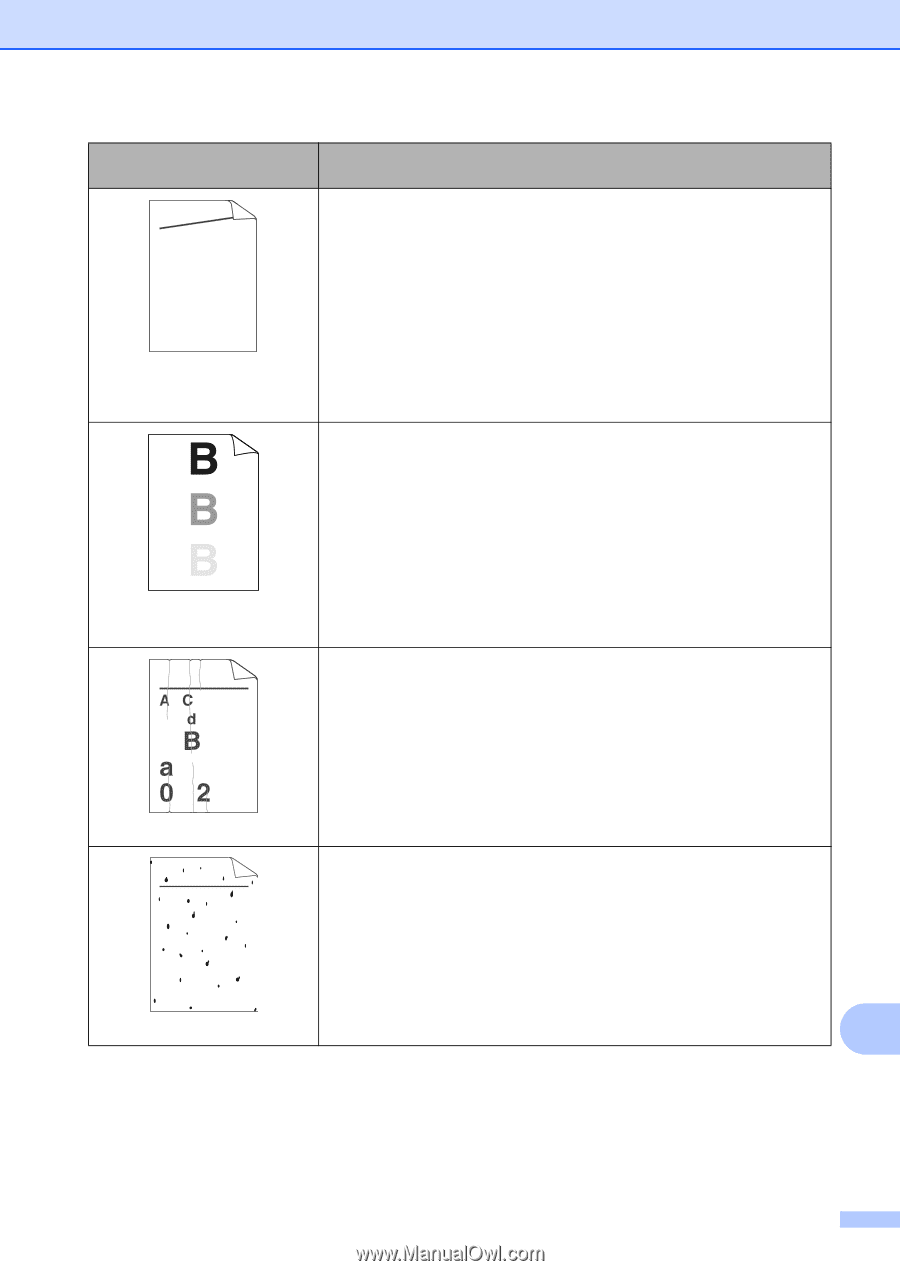
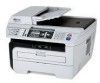
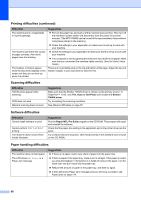
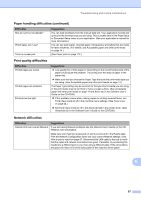
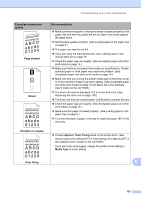
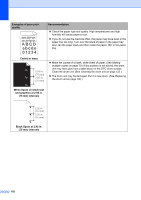
Troubleshooting and routine maintenance Examples of poor print quality AaAa0bBbc1CBdDec2EfCgdF3hGDie4jHk Page skewed Ghost B DEFGH abc efghijk A CD bcde 1 34 Wrinkles or creases ABCDEFGH abcdefghijk ABCD abcde 01234 Poor fixing Recommendation „ Make sure that the paper or other print media is loaded properly in the paper tray and that the guides are not too tight or too loose against the paper stack. „ Set the paper guides correctly. (See Loading paper in the paper tray on page 8.) „ The paper tray may be too full. „ If you are using the manual feed slot, see Loading paper in the manual feed slot on page 10. „ Check the paper type and quality. (See Acceptable paper and other print media on page 14.) „ Make sure that you use paper that meets our specifications. Rough- surfaced paper or thick paper may cause the problem. (See Acceptable paper and other print media on page 14.) „ Make sure that you choose the proper media type in the printer driver or in the machine's Paper Type menu setting. (See Acceptable paper and other print media on page 14 and Basic tab in the Software User's Guide on the CD-ROM.) „ The drum unit may be damaged. Put in a new drum unit. (See Replacing the drum unit on page 130.) „ The fuser unit may be contaminated. Call Brother Customer Service. „ Check the paper type and quality. (See Acceptable paper and other print media on page 14.) „ Make sure that paper is loaded properly. (See Loading paper in the paper tray on page 8.) „ Turn over the stack of paper in the tray or rotate the paper 180° in the input tray. „ Choose Improve Toner Fixing mode in the printer driver. (See Device Options (For Windows®) or Print Settings (For Macintosh®) in the software User's Guide on the CD-ROM.) If you print only a few pages, change the printer driver setting in Media Type to a thin setting. B 101
-
 1
1 -
2
-
3
-
4
-
5
-
6
-
7
-
8
-
9
-
10
-
11
-
12
-
13
-
14
-
15
-
16
-
17
-
18
-
19
-
20
-
21
-
22
-
23
-
24
-
25
-
26
-
27
-
28
-
29
-
30
-
31
-
32
-
33
-
34
-
35
-
36
-
37
-
38
-
39
-
40
-
41
-
42
-
43
-
44
-
45
-
46
-
47
-
48
-
49
-
50
-
51
-
52
-
53
-
54
-
55
-
56
-
57
-
58
-
59
-
60
-
61
-
62
-
63
-
64
-
65
-
66
-
67
-
68
-
69
-
70
-
71
-
72
-
73
-
74
-
75
-
76
-
77
-
78
-
79
-
80
-
81
-
82
-
83
-
84
-
85
-
86
-
87
-
88
-
89
-
90
-
91
-
92
-
93
-
94
-
95
-
96
-
97
-
98
-
99
-
100
-
101
-
102
-
103
-
104
-
105
-
106
-
107
-
108
-
109
-
 110
110 -
 111
111 -
 112
112 -
 113
113 -
 114
114 -
 115
115 -
 116
116 -
 117
117 -
 118
118 -
 119
119 -
 120
120 -
121
-
122
-
123
-
124
-
125
-
126
-
127
-
128
-
129
-
130
-
131
-
132
-
133
-
134
-
135
-
136
-
137
-
138
-
139
-
140
-
141
-
142
-
143
-
144
-
145
-
146
-
147
-
148
-
149
-
150
-
151
-
152
-
153
-
154
-
155
-
156
-
157
-
158
-
159
-
160
-
161
-
162
-
163
-
164
-
165
-
166
-
167
-
168
-
169
-
170
-
171
-
172
-
173
-
174
-
175
-
176
-
177
-
178
-
179
-
180
-
181
-
182
-
183
-
184
-
185
-
186
-
187
-
188
-
189
-
190
-
191
-
192
 |
 |