Brother International MFC 7440N Users Manual - English - Page 117
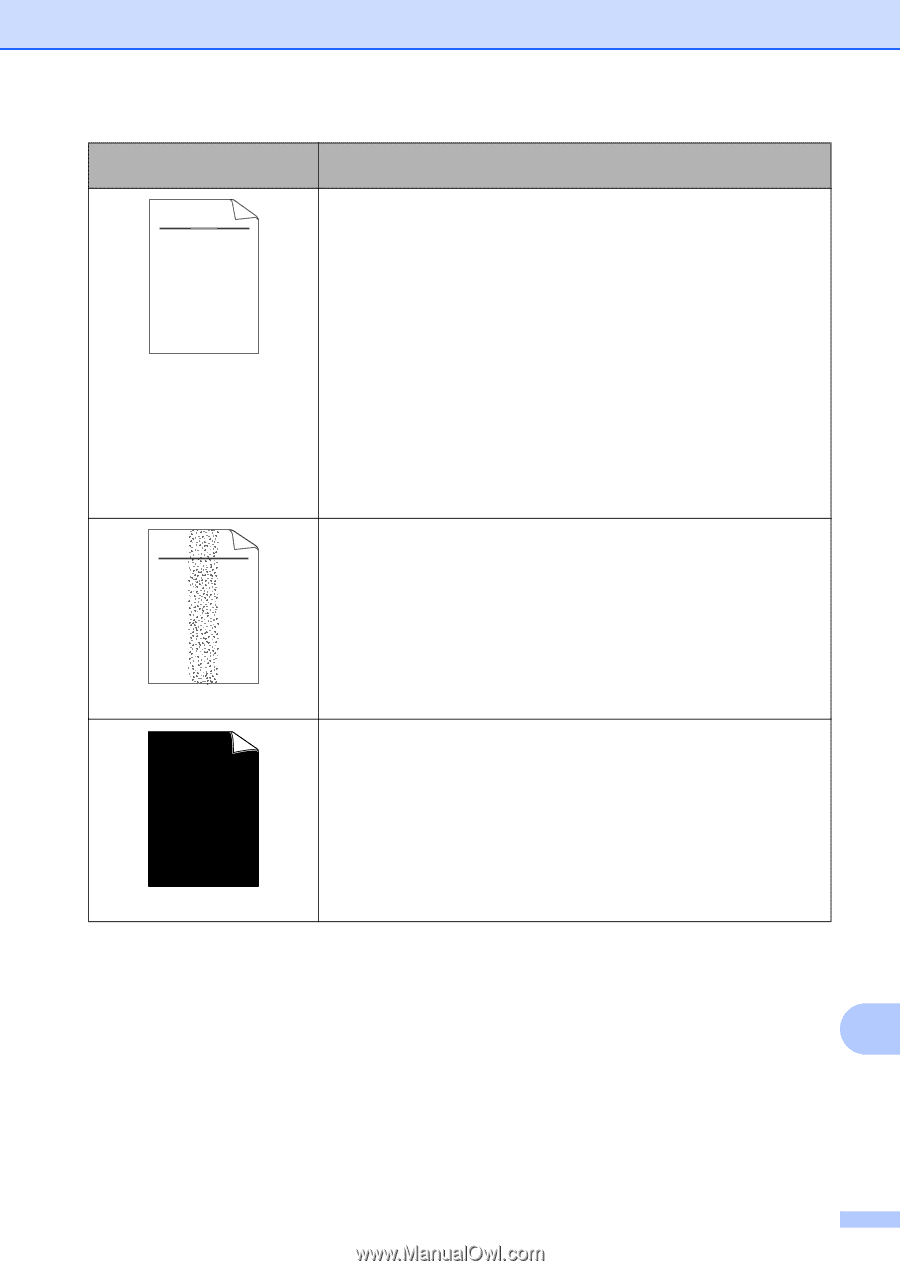
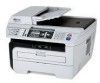
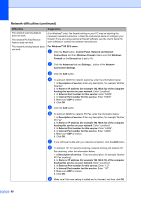
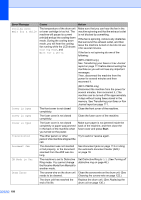
Faint, Toner Save, Properties, Toner specks, All black, Examples of poor print, quality - toner cartridge
 |
UPC - 012502620631
View all Brother International MFC 7440N manuals
Add to My Manuals
Save this manual to your list of manuals |
Page 117 highlights
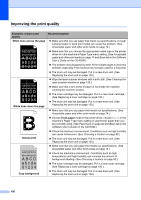
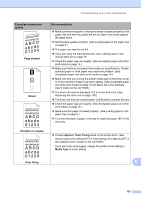
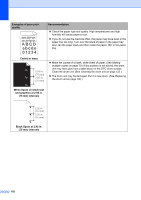
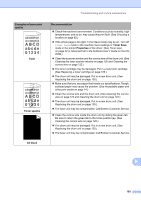
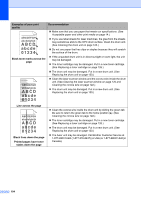
Troubleshooting and routine maintenance Examples of poor print quality ABCDEFGH abcdefghijk ABCD abcde 01234 Faint ABCDEFGH abcdefghijk ABCD abcde 01234 Toner specks All black Recommendation „ Check the machine's environment. Conditions such as humidity, high temperatures, and so on, may cause this print fault. (See Choosing a location on page 82.) „ If the whole page is too light, Toner Save mode may be on. Turn off Toner Save mode in the machine menu settings or Toner Save mode in the printer Properties of the driver. (See Toner save on page 22 or Advanced tab in the Software User's Guide on the CDROM.) „ Clean the scanner window and the corona wire of the drum unit. (See Cleaning the laser scanner window on page 120 and Cleaning the corona wire on page 122.) „ The toner cartridge may be damaged. Put in a new toner cartridge. (See Replacing a toner cartridge on page 126.) „ The drum unit may be damaged. Put in a new drum unit. (See Replacing the drum unit on page 130.) „ Make sure that you use paper that meets our specifications. Roughsurfaced paper may cause the problem. (See Acceptable paper and other print media on page 14.) „ Clean the corona wire and the drum unit. (See Cleaning the corona wire on page 122 and Cleaning the drum unit on page 123.) „ The drum unit may be damaged. Put in a new drum unit. (See Replacing the drum unit on page 130.) „ The fuser unit may be contaminated. Call Brother Customer Service. „ Clean the corona wire inside the drum unit by sliding the green tab. Be sure to return the green tab to the home position (a). (See Cleaning the corona wire on page 122.) „ The drum unit may be damaged. Put in a new drum unit. (See Replacing the drum unit on page 130.) „ The fuser unit may be contaminated. Call Brother Customer Service. B 103
-
 1
1 -
2
-
3
-
4
-
5
-
6
-
7
-
8
-
9
-
10
-
11
-
12
-
13
-
14
-
15
-
16
-
17
-
18
-
19
-
20
-
21
-
22
-
23
-
24
-
25
-
26
-
27
-
28
-
29
-
30
-
31
-
32
-
33
-
34
-
35
-
36
-
37
-
38
-
39
-
40
-
41
-
42
-
43
-
44
-
45
-
46
-
47
-
48
-
49
-
50
-
51
-
52
-
53
-
54
-
55
-
56
-
57
-
58
-
59
-
60
-
61
-
62
-
63
-
64
-
65
-
66
-
67
-
68
-
69
-
70
-
71
-
72
-
73
-
74
-
75
-
76
-
77
-
78
-
79
-
80
-
81
-
82
-
83
-
84
-
85
-
86
-
87
-
88
-
89
-
90
-
91
-
92
-
93
-
94
-
95
-
96
-
97
-
98
-
99
-
100
-
101
-
102
-
103
-
104
-
105
-
106
-
107
-
108
-
109
-
110
-
111
-
 112
112 -
 113
113 -
 114
114 -
 115
115 -
 116
116 -
 117
117 -
 118
118 -
 119
119 -
 120
120 -
 121
121 -
 122
122 -
123
-
124
-
125
-
126
-
127
-
128
-
129
-
130
-
131
-
132
-
133
-
134
-
135
-
136
-
137
-
138
-
139
-
140
-
141
-
142
-
143
-
144
-
145
-
146
-
147
-
148
-
149
-
150
-
151
-
152
-
153
-
154
-
155
-
156
-
157
-
158
-
159
-
160
-
161
-
162
-
163
-
164
-
165
-
166
-
167
-
168
-
169
-
170
-
171
-
172
-
173
-
174
-
175
-
176
-
177
-
178
-
179
-
180
-
181
-
182
-
183
-
184
-
185
-
186
-
187
-
188
-
189
-
190
-
191
-
192
 |
 |