Brother International MFC 7440N Users Manual - English - Page 134
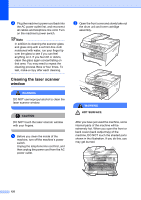
Cleaning the laser scanner window, CAUTION, HOT SURFACE
 |
UPC - 012502620631
View all Brother International MFC 7440N manuals
Add to My Manuals
Save this manual to your list of manuals |
Page 134 highlights
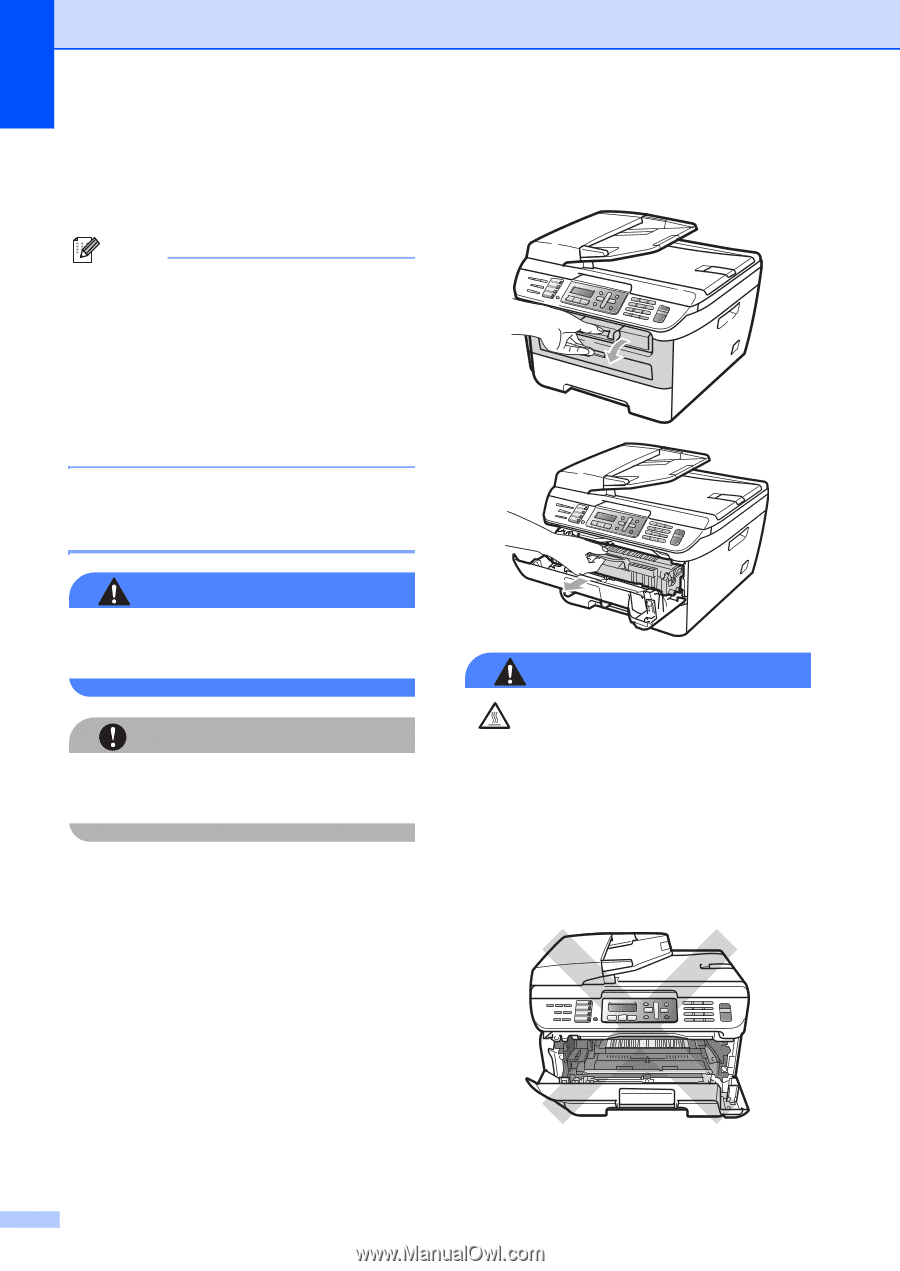
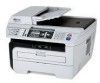
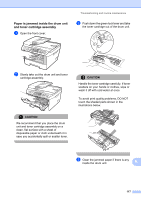
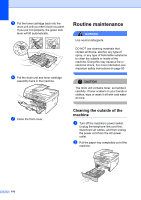
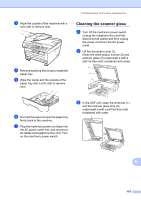
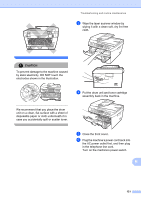
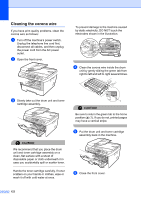
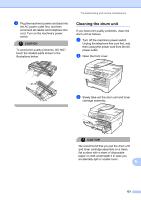
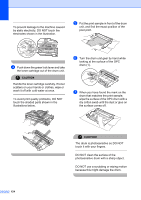
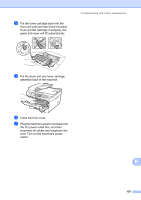
d Plug the machine's power cord back into the AC power outlet first, and reconnect all cables and telephone line cord. Turn on the machine's power switch. Note In addition to cleaning the scanner glass and glass strip with a soft lint-free cloth moistened with water, run your finger tip over the glass to see if you can feel anything on it. If you feel dirt or debris, clean the glass again concentrating on that area. You may need to repeat the cleaning process three or four times. To test, make a copy after each cleaning. Cleaning the laser scanner window B WARNING DO NOT use isopropyl alcohol to clean the laser scanner window. CAUTION DO NOT touch the laser scanner window with your fingers. a Before you clean the inside of the machine, turn off the machine's power switch. Unplug the telephone line cord first, and then unplug the power cord from the AC power outlet. b Open the front cover and slowly take out the drum unit and toner cartridge assembly. WARNING HOT SURFACE After you have just used the machine, some internal parts of the machine will be extremely hot. When you open the front or back cover (back output tray) of the machine, DO NOT touch the shaded parts shown in the illustration. If you do this, you may get burned. 120
-
 1
1 -
2
-
3
-
4
-
5
-
6
-
7
-
8
-
9
-
10
-
11
-
12
-
13
-
14
-
15
-
16
-
17
-
18
-
19
-
20
-
21
-
22
-
23
-
24
-
25
-
26
-
27
-
28
-
29
-
30
-
31
-
32
-
33
-
34
-
35
-
36
-
37
-
38
-
39
-
40
-
41
-
42
-
43
-
44
-
45
-
46
-
47
-
48
-
49
-
50
-
51
-
52
-
53
-
54
-
55
-
56
-
57
-
58
-
59
-
60
-
61
-
62
-
63
-
64
-
65
-
66
-
67
-
68
-
69
-
70
-
71
-
72
-
73
-
74
-
75
-
76
-
77
-
78
-
79
-
80
-
81
-
82
-
83
-
84
-
85
-
86
-
87
-
88
-
89
-
90
-
91
-
92
-
93
-
94
-
95
-
96
-
97
-
98
-
99
-
100
-
101
-
102
-
103
-
104
-
105
-
106
-
107
-
108
-
109
-
110
-
111
-
112
-
113
-
114
-
115
-
116
-
117
-
118
-
119
-
120
-
121
-
122
-
123
-
124
-
125
-
126
-
127
-
128
-
 129
129 -
 130
130 -
 131
131 -
 132
132 -
 133
133 -
 134
134 -
 135
135 -
 136
136 -
 137
137 -
 138
138 -
 139
139 -
140
-
141
-
142
-
143
-
144
-
145
-
146
-
147
-
148
-
149
-
150
-
151
-
152
-
153
-
154
-
155
-
156
-
157
-
158
-
159
-
160
-
161
-
162
-
163
-
164
-
165
-
166
-
167
-
168
-
169
-
170
-
171
-
172
-
173
-
174
-
175
-
176
-
177
-
178
-
179
-
180
-
181
-
182
-
183
-
184
-
185
-
186
-
187
-
188
-
189
-
190
-
191
-
192
 |
 |