Brother International MFC 7440N Users Manual - English - Page 145
tightly in a bag so that toner powder does, not spill out of the unit.
 |
UPC - 012502620631
View all Brother International MFC 7440N manuals
Add to My Manuals
Save this manual to your list of manuals |
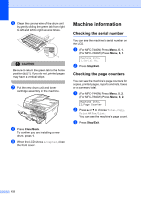
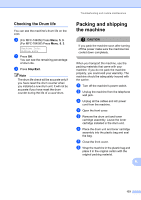
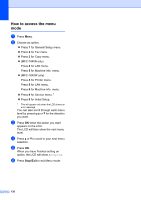
Page 145 highlights
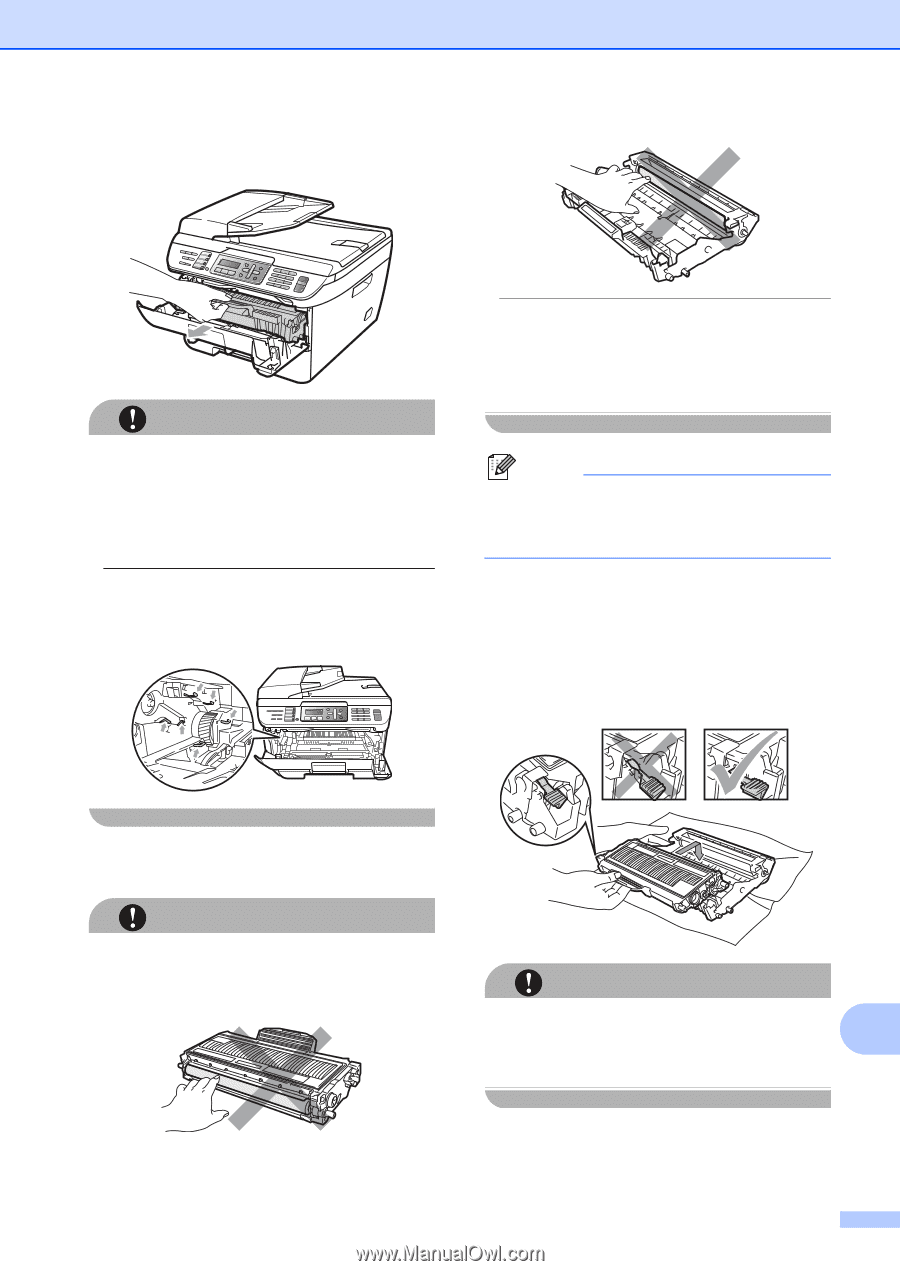
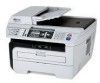
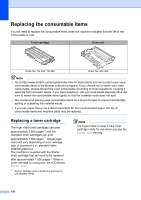
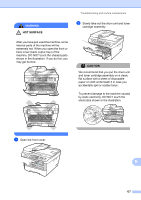
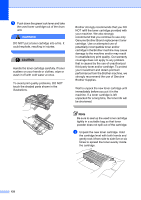
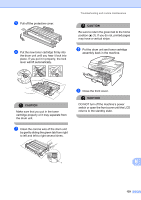
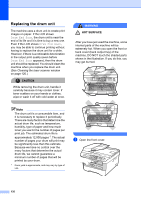
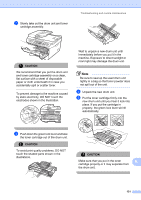
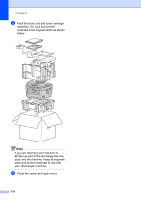
b Slowly take out the drum unit and toner cartridge assembly. Troubleshooting and routine maintenance CAUTION We recommend that you put the drum unit and toner cartridge assembly on a clean, flat surface with a sheet of disposable paper or cloth underneath it in case you accidentally spill or scatter toner. To prevent damage to the machine caused by static electricity, DO NOT touch the electrodes shown in the illustration. Wait to unpack a new drum unit until immediately before you put it in the machine. Exposure to direct sunlight or room light may damage the drum unit. Note Be sure to seal up the used drum unit tightly in a bag so that toner powder does not spill out of the unit. d Unpack the new drum unit. e Put the toner cartridge firmly into the new drum unit until you hear it lock into place. If you put the cartridge in properly, the green lock lever will lift automatically. c Push down the green lock lever and take the toner cartridge out of the drum unit. CAUTION To avoid print quality problems, DO NOT touch the shaded parts shown in the illustrations. CAUTION Make sure that you put in the toner B cartridge properly or it may separate from the drum unit. 131
-
 1
1 -
2
-
3
-
4
-
5
-
6
-
7
-
8
-
9
-
10
-
11
-
12
-
13
-
14
-
15
-
16
-
17
-
18
-
19
-
20
-
21
-
22
-
23
-
24
-
25
-
26
-
27
-
28
-
29
-
30
-
31
-
32
-
33
-
34
-
35
-
36
-
37
-
38
-
39
-
40
-
41
-
42
-
43
-
44
-
45
-
46
-
47
-
48
-
49
-
50
-
51
-
52
-
53
-
54
-
55
-
56
-
57
-
58
-
59
-
60
-
61
-
62
-
63
-
64
-
65
-
66
-
67
-
68
-
69
-
70
-
71
-
72
-
73
-
74
-
75
-
76
-
77
-
78
-
79
-
80
-
81
-
82
-
83
-
84
-
85
-
86
-
87
-
88
-
89
-
90
-
91
-
92
-
93
-
94
-
95
-
96
-
97
-
98
-
99
-
100
-
101
-
102
-
103
-
104
-
105
-
106
-
107
-
108
-
109
-
110
-
111
-
112
-
113
-
114
-
115
-
116
-
117
-
118
-
119
-
120
-
121
-
122
-
123
-
124
-
125
-
126
-
127
-
128
-
129
-
130
-
131
-
132
-
133
-
134
-
135
-
136
-
137
-
138
-
139
-
 140
140 -
 141
141 -
 142
142 -
 143
143 -
 144
144 -
 145
145 -
 146
146 -
 147
147 -
 148
148 -
 149
149 -
 150
150 -
151
-
152
-
153
-
154
-
155
-
156
-
157
-
158
-
159
-
160
-
161
-
162
-
163
-
164
-
165
-
166
-
167
-
168
-
169
-
170
-
171
-
172
-
173
-
174
-
175
-
176
-
177
-
178
-
179
-
180
-
181
-
182
-
183
-
184
-
185
-
186
-
187
-
188
-
189
-
190
-
191
-
192
 |
 |