Brother International XL 5130 Users Manual - English - Page 13
Operating Your Sewing Machine, Connecting Plugs, Fonctionnement De La, Machine A Coudre - power cord
 |
View all Brother International XL 5130 manuals
Add to My Manuals
Save this manual to your list of manuals |
Page 13 highlights
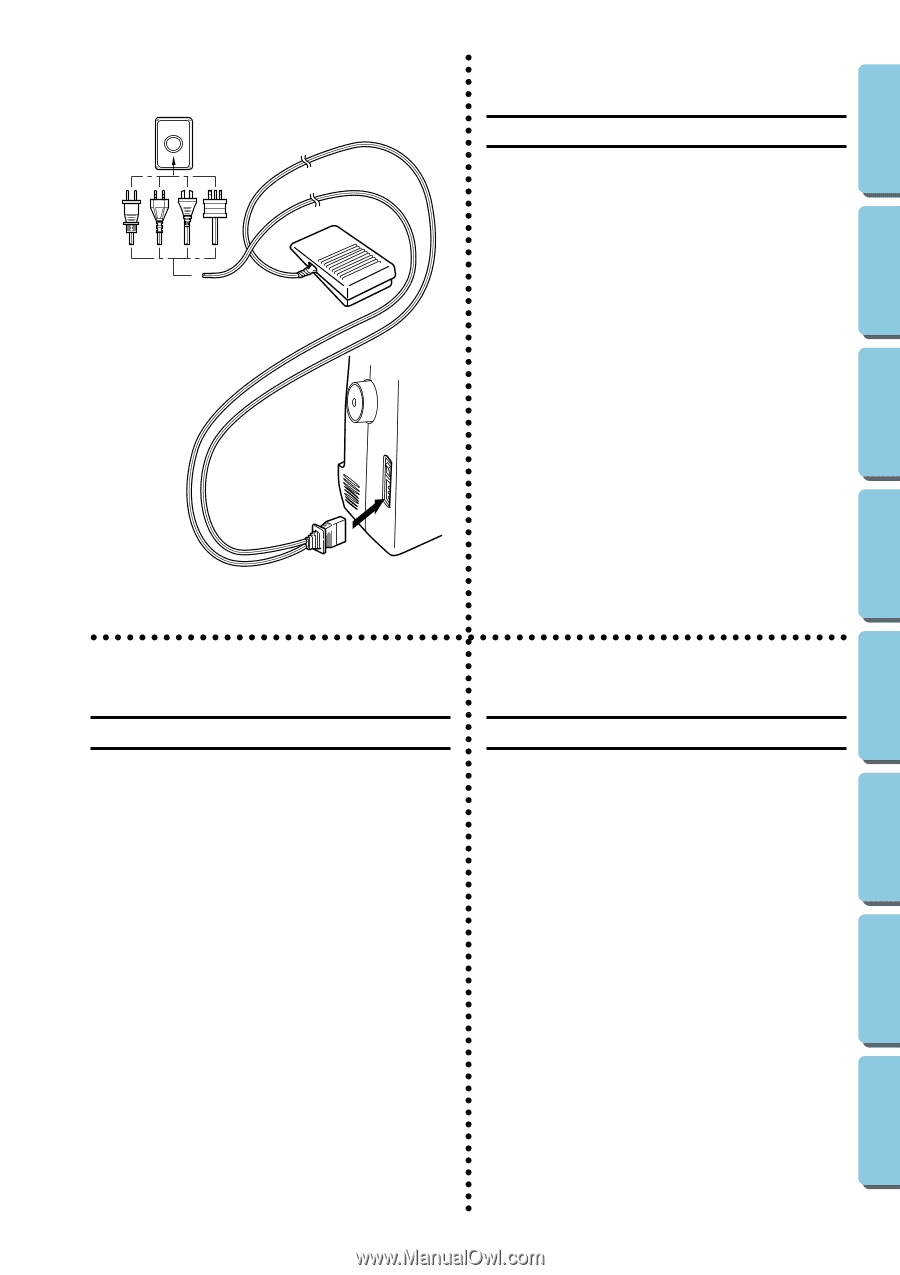
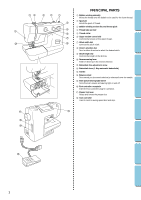
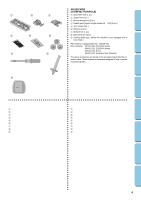
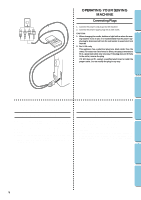
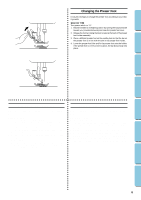
CONTENTS KNOWING YOUR SEWING MACHINE STRAIGHT AND ZIGZAG STITCHING BUILT-IN STITCHES OPERATING YOUR SEWING MACHINE Connecting Plugs 1. Connect the power cord plug into the machine. 2. Connect the power supply plug into a wall outlet. CAUTION: 1. When changing the needle, bobbin or light bulb or when the sew- ing machine is not in use, it is recommended that the power supply plug be disconnected from the wall socket to avoid electrical hazards. 2. For U.S.A. only This appliance has a polarized plug (one blade wider than the other). To reduce the risk of electric shock, this plug is intended to fit in a polarized outlet only one way. If the plug does not fit fully in the outlet, reverse the plug. If it still does not fit, contact a qualified electrician to install the proper outlet. Do not modify the plug in any way. FUNCIONAMIENTO DE LA MÁQUINA DE COSER FONCTIONNEMENT DE LA MACHINE A COUDRE Conexión de los enchufes Raccordement 1. Conecte el enchufe a la máquina, el cordón, se encuentra situado entre el pedal y el enchufe destinado a la alimentación de corriente. 2. Conecte el enchufe de alimentación a una toma de corriente. ATENCIÓN: 1. Cuando se cambia una aguja, la canilla o la bombilla de luz, o cuando se deja la máquina sin funcionar, se recomienda siempre retirar el enchufe de la toma de corriente para evitar choques eléctricos. 1. Brancher la fiche qui se trouve sur le cordon d'alimentation entre la pédale et la fiche d'alimentation dans la machine. 2. Brancher la fiche d'alimentation à une prise secteur. PRÉCAUTION: 1. Lors du remplacement de l'ampoule, de la canette, de l'aiguille ou lorsque la machine n'est pas utilisée, il est recommandé de la débrancher de la prise secteur pour éviter toute décharge électrique. BUTTONHOLE AND BUTTON SEWING USING ATTACHMENTS AND APPLICATIONS MAINTENANCE INDEX 5
-
 1
1 -
2
-
3
-
4
-
5
-
6
-
7
-
 8
8 -
 9
9 -
 10
10 -
 11
11 -
 12
12 -
 13
13 -
 14
14 -
 15
15 -
 16
16 -
 17
17 -
 18
18 -
19
-
20
-
21
-
22
-
23
-
24
-
25
-
26
-
27
-
28
-
29
-
30
-
31
-
32
-
33
-
34
-
35
-
36
-
37
-
38
-
39
-
40
-
41
-
42
-
43
-
44
-
45
-
46
-
47
-
48
-
49
-
50
-
51
-
52
-
53
-
54
-
55
-
56
-
57
-
58
-
59
-
60
-
61
-
62
-
63
-
64
-
65
-
66
-
67
-
68
-
69
-
70
-
71
-
72
-
73
-
74
-
75
-
76
-
77
 |
 |