Brother International XL 5130 Users Manual - English - Page 59
USING ATTACHMENTS AND APPLICATIONS, Zipper Inserting, Gathering, fig. - needle holder
 |
View all Brother International XL 5130 manuals
Add to My Manuals
Save this manual to your list of manuals |
Page 59 highlights
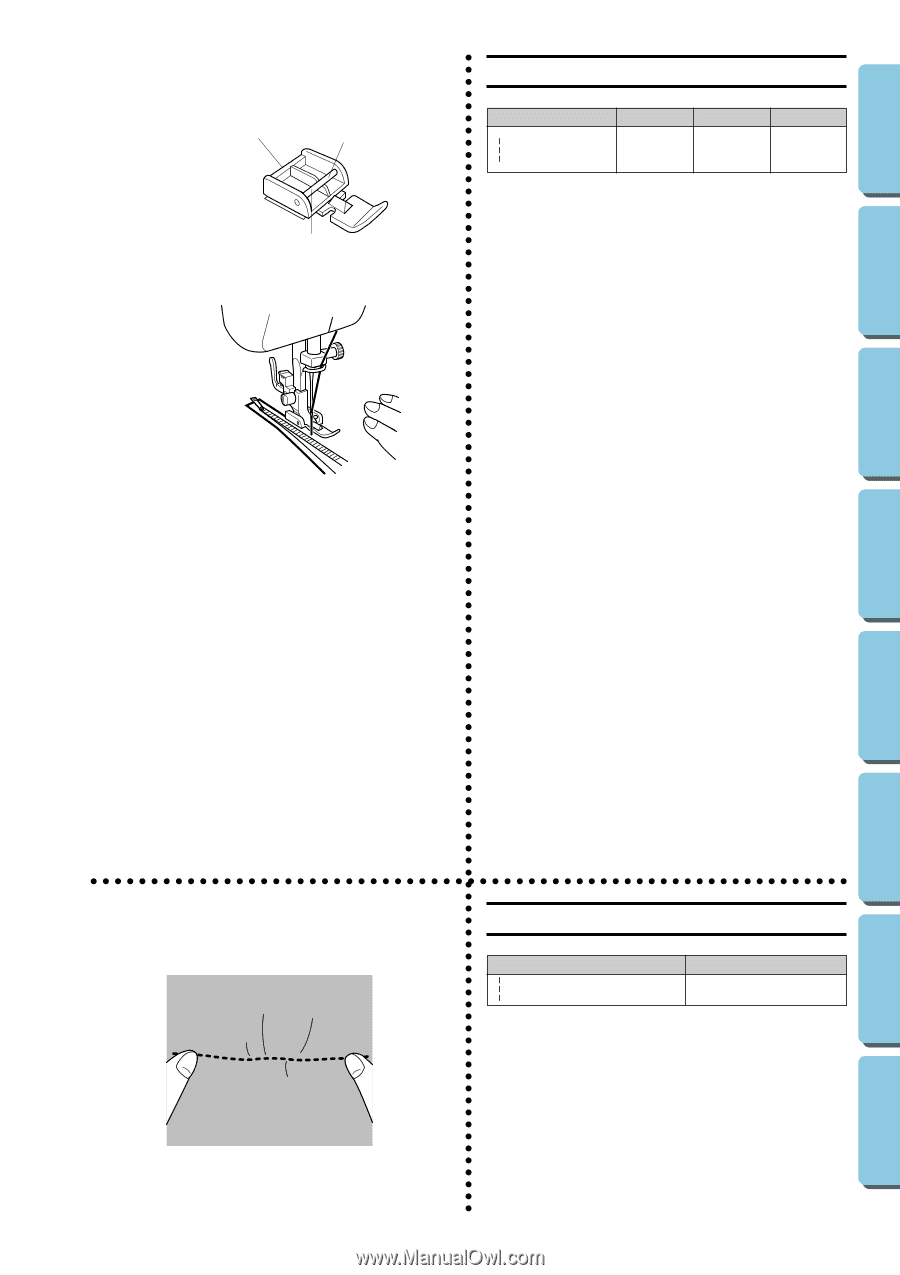
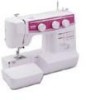
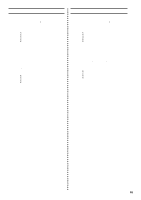
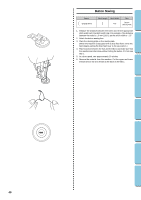
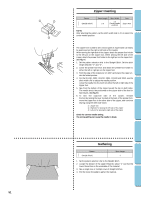
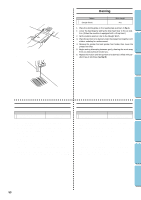
CONTENTS KNOWING YOUR SEWING MACHINE STRAIGHT AND ZIGZAG STITCHING BUILT-IN STITCHES A 1 2 3 B Zipper Inserting Pattern (Straight Stitch) Stitch Length 2-3 Stitch Width 2.5 (Center needle position) Foot Zipper Foot NOTE: After selecting the pattern, set the stitch width dial to 2.5 to select the center needle position. The zipper foot is used to sew various types of zippers and can easily be positioned on the right or left side of the needle. When sewing the right side of the zipper, attach the presser foot holder to the left pin on the zipper foot. When sewing the left side of the zipper, attach the presser foot holder to the right pin on the zipper foot. (See fig. A.) 1. Set the pattern selection dial to the Straight Stitch. Set the stitch length between "2" and "3". 2. Lower the presser foot lever and attach the presser foot holder to either the left or right pin on the zipper foot. 3. Fold the edge of the material 2 cm (3/4") and place the zipper under the folded portion. 4. For the XL5130, XR32, XL5232, XR34, XL5340 and XR42, use the stitch width dial to adjust the needle position. Lower the needle into the notch on either the left or right side of the zipper foot. 5. Sew from the bottom of the zipper toward the top on both sides. The needle should be positioned on the zipper side of the foot for best results. (See fig. B.) 6. To sew the opposite side of the zipper, release the foot by raising the lever located at the back of the presser foot, move the zipper foot to the other side of the zipper, and continue sewing using the other side notch. 1 Zipper foot 2 Right pin for sewing the left side of the zipper 3 Left pin for sewing the right side of the zipper Check for correct needle setting. The wrong setting can cause the needle to break. BUTTONHOLE AND BUTTON SEWING USING ATTACHMENTS AND APPLICATIONS MAINTENANCE Gathering Pattern (Straight Stitch) Stitch Length 4 1. Set the pattern selection dial to the Straight Stitch. 2. Loosen the tension of the upper thread (to about "2") so that the lower thread lies on the underside of the material. 3. Sew a single row or multiple rows of straight stitches. 4. Pull the lower thread(s) to gather the material. INDEX 51
-
 1
1 -
2
-
3
-
4
-
5
-
6
-
7
-
8
-
9
-
10
-
11
-
12
-
13
-
14
-
15
-
16
-
17
-
18
-
19
-
20
-
21
-
22
-
23
-
24
-
25
-
26
-
27
-
28
-
29
-
30
-
31
-
32
-
33
-
34
-
35
-
36
-
37
-
38
-
39
-
40
-
41
-
42
-
43
-
44
-
45
-
46
-
47
-
48
-
49
-
50
-
51
-
52
-
53
-
 54
54 -
 55
55 -
 56
56 -
 57
57 -
 58
58 -
 59
59 -
 60
60 -
 61
61 -
 62
62 -
 63
63 -
 64
64 -
65
-
66
-
67
-
68
-
69
-
70
-
71
-
72
-
73
-
74
-
75
-
76
-
77
 |
 |