Brother International XL 5130 Users Manual - English - Page 28
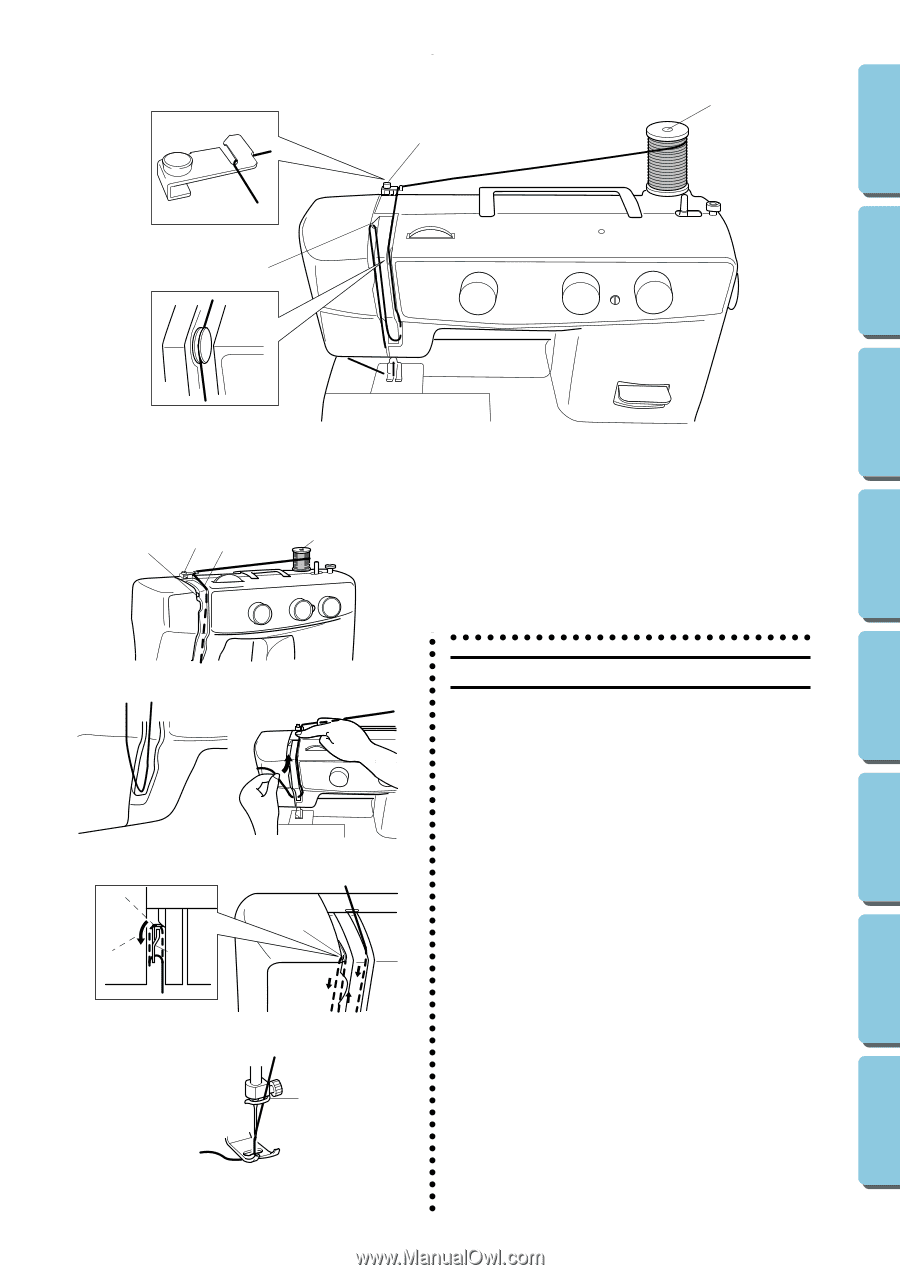
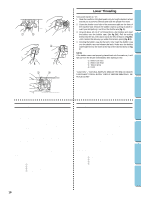
Upper (Needle) Threading, fig. A., C - sewing
 |
View all Brother International XL 5130 manuals
Add to My Manuals
Save this manual to your list of manuals |
Page 28 highlights
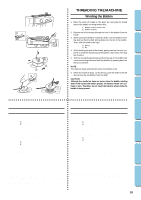
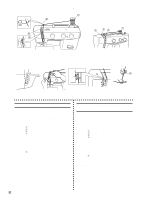
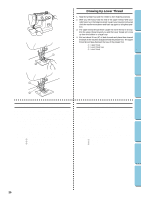
CONTENTS KNOWING YOUR SEWING MACHINE STRAIGHT AND ZIGZAG STITCHING BUILT-IN STITCHES 1 2 4 3 BUTTONHOLE AND BUTTON SEWING USING ATTACHMENTS AND APPLICATIONS A 4 23 1 C B D 4 4 E 5 Upper (Needle) Threading Turn power switch to "O". 1. Raise the presser foot lever and turn the balance wheel toward you (counterclockwise) to raise the thread take-up lever to its highest position. 2. Pull up the spool pin and place a spool of thread on it. 3. Pass the thread through guides. (See fig. A.) 1 Spool pin 2 Thread guide 3 Tension discs 4 Thread take-up lever 4. While holding the thread as shown in fig. B, C, pull it between the tension discs. 5. Guide the thread to the back of the thread take-up lever and around to the left (fig. D). Bring the thread through the slit by pulling it toward you and into the eyelet. 6. Bring the thread down and pass it behind the thread guide. 5 Thread guide 7. Thread the needle from front to back and pull out about 5 cm (2") of thread as shown in fig. E. NOTE: Incorrectly feeding the thread may cause it to break, skip stitches or wrinkle the fabric. 20 MAINTENANCE INDEX
-
 1
1 -
2
-
3
-
4
-
5
-
6
-
7
-
8
-
9
-
10
-
11
-
12
-
13
-
14
-
15
-
16
-
17
-
18
-
19
-
20
-
21
-
22
-
 23
23 -
 24
24 -
 25
25 -
 26
26 -
 27
27 -
 28
28 -
 29
29 -
 30
30 -
 31
31 -
 32
32 -
 33
33 -
34
-
35
-
36
-
37
-
38
-
39
-
40
-
41
-
42
-
43
-
44
-
45
-
46
-
47
-
48
-
49
-
50
-
51
-
52
-
53
-
54
-
55
-
56
-
57
-
58
-
59
-
60
-
61
-
62
-
63
-
64
-
65
-
66
-
67
-
68
-
69
-
70
-
71
-
72
-
73
-
74
-
75
-
76
-
77
 |
 |