Brother International XL 5130 Users Manual - English - Page 53
MAKING A BUTTONHOLE, Sewn Portion, Pattern, How to Sew - sew machine
 |
View all Brother International XL 5130 manuals
Add to My Manuals
Save this manual to your list of manuals |
Page 53 highlights
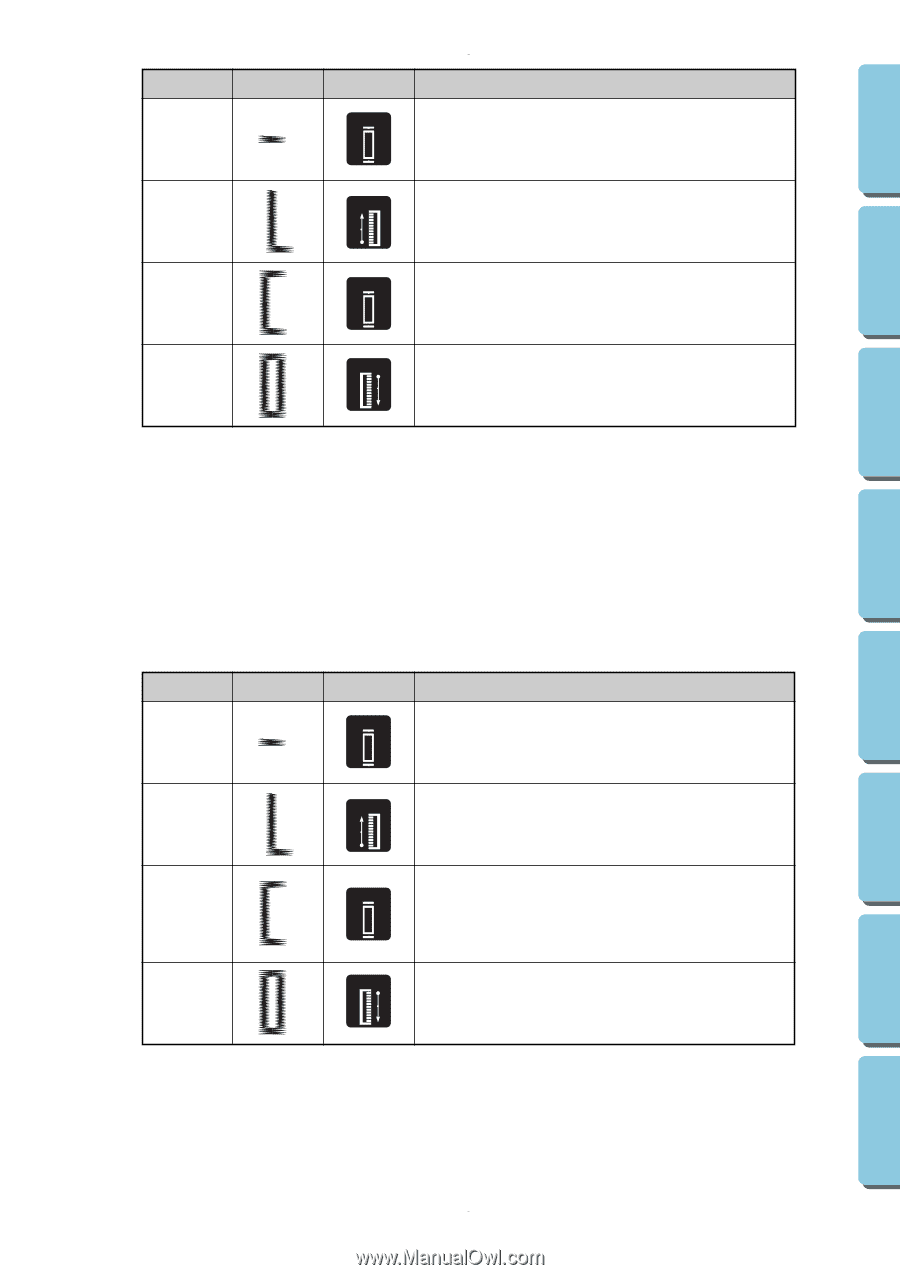
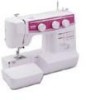
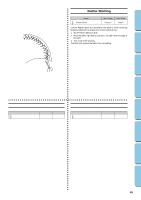
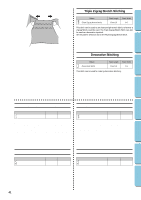
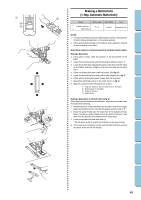
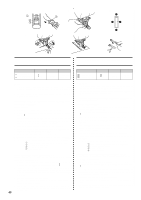
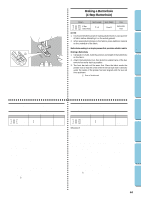
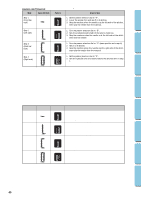
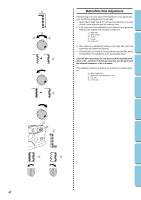
CONTENTS KNOWING YOUR SEWING MACHINE STRAIGHT AND ZIGZAG STITCHING BUILT-IN STITCHES MAKING A BUTTONHOLE Step Sewn Portion Step 1 (Front bar tack) A Step 2 B (Left side) Step 3 C (Back bar tack) Step 4 (Right side) D Pattern A/C C A B A/C C A D How to Sew 1. Set the pattern selection dial to "A". 2. Lower the presser foot and sew 5 to 6 stitches. 3. Stop the machine when the needle is at the left side of the stitches, then raise the needle from the material. 1. Turn the pattern selection dial to "B". 2. Sew the predetermined length of the tailor's chalk line. 3. Stop the machine when the needle is at the left side of the stitch, then raise the needle. 1. Turn the pattern selection dial to "C" (same position as in step A). 2. Sew 5 to 6 stitches. 3. Stop the machine when the needle is at the right side of the stitch, then raise the needle from the material. 1. Set the pattern selection dial to "D". 2. Sew the right side until the needle reaches the stitches sewn in step 1. BUTTONHOLE AND BUTTON SEWING USING ATTACHMENTS AND APPLICATIONS MAINTENANCE PARA COSER OJALES Pasos Parte Cosida Número de puntada Como Coser 1er Paso (Remate de la parte delantera) A/C C 1. Ponga el selector de puntada en "A". 2. Baje el prensatelas y cosa de 5 a 6 puntadas. A 3. Pare la máquina cuando la aguja esté a la izquierda de las punta- A das, luego levante la aguja del tejido. 2° Paso (Lado B 1. Gire el selector de puntada en "B". B 2. Cosa la línea del jaboncillo de la longitud predeterminada. izquierdo) 3. Pare la máquina cuando la aguja esté a la izquierda de la punta- da y luego levante la aguja. 3er Paso (Remate de la parte trasera) C 1. Gire el selector de puntada en "C" (en la misma posición que en el A/C A paso ). C 2. Cosa 5 ó 6 puntadas. 3. Pare la máquina cuando la aguja esté a la derecha de la puntada A y luego levante la aguja del tejido. 4° Paso (Lado derecho) D 1. Ponga el selector de puntada en "D". 2. Cosa la parte derecha hasta que la aguja llegue a las puntadas cosidas en el 1er Paso. D 45 INDEX
-
 1
1 -
2
-
3
-
4
-
5
-
6
-
7
-
8
-
9
-
10
-
11
-
12
-
13
-
14
-
15
-
16
-
17
-
18
-
19
-
20
-
21
-
22
-
23
-
24
-
25
-
26
-
27
-
28
-
29
-
30
-
31
-
32
-
33
-
34
-
35
-
36
-
37
-
38
-
39
-
40
-
41
-
42
-
43
-
44
-
45
-
46
-
47
-
 48
48 -
 49
49 -
 50
50 -
 51
51 -
 52
52 -
 53
53 -
 54
54 -
 55
55 -
 56
56 -
 57
57 -
 58
58 -
59
-
60
-
61
-
62
-
63
-
64
-
65
-
66
-
67
-
68
-
69
-
70
-
71
-
72
-
73
-
74
-
75
-
76
-
77
 |
 |