Brother International GT-541 Instruction Manual - English - Page 103
Print and check the Nozzle Check Pattern see 7-2-3. Checking Print Quality with Nozzle Check
 |
View all Brother International GT-541 manuals
Add to My Manuals
Save this manual to your list of manuals |
Page 103 highlights
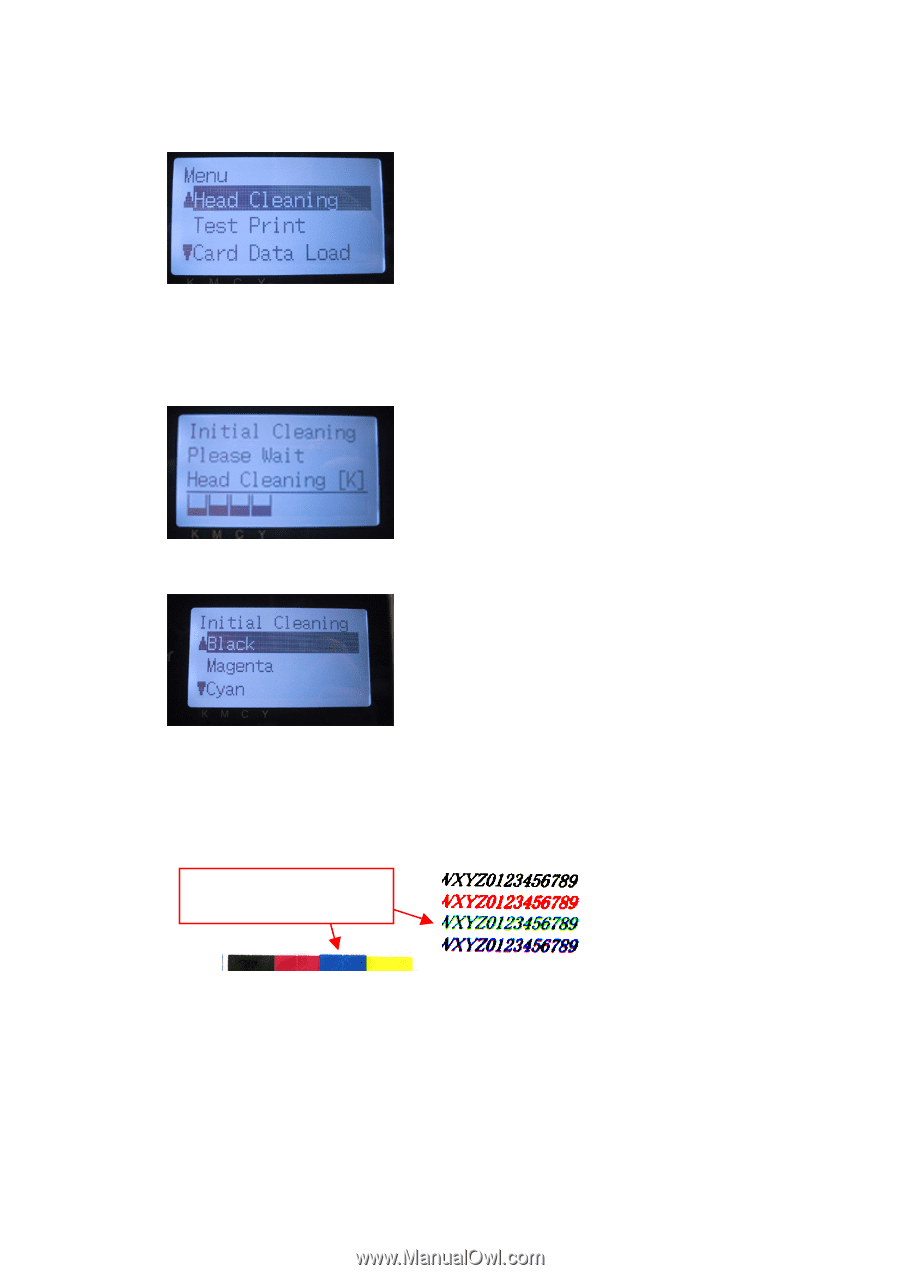
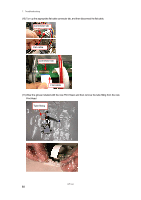
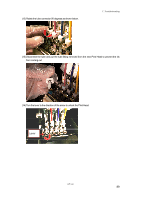
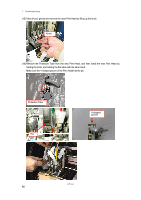
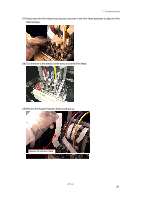
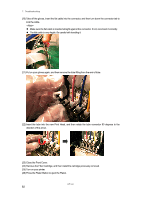
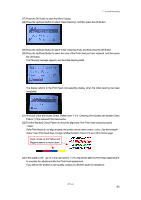
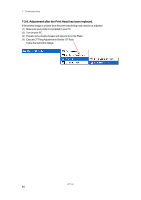
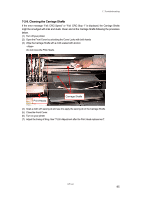
7. Troubleshooting (27) Press the OK Button to open the Menu Display. (28) Press the Up/Down Button to select "Head Cleaning", and then press the OK Button. (29) Press the Up/Down Button to select "Initial" Cleaning mode, and then press the OK Button. (30) Press the Up/Down Button to select the color of the Print Head you have replaced, and then press the OK Button. The following message appears, and the initial cleaning starts. The display returns to the Print Head color-selecting display, when the initial cleaning has been completed. (31) Print and check the Nozzle Check Pattern (see "7-2-3. Checking Print Quality with Nozzle Check Pattern ") if the replaced Print Head works. (32) Print the Standard Check Pattern to check the alignment if the Print Head is placed properly. If the Print Heads do not align properly, the printer cannot make correct r colors. See the example below: Cyan Print Head does not align (shifted forward). Check (17) and (18) in former page. Cyan moves up and Yellow and Magenta seems to move down. (33) If the quality is OK go on to the next section "7-2-8. Adjustment after the Print Head replacement" to complete the adjustment after the Print Head replacement. If you still see the problem in print quality, contact your Brother dealer for assistance. GT-541 93
-
 1
1 -
2
-
3
-
4
-
5
-
6
-
7
-
8
-
9
-
10
-
11
-
12
-
13
-
14
-
15
-
16
-
17
-
18
-
19
-
20
-
21
-
22
-
23
-
24
-
25
-
26
-
27
-
28
-
29
-
30
-
31
-
32
-
33
-
34
-
35
-
36
-
37
-
38
-
39
-
40
-
41
-
42
-
43
-
44
-
45
-
46
-
47
-
48
-
49
-
50
-
51
-
52
-
53
-
54
-
55
-
56
-
57
-
58
-
59
-
60
-
61
-
62
-
63
-
64
-
65
-
66
-
67
-
68
-
69
-
70
-
71
-
72
-
73
-
74
-
75
-
76
-
77
-
78
-
79
-
80
-
81
-
82
-
83
-
84
-
85
-
86
-
87
-
88
-
89
-
90
-
91
-
92
-
93
-
94
-
95
-
96
-
97
-
 98
98 -
 99
99 -
 100
100 -
 101
101 -
 102
102 -
 103
103 -
 104
104 -
 105
105 -
 106
106 -
 107
107 -
 108
108 -
109
-
110
-
111
-
112
-
113
-
114
-
115
-
116
-
117
-
118
-
119
-
120
-
121
-
122
-
123
-
124
-
125
-
126
 |
 |