Brother International GT-541 Instruction Manual - English - Page 91
Changing the Print Direction, Press the Up/Down Button to select Print Direction
 |
View all Brother International GT-541 manuals
Add to My Manuals
Save this manual to your list of manuals |
Page 91 highlights
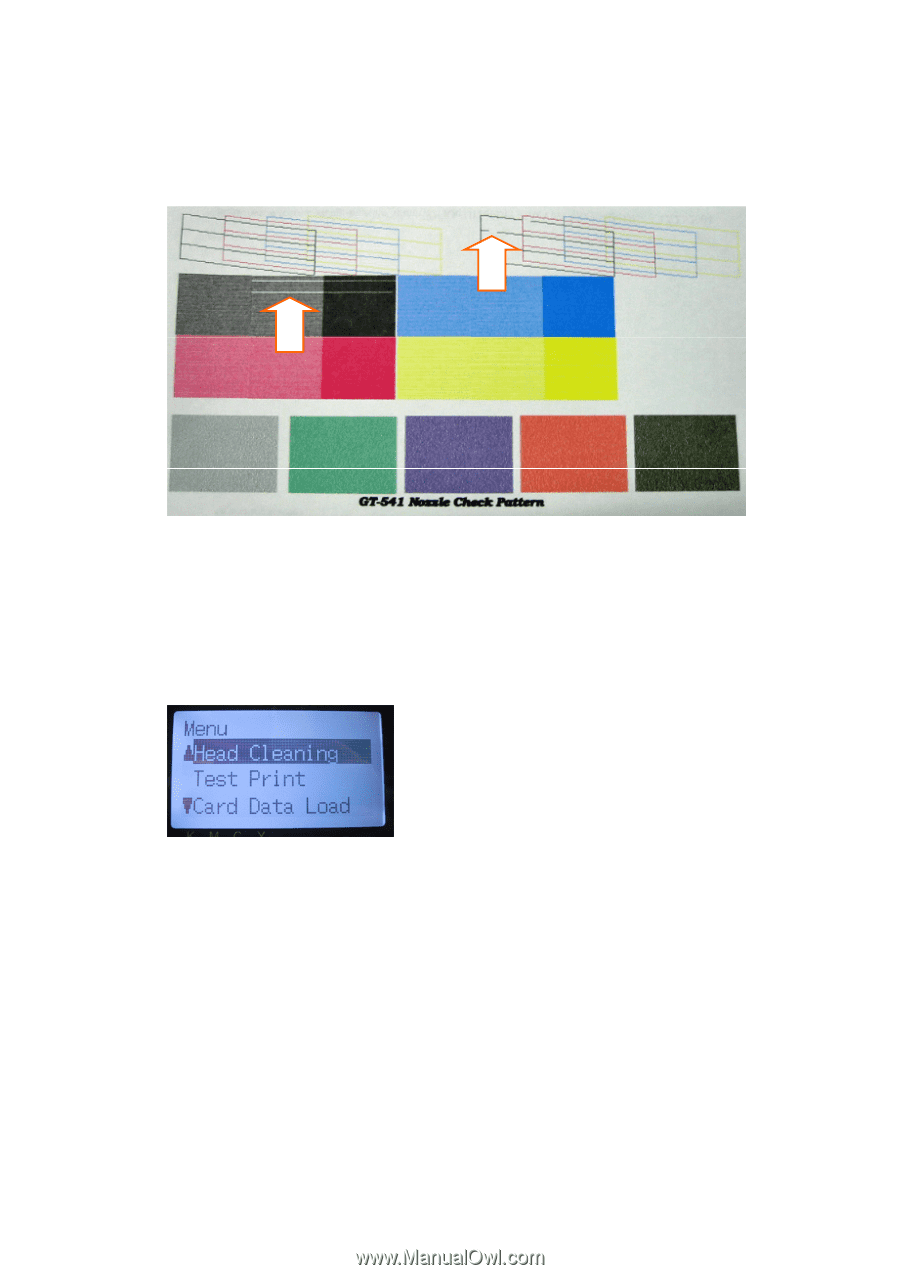
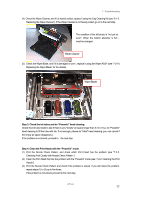
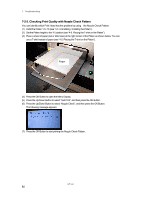
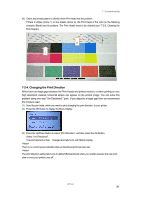
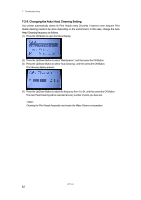
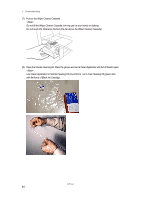
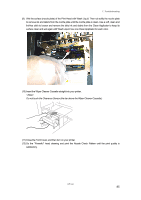
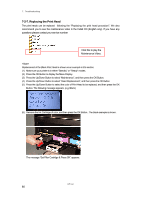
7. Troubleshooting (8) Check the printed pattern to identify which Print Head has the problem. If there is stripes (arrow 1) or line breaks (arrow 2), the Print Head of the color (in the following example: Black) has the problem. The Print Heads need to be cleaned (see "7-2-2. Cleaning the Print Heads"). 2 1 7-2-4. Changing the Print Direction When there are large gaps between the Print Heads and printed medium, or when printing on very high absorbent material, horizontal stripes can appear on the printed image .You can solve this problem using one-way "Uni-Directional " print.. If you adjust to a larger gap then we recommend this mode is used. (1) Send the print data, which you want to print changing the print direction, to your printer. (2) Press the OK Button to display the Menu Display. (3) Press the Up/Down Button to select "Print Direction", and then press the OK Button. Select "Uni-Directional". The print direction is then changed and returns to Job/ Status Display. There is no control panel indication that uni directional print has been set. The print direction setting returns to its default (Bi-Directional) when your printer receives the new print data or once your printer turns off. GT-541 81
-
 1
1 -
2
-
3
-
4
-
5
-
6
-
7
-
8
-
9
-
10
-
11
-
12
-
13
-
14
-
15
-
16
-
17
-
18
-
19
-
20
-
21
-
22
-
23
-
24
-
25
-
26
-
27
-
28
-
29
-
30
-
31
-
32
-
33
-
34
-
35
-
36
-
37
-
38
-
39
-
40
-
41
-
42
-
43
-
44
-
45
-
46
-
47
-
48
-
49
-
50
-
51
-
52
-
53
-
54
-
55
-
56
-
57
-
58
-
59
-
60
-
61
-
62
-
63
-
64
-
65
-
66
-
67
-
68
-
69
-
70
-
71
-
72
-
73
-
74
-
75
-
76
-
77
-
78
-
79
-
80
-
81
-
82
-
83
-
84
-
85
-
 86
86 -
 87
87 -
 88
88 -
 89
89 -
 90
90 -
 91
91 -
 92
92 -
 93
93 -
 94
94 -
 95
95 -
 96
96 -
97
-
98
-
99
-
100
-
101
-
102
-
103
-
104
-
105
-
106
-
107
-
108
-
109
-
110
-
111
-
112
-
113
-
114
-
115
-
116
-
117
-
118
-
119
-
120
-
121
-
122
-
123
-
124
-
125
-
126
 |
 |