Brother International XL-2600i Operation Manual - Page 65
presser foot holder screw securely. If
 |
View all Brother International XL-2600i manuals
Add to My Manuals
Save this manual to your list of manuals |
Page 65 highlights
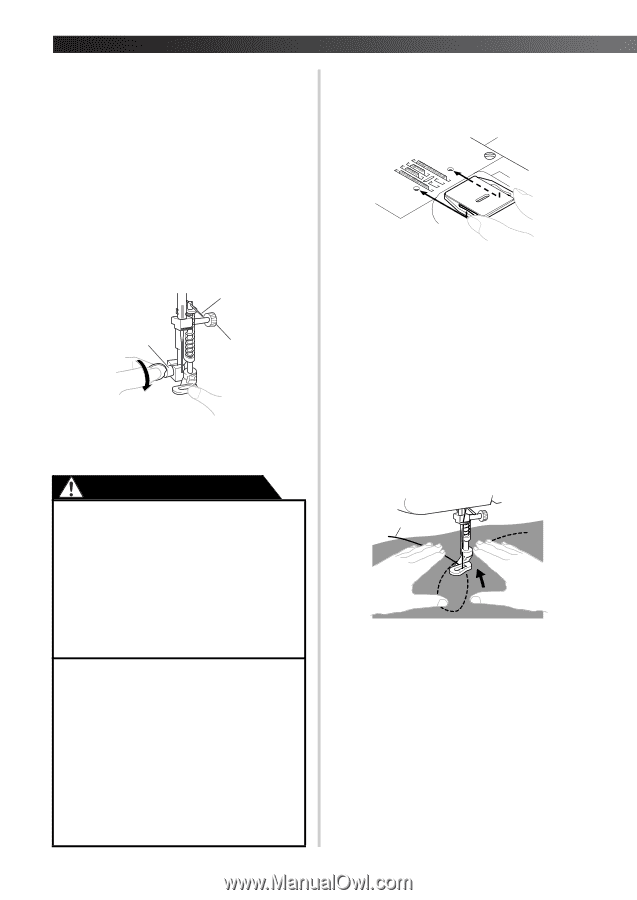
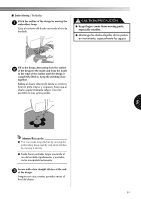
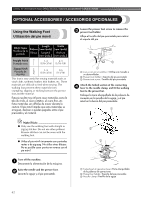
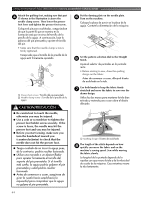
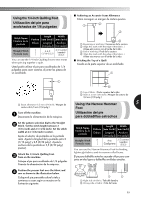
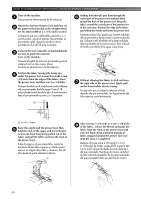
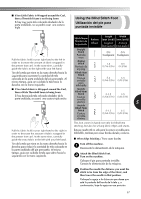
USING ATTACHMENTS AND APPLICATIONS / USO DE ACCESORIOS Y APLICACIONES Attach the quilting foot, making sure that part 4 A shown in the illustration is above the needle clamp screw. Then lower the presser foot lever and tighten the presser foot screw. Coloque el pie para acolchados, asegurándose de que la parte A que se muestra en la ilustración está por encima del tornillo de la presilla de la aguja. A continuación, baje la palanca del pie prensatela y apriete el tornillo del pie. • Make sure that the needle clamp screw is firmly tightened. Compruebe que el tornillo de la presilla de la aguja está firmemente apretado. A 1 2 1 Presser foot screw / Tornillo del pie prensatela 2 Needle clamp screw / Tornillo de la presilla de la aguja CAUTION/PRECAUCIÓN ● Be careful not to touch the needle, otherwise you may be injured. ● Use a coin or screwdriver to tighten the presser foot holder screw securely. If the screw is loose, the needle may hit the presser foot and you may be injured. ● Before you start sewing, make sure you turn the handwheel toward you (counterclockwise) to check that the needle does not hit the presser foot. ● Tenga cuidado de no tocar la aguja pues, de lo contrario, podría resultar lesionado. ● Utilice una moneda o un destornillador para apretar firmemente el tornillo del soporte del pie prensatela. Si el tornillo está suelto, la aguja podría golpear el pie prensatela y usted podría resultar lesionado. ● Antes de comenzar a coser, asegúrese de girar la rueda hacia usted (hacia la izquierda) para comprobar que la aguja no golpea el pie prensatela. Put the darning plate on the needle plate. 5 Turn on the machine. Coloque la placa de zurcir en la placa de la aguja. Conecte la alimentación de la máquina. Set the pattern selection dial to the Straight 6 Stitch. Ajuste el selector de puntadas en la puntada recta. • Before starting to sew, draw the quilting design on the fabric. Antes de comenzar a coser, dibuje el diseño de acolchado en la tela. Use both hands to keep the fabric firmly 7 stretched and move the fabric to sew over the drawn design. Utilice las dos manos para mantener la tela bien estirada y muévala para coser sobre el diseño dibujado. 1 1 Quilting design / Diseño de acolchado The length of the stitch depends on how 8 quickly you move the fabric and on the machine's sewing speed. Sew while moving the fabric slowly. La longitud de la puntada depende de la rapidez con que mueva la tela y de la velocidad de cosido de la máquina. Cosa mientras mueve la tela lentamente. 64
-
 1
1 -
2
-
3
-
4
-
5
-
6
-
7
-
8
-
9
-
10
-
11
-
12
-
13
-
14
-
15
-
16
-
17
-
18
-
19
-
20
-
21
-
22
-
23
-
24
-
25
-
26
-
27
-
28
-
29
-
30
-
31
-
32
-
33
-
34
-
35
-
36
-
37
-
38
-
39
-
40
-
41
-
42
-
43
-
44
-
45
-
46
-
47
-
48
-
49
-
50
-
51
-
52
-
53
-
54
-
55
-
56
-
57
-
58
-
59
-
 60
60 -
 61
61 -
 62
62 -
 63
63 -
 64
64 -
 65
65 -
 66
66 -
 67
67 -
 68
68 -
 69
69 -
 70
70 -
71
-
72
-
73
-
74
-
75
-
76
-
77
-
78
-
79
-
80
-
81
-
82
 |
 |