Canon PowerShot G3 Software Starter Guide DC SD Ver.11
Canon PowerShot G3 Manual
 |
View all Canon PowerShot G3 manuals
Add to My Manuals
Save this manual to your list of manuals |
Canon PowerShot G3 manual content summary:
- Canon PowerShot G3 | Software Starter Guide DC SD Ver.11 - Page 1
Starter Guide (For the Canon Digital Camera Solution Disk Version 11) PowerShot G3 PowerShot S45 PowerShot S230 DIGITAL ELPH / DIGITAL IXUS v3 Windows Macintosh CDI-E071-010 XXXXCHXX © 2002 CANON INC. PRINTED IN JAPAN You must install the sofware bundled on the Canon Digital Camera Solution - Canon PowerShot G3 | Software Starter Guide DC SD Ver.11 - Page 2
PRECAUTIONS The precautions noted within this guide are intended to instruct you in the safe and camera, the software, the CompactFlash™ cards (CF cards), personal computers, peripheral devices, or use of non-Canon CF cards. Trademark Acknowledgments • Canon and PowerShot are trademarks of Canon - Canon PowerShot G3 | Software Starter Guide DC SD Ver.11 - Page 3
("Data") contained in the Software, which are to be downloaded to the applicable Canon digital camera product, Canon grants you a personal, non-exclusive license to use the Data on a single Canon digital camera product only. YOU SHALL NOT ASSIGN, SUBLICENSE, RENT, LEASE, LOAN, CONVEY OR OTHERWISE - Canon PowerShot G3 | Software Starter Guide DC SD Ver.11 - Page 4
of the province of Ontario. 10. OWNERSHIP: All rights, including but not limited to copyrights and trade secret rights, to the SOFTWARE belong to Canon, its affiliated corporations and third party licensors. Your use of the SOFTWARE is subject to the laws of the United States, and Canada, and other - Canon PowerShot G3 | Software Starter Guide DC SD Ver.11 - Page 5
6 Canon Digital Camera Solution Disk 6 Adobe Photoshop LE CD-ROM 11 ArcSoft Camera Suite 2.0 CD-ROM 11 ArcSoft Camera Suite 1.2 CD-ROM 11 Camera and Software Compatibility 12 About the Other Manuals 13 System Requirements 15 Windows 15 Macintosh 16 The explanations in this guide use - Canon PowerShot G3 | Software Starter Guide DC SD Ver.11 - Page 6
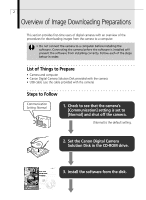
correctly. Follow each of the steps below in order. List of Things to Prepare • Camera and computer • Canon Digital Camera Solution Disk provided with the camera • USB cable (use the cable provided with the camera) Steps to Follow Communication Setting: Normal 1. Check to see that the - Canon PowerShot G3 | Software Starter Guide DC SD Ver.11 - Page 7
Automation Wizard. Mac OS X : Double-click the [Canon ImageBrowser] icon on the desktop. * With Windows XP, the Event dialog does not appear the first time the camera is connected after computer start-up. For downloading instructions, see the following. Windows: Downloading and Printing Images with - Canon PowerShot G3 | Software Starter Guide DC SD Ver.11 - Page 8
Canon Digital Camera Solution Disk. Program 98 ZoomBrowser EX ImageBrowser TWAIN Driver • WIA Driver - USB Mounter File Viewer Utility PhotoRecord PhotoStitch RemoteCapture CP-100/CP-10 Printer Driver - • PowerShot S45 The following programs are supplied on the ArcSoft Camera Suite 2.0 - Canon PowerShot G3 | Software Starter Guide DC SD Ver.11 - Page 9
5 • PowerShot S230 DIGITAL ELPH / DIGITAL IXUS v3 The following programs are supplied on the ArcSoft Camera Suite 1.2 CD-ROM. Program 98 ArcSoft PhotoImpression ArcSoft VideoImpression Compatible Operating System Windows Macintosh Me 2000 XP OS 8.6-9.2 OS X • • • • Windows / Macintosh - Canon PowerShot G3 | Software Starter Guide DC SD Ver.11 - Page 10
CD-ROMs. Canon Digital Camera Solution Disk Some camera models do not support some of the software functions. Please check the Camera and Software . WIA Driver (Windows) This driver for Windows Me and Windows XP starts the Scanners and Cameras Wizard to automatically download camera images to - Canon PowerShot G3 | Software Starter Guide DC SD Ver.11 - Page 11
Windows / Macintosh 7 • Categorizing and Organizing Large Volumes of Images ZoomBrowser EX (Windows)/ImageBrowser (Macintosh) These programs display downloaded images in an index format and allow you to sort and organize them by criteria such as the content or shooting date. ZoomBrowser EX also - Canon PowerShot G3 | Software Starter Guide DC SD Ver.11 - Page 12
enough for easy transmission. * The automatic start of email programs is only supported by Windows and the email programs must be enabled as MAPI clients. Start-Up Sounds to the Camera ZoomBrowser EX (Windows)/ImageBrowser (Macintosh) These programs can add various camera settings such as start-up - Canon PowerShot G3 | Software Starter Guide DC SD Ver.11 - Page 13
ImageBrowser (Macintosh) These programs can output an index of the computer or camera's image thumbnails (tiny versions) to a printer. • Programs for Printing Photo Cards and Adhesive Labels with Card Photo Printer CP-100/CP-10 PhotoRecord (Windows)/ImageBrowser (Macintosh) These programs can output - Canon PowerShot G3 | Software Starter Guide DC SD Ver.11 - Page 14
and save them in the QuickTime VR format to make them appear to surround you as you view them. • Computer-Controlled Camera Shooting RemoteCapture This program allows your camera's shutter to be controlled by the computer when the two are connected. The recorded images are loaded directly into the - Canon PowerShot G3 | Software Starter Guide DC SD Ver.11 - Page 15
multiple clips or stills and for editing out unwanted frames from movies. ArcSoft Camera Suite 1.2 CD-ROM This CD-ROM is distributed with PowerShot S230 DIGITAL ELPH/DIGITAL IXUS v3 digital cameras. • Special Effects and Image Editing for Various Purposes ArcSoft PhotoImpression This program can - Canon PowerShot G3 | Software Starter Guide DC SD Ver.11 - Page 16
Compatibility The Canon Digital Camera Solution Disk contains a number of software programs and drivers. Check the chart below for the compatibility of your particular camera model with each program's special functions. Model PowerShot G3 PowerShot S45 DIGITAL IXUS v3 PowerShot S230 DIGITAL ELPH - Canon PowerShot G3 | Software Starter Guide DC SD Ver.11 - Page 17
10 Printer Driver User Guide This PDF format manual is for the separately sold Card Photo Printer CP-100 or Card Photo Printer CP-10. It is contained on the Canon Digital Camera Solution Disk. The following procedures can be used to read the manual. Windows 1. Place the Canon Digital Camera Solution - Canon PowerShot G3 | Software Starter Guide DC SD Ver.11 - Page 18
] and [Acrobat] folders. 3. Double-click the [ar405eng.exe] file to start the installer. Follow the onscreen instructions to install Adobe Acrobat Reader. • Macintosh 1. Place the Canon Digital Camera Solution Disk in the CD-ROM drive. 2. Open the [Readme], [English] and [Acrobat] folders. 3. Double - Canon PowerShot G3 | Software Starter Guide DC SD Ver.11 - Page 19
MB or more • Canon Camera TWAIN Driver: 25 MB or more • Canon Camera WIA Driver: 25 MB or more • Canon CP-100/CP-10 Printer Driver: 1 MB or the camera's movies or save images merged with PhotoStitch in the QuickTime VR format. QuickTime is included on the Canon Digital Camera Solution Disk - Canon PowerShot G3 | Software Starter Guide DC SD Ver.11 - Page 20
Utility: 100 MB or more - PhotoStitch: 30 MB or more - RemoteCapture: 15 MB or more • USB Mounter: 5 MB or more • Canon CP-100/CP-10 Printer Driver: 3.8 MB or more (space required for installation) • Adobe Photoshop LE: 40 MB or more • ArcSoft PhotoStudio: 50 MB or more • ArcSoft - Canon PowerShot G3 | Software Starter Guide DC SD Ver.11 - Page 21
Platform Installing the Software 18 Installing from the Canon Digital Camera Solution Disk 18 Installing Adobe Photoshop LE 22 Installing Arcsoft Camera Suite 2.0 22 Installing Arcsoft Camera Suite 1.2 22 Installing the Printer Driver for Card Photo Printer CP-100/CP-10 (Sold Separately) . 22 - Canon PowerShot G3 | Software Starter Guide DC SD Ver.11 - Page 22
the appropriate driver from the Canon Digital Camera Solution Disk listed below onto the computer. Windows 98/Windows 2000: TWAIN Driver Windows Me/Windows XP: WIA Driver Installation ".exe" extension does not show, see the computer's manual for instructions on showing file name extensions.) - Canon PowerShot G3 | Software Starter Guide DC SD Ver.11 - Page 23
3. Click [Software Installation]. 19 Installer Panel 4. Click [Next]. 5. Read the software license agreement and click [Yes] if you consent to all the conditions. 6. Confirm the installation destination and click [Next]. Windows 7. Select the programs you wish to install and click [Next]. • - Canon PowerShot G3 | Software Starter Guide DC SD Ver.11 - Page 24
beside your camera model name. 9. Review the installation settings and click [Next]. The items displayed here differ according to the software installed. • The installation will start. Follow the onscreen instructions to proceed. If you installed the WIA driver or the TWAIN driver, the following - Canon PowerShot G3 | Software Starter Guide DC SD Ver.11 - Page 25
now.] and click [Finish]. • Remove the Canon Digital Camera Solution Disk once the installation is complete and before you connect the camera to the computer so that the proper driver can be installed. • At this point, the required TWAIN Driver or WIA Driver has only been copied to your computer - Canon PowerShot G3 | Software Starter Guide DC SD Ver.11 - Page 26
must be installed to print from one of these printers connected* to a computer. For installation instructions, please see the Card Photo Printer CP-100/CP10 Printer Driver User Guide contained as a PDF file on the Canon Digital Camera Solution Disk (p. 13). * Interface Cable PIF-100 (sold separately - Canon PowerShot G3 | Software Starter Guide DC SD Ver.11 - Page 27
28) for instructions for removing this software. Uninstalling the Card Photo Printer CP-100/CP-10 Printer Driver For instructions to delete the printer driver, please see the Card Photo Printer CP-100/ CP-10 Printer Driver User Guide contained as a PDF file on the Canon Digital Camera Solution Disk - Canon PowerShot G3 | Software Starter Guide DC SD Ver.11 - Page 28
to follow the steps below in order to install the driver software. 1. Install one of the following drivers from the Canon Digital Camera Solution Disk (p. 18). Windows 98 / Windows 2000: TWAIN Driver Windows Me / Windows XP: WIA Driver - Copy the required files to your computer. 2. Connect the - Canon PowerShot G3 | Software Starter Guide DC SD Ver.11 - Page 29
the camera's DIGITAL terminal. • You do not need to turn off the computer for this procedure. Refer to the computer's manual for the location of the USB ports. See the Camera User Guide for instructions for attaching the cable. 4. Set the mode switch to Replay mode and turn the camera on. (PowerShot - Canon PowerShot G3 | Software Starter Guide DC SD Ver.11 - Page 30
to install programs. After a few moments, a dialog such as the Add New Hardware Wizard will display and automatically install the TWAIN Driver or WIA Driver. If you are prompted to restart the computer, restart it according to the onscreen messages. After installation, the Event dialog will appear - Canon PowerShot G3 | Software Starter Guide DC SD Ver.11 - Page 31
interface is not supported for systems not complying with the above conditions.) 2. Is the camera correctly connected to the computer? See the Camera User Guide for connection instructions. 3. Is the camera's [Communication] setting set to [Normal]? See the Camera User Guide for instructions to set - Canon PowerShot G3 | Software Starter Guide DC SD Ver.11 - Page 32
cannot be downloaded once the driver has been uninstalled. 1. Attach the supplied USB cable to the computer's USB port and the camera's Digital Terminal. Prepare the camera for communication with the computer. • For USB cable connection instructions, see Connecting the Camera to a Computer (p. 25 - Canon PowerShot G3 | Software Starter Guide DC SD Ver.11 - Page 33
[Canon Utilities], [Digital Camera TWAIN Driver] or [Digital Camera WIA Driver], and [TWAIN Driver Uninstall] or [WIA Driver Uninstall]. • The content of the underlined items will vary according to your camera model as follows. - PowerShot G3: [PowerShot G3 TWAIN Driver] or [PowerShot G3 WIA Driver - Canon PowerShot G3 | Software Starter Guide DC SD Ver.11 - Page 34
the camera will disconnect after approximately 1 minute. Please see the Camera User Guide for information on what to do if the camera powers the camera's Digital Terminal. Prepare the camera for communication with the computer. • For USB cable connection instructions, see Connecting the Camera to - Canon PowerShot G3 | Software Starter Guide DC SD Ver.11 - Page 35
card into the CF card reader or PC card reader. • Use a separately sold PC card adapter (PCMCIA adapter) if required. • See the manual for the PC card reader for its connection and handling instructions. Insert the CF card into an adapter if required Insert the loaded adapter into the slot Windows - Canon PowerShot G3 | Software Starter Guide DC SD Ver.11 - Page 36
EX. • Double-click the [ZoomBrowser EX] icon on the desktop. 3. Click [Camera & Memory Card] and [Browse & Download Images]. • This will display the Camera window. The images on the CF card will display in the Camera window as thumbnails (p. 34). If multiple PC card readers loaded with CF cards are - Canon PowerShot G3 | Software Starter Guide DC SD Ver.11 - Page 37
* Files with the THM extension are the thumbnail image files for the camera's index replay mode. ** Each successive file shot in Stitch Assist mode is the third digit in the name. i.e. [STA_0001.JPG], [STB_0002.JPG], [STC_0003.JPG] ... • The "xxxx" in file names represent four-digit numbers. • - Canon PowerShot G3 | Software Starter Guide DC SD Ver.11 - Page 38
Settings dialog allowing you to select the image destination folder will display. • If you are downloading images previously selected with the camera's [Transfer Order] setting, click [Select] and select [Select Send Mark]. 2. Make sure the settings are appropriate and click [OK]. (For details - Canon PowerShot G3 | Software Starter Guide DC SD Ver.11 - Page 39
35 Printing Images 1. Select the image(s) you wish to print. • Click images to select them. You can select multiple images by clicking on successive images. To deselect an image, click it again. • Movie images cannot be printed. 2. Click [Print] and select [Layout Print]. • A dialog allowing you - Canon PowerShot G3 | Software Starter Guide DC SD Ver.11 - Page 40
freely for printing. The other print modes allow you to do such things as tile the images for printing or arrange them for printing on Canon perforated paper. 5. In the next dialog, set the paper size and other settings and click [Next]. 6. In the last dialog, select [Automatic layout] and click - Canon PowerShot G3 | Software Starter Guide DC SD Ver.11 - Page 41
allow you to print images with image quality adjustments and also supports the Exif 2.2 standard (or Exif Print). This function click [Close]. The selected image will be corrected. • Images shot with cameras complying with the Exif 2.2 standard incorporate shooting settings information, such as the - Canon PowerShot G3 | Software Starter Guide DC SD Ver.11 - Page 42
Window This section provides a brief introduction of the names and functions of the Camera window parts. The images from the camera (or CF card) display here. Task Buttons Function Buttons Task Buttons Select a procedure you wish to carry out from those below. • Download Image Button Downloads - Canon PowerShot G3 | Software Starter Guide DC SD Ver.11 - Page 43
. When you download JPEG images that have been rotated automatically (if the [Auto Rotate] function is set to [On]) or manually by the camera, or that have been rotated in the Camera window, two images are saved onto the computer, the pre-rotation image and the post-rotation image. (This setting can - Canon PowerShot G3 | Software Starter Guide DC SD Ver.11 - Page 44
a procedure you wish to carry out from those below. When you click a button, an additional menu of functions will display. • Camera & Memory Card Button Use this to display the Camera window. Clicking this button opens the menu with options such as [Browse and Download Images], [Upload Images], [My - Canon PowerShot G3 | Software Starter Guide DC SD Ver.11 - Page 45
Windows 41 Function Buttons The following functions can be performed on images selected in the Browser Area. • View Mode Button Switches between the Zoom Mode and Scroll Mode to suit your requirements. Zoom Mode When a folder has been created within a folder, this mode can be used to display all - Canon PowerShot G3 | Software Starter Guide DC SD Ver.11 - Page 46
camera model supports this function (p. 12). The RAW image file format records image data as captured by the camera's image sensor without further processing by the camera quality. * As measured by standard Canon test conditions. • Please see the Camera User Guide to learn how to shoot RAW images - Canon PowerShot G3 | Software Starter Guide DC SD Ver.11 - Page 47
at which images display. Display Mode List Box Selects the thumbnail or preview display mode. Model-specific Processing Mode List Box Selects the model of camera in use. Click this button and then a white portion of an image to automatically adjust the white balance to that color. Adjusts white - Canon PowerShot G3 | Software Starter Guide DC SD Ver.11 - Page 48
44 • The following screen will appear on top of File Viewer Utility. Select the name of your camera and click [OK]. (First time connection only) 3. Select the name of your camera from File Viewer Utility's model-specific processing list box. Step 3 refers to this box. 4. Adjust the image quality as - Canon PowerShot G3 | Software Starter Guide DC SD Ver.11 - Page 49
a later version is not already installed, install the QuickTime program from the Canon Digital Camera Solution Disk. Place the disk in the CD-ROM drive and click will start Windows Media Player, which may not support this file type. To replay movies, start QuickTime Player first and open the file - Canon PowerShot G3 | Software Starter Guide DC SD Ver.11 - Page 50
button to start PhotoStitch. 2. Follow the instructions in the guidance window to merge the images instructions to merge the images. Images Shot in Stitch Assist Mode PhotoStitch automatically arranges images shot with the camera Assist mode images appear in the Camera window as shown below. Stitch - Canon PowerShot G3 | Software Starter Guide DC SD Ver.11 - Page 51
• You may notice that the interval between the shutter release and activation is slightly longer when RemoteCapture is used to shoot than when the camera is used in the normal fashion. • Images shot with RemoteCapture are automatically saved to the folder selected in ZoomBrowser EX. Windows • Save - Canon PowerShot G3 | Software Starter Guide DC SD Ver.11 - Page 52
here. Viewfinder On/Off Button Turns the viewfinder display on or off. Slide this to zoom the camera in or out. Reflect changes Button Updates the settings. PowerShot S230 DIGITAL ELPH/DIGITAL IXUS v3 • When the Viewfinder is displayed, it will automatically turn off 1 minute after it was turned - Canon PowerShot G3 | Software Starter Guide DC SD Ver.11 - Page 53
computer's USB port and the camera's DIGITAL terminal. Prepare the camera for communication with the computer. • For USB cable connection instructions, see Connecting the Camera to a Computer (p. 25). - PowerShot S45: open the lens cover after connecting. - PowerShot G3: remove the lens cap after - Canon PowerShot G3 | Software Starter Guide DC SD Ver.11 - Page 54
continue to function after the computer enters standby mode. Always turn off the standby function before you start shooting with RemoteCapture. • Please note that the camera will not be able to shoot at the specified interval if it is shorter than the time required to transmit the data and save it - Canon PowerShot G3 | Software Starter Guide DC SD Ver.11 - Page 55
window, click the [Viewfinder On] button. If you select [Video Out terminal] instead, you can view the subject on a TV set. Please see the Camera User Guide to learn how to connect to a TV. Printing an Index of the Thumbnail Images If you select images in the Thumbnail View area of Save - Canon PowerShot G3 | Software Starter Guide DC SD Ver.11 - Page 56
LE Starting the TWAIN Driver from within Adobe Photoshop LE 1. Attach the supplied USB cable to the computer's USB port and the camera's DIGITAL terminal. Prepare the camera for communication with the computer. • For USB cable connection instructions, see Connecting the Camera to a Computer (p. 25 - Canon PowerShot G3 | Software Starter Guide DC SD Ver.11 - Page 57
Starting the TWAIN Driver from within ArcSoft PhotoStudio 1. Attach the supplied USB cable to the computer's USB port and the camera's DIGITAL terminal. Prepare the camera for communication with the computer. • For USB cable connection instructions, see Connecting the Camera to a Computer (p. 25 - Canon PowerShot G3 | Software Starter Guide DC SD Ver.11 - Page 58
Source] list. 6. Click the button. • The TWAIN Driver will start. Loading Images from the Camera with the TWAIN Driver • The TWAIN Driver can display still images only. To download movies to a computer, start ZoomBrowser EX. • TWAIN Driver Window 1. Select images for downloading, click the [File - Canon PowerShot G3 | Software Starter Guide DC SD Ver.11 - Page 59
Driver), you have the following alternatives for downloading images to the computer. Downloading with the Scanner and Camera Wizard Follow the Wizard's step-by-step instructions port and the camera's Digital Terminal. • For USB cable connection instructions, see Connecting the Camera to a Computer - Canon PowerShot G3 | Software Starter Guide DC SD Ver.11 - Page 60
56 4. Specify a file name prefix and destination for the image files. Specify a file name here. Specify the folder that will become the file destination. 5. Click [Next]. • The images will start downloading to the computer. 6. Select [Nothing, I'm finished working with these pictures] and click [ - Canon PowerShot G3 | Software Starter Guide DC SD Ver.11 - Page 61
can also be downloaded this way. 1. Attach the supplied USB cable to the computer's USB port and the camera's Digital Terminal. • For USB cable connection instructions, see Connecting the Camera to a Computer (p. 25). • If the Event dialog, which allows you to select an application to start (p. 30 - Canon PowerShot G3 | Software Starter Guide DC SD Ver.11 - Page 62
be downloaded with this method. 1. Attach the supplied USB cable to the computer's USB port and the camera's Digital Terminal. • For USB cable connection instructions, see Connecting the Camera to a Computer (p. 25). • If the Event dialog, which allows you to select an application to start (p. 30 - Canon PowerShot G3 | Software Starter Guide DC SD Ver.11 - Page 63
bundled on the Canon Digital Camera Solution Disk to download the images. For more information, please read the supplied "Picture Transfer Protocol (PTP) Mode" leaflet. 1. Set the camera's [Communication] setting to [PTP]. • See your Camera User Guide for instructions. 2. Attach the supplied - Canon PowerShot G3 | Software Starter Guide DC SD Ver.11 - Page 64
Click [Finish]. • This concludes the download. • To download images using the applications on the Canon Digital Camera Solution Disk, such as ZoomBrowser EX or File Viewer Utility, you must reset the camera's [Communication] setting to [Normal]. These applications cannot be used with the PTP mode. - Canon PowerShot G3 | Software Starter Guide DC SD Ver.11 - Page 65
the Software 62 Installing from the Canon Digital Camera Solution Disk ....... 62 Installing Adobe Photoshop LE 63 Installing Arcsoft Camera Suite 2.0 64 Installing Arcsoft Camera Suite 1.2 64 Installing the Card Photo Printer CP-100/CP-10 Printer Driver ... 65 Uninstalling the Software 65 - Canon PowerShot G3 | Software Starter Guide DC SD Ver.11 - Page 66
the CD-ROM icon, followed by the [Mac OS 8/9] and [Canon Digital Camera Installer] icons. • The installer panel will display. 4. Click [Digital Camera Software Installation]. Installer Panel 5. Follow the onscreen instructions to proceed with the installation. 6. After the installation is complete - Canon PowerShot G3 | Software Starter Guide DC SD Ver.11 - Page 67
by the [Mac OS 8/9] folder and the [Canon Digital Camera Installer] icons to install the program. Installing Adobe Photoshop LE The Adobe Photoshop LE CD-ROM is distributed with PowerShot G3 digital cameras. • For detailed installation instructions, double-click the Adobe Photoshop LE CD-ROM - Canon PowerShot G3 | Software Starter Guide DC SD Ver.11 - Page 68
process for installing ArcSoft PhotoStudio and ArcSoft VideoImpression Installing Arcsoft Camera Suite 1.2 The Arcsoft Camera Suite CD-ROM is distributed with PowerShot S230 DIGITAL ELPH/ DIGITAL IXUS v3 digital cameras. Installing ArcSoft PhotoImpression 1. Close any programs that are running - Canon PowerShot G3 | Software Starter Guide DC SD Ver.11 - Page 69
] file on the Canon Digital Camera Solution Disk. Uninstalling the Card Photo Printer CP-100/CP-10 Printer Driver For instructions to delete the printer driver, please see the Card Photo Printer CP-100/ CP-10 Printer Driver User Guide contained on the Canon Digital Camera Solution Disk as a PDF - Canon PowerShot G3 | Software Starter Guide DC SD Ver.11 - Page 70
the camera's DIGITAL terminal. • You do not need to turn off the computer for this procedure. Refer to the computer's manual for the location of the USB ports. See the Camera User Guide for instructions for attaching the cable. 4. Set the mode switch to Replay mode and turn the camera on. (PowerShot - Canon PowerShot G3 | Software Starter Guide DC SD Ver.11 - Page 71
, the camera will disconnect after approximately 1 minute. Please see the Camera User Guide for information on what to do if the camera powers down camera's Digital Terminal. Prepare the camera for communication with the computer. • For USB cable connection instructions, see Connecting the Camera to - Canon PowerShot G3 | Software Starter Guide DC SD Ver.11 - Page 72
68 3. Confirm that [USB port] and your camera model name are selected and click the [Set] button. Your camera model name will appear here. • The Camera Window will open and display the camera images as thumbnails (tiny versions) (p. 72). • In the ImageBrowser Automation Wizard dialog, you can select - Canon PowerShot G3 | Software Starter Guide DC SD Ver.11 - Page 73
supplied USB cable to the computer's USB port and the camera's DIGITAL Terminal. Prepare the camera for communication with the computer. • For USB cable connection instructions, see Connecting the Camera to a Computer (p. 66). 2. Double-click the [Canon ImageBrowser] icon on the desktop. • If the - Canon PowerShot G3 | Software Starter Guide DC SD Ver.11 - Page 74
the camera images as thumbnails (tiny versions) (p. 72). CF Card Reader / PC Card Reader Connection 1. Insert the CF card into the CF card reader or PC card reader. • Use a PC card adapter (PCMCIA adapter) if required. See the manual for the PC card reader for its handling instructions. Insert - Canon PowerShot G3 | Software Starter Guide DC SD Ver.11 - Page 75
double-click the folder in which you installed the program, followed by the [Canon Utilities] and [ImageBrowser] folders and the [ImageBrowser] file. 3. Double-click . • The images from the CF card will display as thumbnails in the Camera window (p. 72). Mac OS 8.6 - 9.2 Mac OS X Explorer View - Canon PowerShot G3 | Software Starter Guide DC SD Ver.11 - Page 76
You can also check the battery charge and remaining memory capacity. 1. Click the [Setup Options] button and select [Camera Settings] from the displayed menu. 2. Check or change the settings. Input a camera owner name here (up to 31 characters). Set the date and time here. Click this button to - Canon PowerShot G3 | Software Starter Guide DC SD Ver.11 - Page 77
subfolder of the [Users] folder in the startup disk. Mac OS 8.6 - 9.2 Mac OS X Explorer View Section 2. Create a new folder for saving images from the camera. • Click the [File] menu and select [New Folder]. A folder with the name "Untitled" will be created. Click it to change the folder name as - Canon PowerShot G3 | Software Starter Guide DC SD Ver.11 - Page 78
images are saved to the computer and appear in the Browser area. • You can also download images to the computer by dragging them from the Camera window and dropping them on the Browser area or the Explorer View Section. "RAW" displays on RAW images. Browser area The movie icon displays on - Canon PowerShot G3 | Software Starter Guide DC SD Ver.11 - Page 79
images cannot be printed. 2. Click the [Print] button and select [Layout printing] from the displayed menu. Layout Options Window Print Window • The [Canon perforated paper printing] option can not be selected with Mac OS X. 3. In the Layout Options window, select the desired layout and click the - Canon PowerShot G3 | Software Starter Guide DC SD Ver.11 - Page 80
76 4. In the next window, select a paper size and click the [OK] button. • The Layout Options window will close and the Print window will open, allowing you to change the layout and printing settings. • The settings available in Step 4 will vary according to the type of layout selected in Step 3. 5. - Canon PowerShot G3 | Software Starter Guide DC SD Ver.11 - Page 81
ImageBrowser features functions that allow you to print images with image quality adjustments. ImageBrowser also supports the Exif 2.2 standard (or Exif Print). • Images shot with cameras complying with the Exif 2.2 standard incorporate shooting settings information, such as the shooting conditions - Canon PowerShot G3 | Software Starter Guide DC SD Ver.11 - Page 82
click [OK]. A check mark must be placed here to automatically correct the image quality. Select this option to automatically correct images shot with Exif 2.2 compliant cameras and other images. Select this option to automatically correct only images shot with Exif 2.2 compliant - Canon PowerShot G3 | Software Starter Guide DC SD Ver.11 - Page 83
camera model supports this function (p. 12). The RAW image file format records image data as captured by the camera's image sensor without further processing by the camera Canon test conditions. • Please see the Camera User Guide 9] folder and the [Canon Digital Camera Installer] folders to install - Canon PowerShot G3 | Software Starter Guide DC SD Ver.11 - Page 84
80 • The following screen will appear on top of File Viewer Utility. Select the name of your camera and click [OK]. (First time connection only) 3. Select the name of your camera from File Viewer Utility's model specific processing list box. Step 3 refers to this box. 4. Adjust the image quality as - Canon PowerShot G3 | Software Starter Guide DC SD Ver.11 - Page 85
image. Displays the image information here. Macintosh Comment Box A description of up to 60 characters can be input here. This section displays when a camera model is selected in the Model-specific Processing Mode List Box and selects RAW images. Display Size List Box Selects the size at which - Canon PowerShot G3 | Software Starter Guide DC SD Ver.11 - Page 86
82 Replaying Movies When you double-click an image with a movie icon in the Browser Window, QuickTime Player will start and replay the movie. 1. Double-click an image with a movie icon. • QuickTime Player will start. 2. Click the play button in QuickTime Player. • The movie will replay. Play - Canon PowerShot G3 | Software Starter Guide DC SD Ver.11 - Page 87
] to start the program. 2. Follow the instructions in the guidance window to merge the images instructions to merge the images. Images Shot in Stitch Assist Mode PhotoStitch automatically arranges images shot with the camera Assist mode images appear in the Camera window as shown below. Stitch Assist - Canon PowerShot G3 | Software Starter Guide DC SD Ver.11 - Page 88
. • You may notice that the interval between the shutter release and activation is slightly longer when RemoteCapture is used to shoot than when the camera is used in the normal fashion. • Images shot with RemoteCapture are automatically saved to the folder selected in ImageBrowser. • You cannot use - Canon PowerShot G3 | Software Starter Guide DC SD Ver.11 - Page 89
image. Recorded images are automatically saved to the computer. Set the basic camera settings here. Slide this to zoom the camera in or out. Reflect Changes Button Updates the settings. PowerShot S230 DIGITAL ELPH / DIGITAL IXUS v3 • When the Viewfinder is displayed, it will automatically turn off - Canon PowerShot G3 | Software Starter Guide DC SD Ver.11 - Page 90
computer's USB port and the camera's Digital Terminal. Prepare the camera for communication with the computer. • For USB cable connection instructions, see Connecting the Camera to a Computer (p. 66). • PowerShot S45: open the lens cover after connecting. • PowerShot G3: remove the lens cap after - Canon PowerShot G3 | Software Starter Guide DC SD Ver.11 - Page 91
continue to function after the computer enters sleep mode. Always turn off the sleep function before you start shooting with RemoteCapture. • Please note that the camera will not be able to shoot at the specified interval if it is shorter than the time required to transmit the data and save it - Canon PowerShot G3 | Software Starter Guide DC SD Ver.11 - Page 92
assigned a name one digit higher than the last. Select a folder for saving images. How to Display the Subject in the Camera's LCD Monitor You can Terminal] instead, you can view the subject on a TV. Please see the Camera User Guide to learn how to connect to a TV. Printing an Index of the Thumbnail - Canon PowerShot G3 | Software Starter Guide DC SD Ver.11 - Page 93
images with the USB Mounter, first enable it with the following procedures. 1. Select [Control Panels] from the Apple menu and [Canon USB Camera Driver]. • The Canon USB Camera Driver control panel will display. 2. Select [Card Reader Mode] and Click here to close it. close the control panel - Canon PowerShot G3 | Software Starter Guide DC SD Ver.11 - Page 94
to the computer's USB port and the camera's Digital Terminal. • For USB cable connection instructions, see Connecting the Camera to a Computer (p. 66). • The camera icon will display on the desktop. 2. Double-click the camera icon. Camera Icon Your camera model name will appear here. 3. Select the - Canon PowerShot G3 | Software Starter Guide DC SD Ver.11 - Page 95
bundled of the Canon Digital Camera Solution Disk to downloard the images. For more information, please read the supplied "Picture Transfer Protocol (PTP) Mode" leaflet. 1. Set the camera's [Communication] setting to [PTP]. • See your Camera User Guide for instructions. 2. Attach the supplied - Canon PowerShot G3 | Software Starter Guide DC SD Ver.11 - Page 96
the images have been downloaded, the destination folder will open. • To download images using the applications bundled on the Canon Digital Camera Solution Disk, such as ImageBrowser, you must reset the camera's [Communication] setting to [Normal]. These applications cannot be used with PTP mode. - Canon PowerShot G3 | Software Starter Guide DC SD Ver.11 - Page 97
Using the My Camera Settings (Windows / Macintosh) My Camera Settings 94 Windows 94 Macintosh 102 Windows / Macintosh - Canon PowerShot G3 | Software Starter Guide DC SD Ver.11 - Page 98
Windows and ImageBrowser for Macintosh. Please check whether or not your camera model supports this function. (p. 12). Windows Displaying the My Camera Window To save the My Camera Settings to the camera, you use the My Camera window. The following explains the procedures for displaying the My - Canon PowerShot G3 | Software Starter Guide DC SD Ver.11 - Page 99
files saved onto the computer. 95 Play Button Click here to play sounds recorded onto the camera. Displays the My Camera Settings in the camera. Delete Button Click here to delete a setting from the Camera list. Windows / Macintosh Add File Button Click here to add a file as one of the My - Canon PowerShot G3 | Software Starter Guide DC SD Ver.11 - Page 100
while the similarly named sound files feature animal sounds. 4. Repeat steps 1-3 to replace all the settings you wish to add to the camera. • To use this data on the camera, change the start-up image and sound settings on the camera itself. Please see the Camera User Guide for these instructions. - Canon PowerShot G3 | Software Starter Guide DC SD Ver.11 - Page 101
the settings individually, select the [Set individually] tab and select the setting type in the [Data Type] list box. 2. Select the settings file(s) from the Camera list that you wish to save to the computer. • If you are working in the [Setup as a theme] tab, the thumbnail (tiny version) of the - Canon PowerShot G3 | Software Starter Guide DC SD Ver.11 - Page 102
pixels. Once you have created the data and saved it to the computer, use the following procedures to add it to the My Camera window. 1. Open the My Camera window, click the [Set individually] tab, select [Startup Image] from [Data Type] and click the [Add File] button. • Select the file you created - Canon PowerShot G3 | Software Starter Guide DC SD Ver.11 - Page 103
the tab of the sound file you will be creating, followed by the [Record] button. • Click the [Start_up Sound] tab in this example. The My Camera Sound Maker dialog will display. • To open a sound file already saved to the computer, click the [Open] button in place of the [Record] button. Then - Canon PowerShot G3 | Software Starter Guide DC SD Ver.11 - Page 104
save it. • Repeats steps 3-7 as required to create sound files for the shutter sound, operation sounds and selftimer sound. 8. Click [Close] to close the My Camera Sound Maker window. - Canon PowerShot G3 | Software Starter Guide DC SD Ver.11 - Page 105
appear in the Computer list. This concludes the process for adding a file to the My Camera settings. You can add the file to the camera with the procedures described in the Saving the Data to the Camera section (p. 96). • To delete a setting, select the file name and click the [Delete] button at - Canon PowerShot G3 | Software Starter Guide DC SD Ver.11 - Page 106
the computer, start ImageBrowser and display the Camera window. • See Starting ImageBrowser for instructions (p. 67). 2. Click [Setup Options] in the Camera window and select [My Camera for Digital Cameras] in the pop-up menu. The My Camera window will display • ImageBrowser already contains several - Canon PowerShot G3 | Software Starter Guide DC SD Ver.11 - Page 107
onto the computer. Add Button Click here to add a file as one of the My Camera Settings to the My Computer list. Displays the My Camera Settings in the camera. Delete Button Click here to delete a setting from the Camera list. Play Button Click here to play the selected sound setting. Save to - Canon PowerShot G3 | Software Starter Guide DC SD Ver.11 - Page 108
wish to add to the camera. 5. Click the [Save to Camera] button. • This concludes the process of saving the My Camera Settings to the camera. To use this data on the camera, change the start-up image and sound settings on the camera itself. Please see the Camera User Guide for these instructions. - Canon PowerShot G3 | Software Starter Guide DC SD Ver.11 - Page 109
to the computer in the [Type] list box. 2. Select the setting in the Camera list that you wish to save to the computer. • If you selected Theme in operating sounds and self-timer sound. 3. Click the [ ] button. • The Camera list setting will change to the selected file. If a setting for this category - Canon PowerShot G3 | Software Starter Guide DC SD Ver.11 - Page 110
the file in the JPEG format at a size of 320 x 240 pixels. After creating the file, add it to the My Camera window with the following procedures. 1. Open the My Camera window and click the [Add] button. • Select the created file in the file opening dialog and click [Open]. • The selected file - Canon PowerShot G3 | Software Starter Guide DC SD Ver.11 - Page 111
107 Creating Files Before Adding them to the My Camera Window (Sound Files) Record and save a sound using a program such as ArcSoft VideoImpression to convert it to the WAV format. Then add it to the My Camera window using the procedures on the preceding page. • Record the sound as an 11.025 KHz or - Canon PowerShot G3 | Software Starter Guide DC SD Ver.11 - Page 112
108 MEMO - Canon PowerShot G3 | Software Starter Guide DC SD Ver.11 - Page 113
Troubleshooting (Windows / Macintosh) This topic explains some of the causes for and solutions to problems with the software. Windows / Macintosh - Canon PowerShot G3 | Software Starter Guide DC SD Ver.11 - Page 114
XP or Mac OS X. See the Camera User Guide for instructions to change the [Communication] setting. Cause #4 Camera not in replay mode (PowerShot S230 DIGITAL ELPH/DIGITAL IXUS v3 only). See the Camera User Guide for instructions to put the camera in replay mode. Cause #5 Insufficient battery - Canon PowerShot G3 | Software Starter Guide DC SD Ver.11 - Page 115
. 1. Install the TWAIN Driver or WIA Driver with the installer utility. (Reinstall the driver if you have previously installed it.) 2. Attach the supplied USB cable again to a USB port directly located on the computer and to the camera's DIGITAL terminal and set the camera to the correct mode for - Canon PowerShot G3 | Software Starter Guide DC SD Ver.11 - Page 116
XP Professional must first log in as an Administrator (computer system administrator) to uninstall the driver. Check to see if the camera is being recognized as an "other" device and delete the driver if it is. 1. Windows XP: Click the [Start] menu, followed by [Control Panel], [Performance and - Canon PowerShot G3 | Software Starter Guide DC SD Ver.11 - Page 117
"Inf" folder, so confirm that you have selected the set for Canon digital cameras. To do this, double-click each [Oem*.inf] file, which will display the contents in the Windows Notepad program, until you find one that has [;*** Canon Camera Driver Setup File****] in the first line. When you find the - Canon PowerShot G3 | Software Starter Guide DC SD Ver.11 - Page 118
Canon digital camera set. • The Inf folder contains numerous files critical to the computer's operation. Be extremely careful to delete the correct files. If you delete the wrong files, you may be unable to restart Windows. Reinstall the Driver 10. Reinstall the driver according to the instructions - Canon PowerShot G3 | Software Starter Guide DC SD Ver.11 - Page 119
dialog, click [OK]. • Remove all copies of your camera model name that appear in the Other devices or Imaging devices the [Other] folder to open it. 10. Find and delete the [Canon.IncCAP_G3], [Canon.IncCAP_S45], or [Canon.IncCAP_S230]. files. • If none of the above files are contained in - Canon PowerShot G3 | Software Starter Guide DC SD Ver.11 - Page 120
, you may be unable to restart Windows. Reinstall the Driver 11. Reinstall the driver according to the instructions in Installing the TWAIN Driver/WIA Driver (p. 24). Cause #8 Driver not installed correctly (Windows only) Uninstall the driver once before reinstalling it. Refer to Uninstalling the - Canon PowerShot G3 | Software Starter Guide DC SD Ver.11 - Page 121
Files] folder cannot be displayed. If you had saved images in the [Program Files] folder (C:\Program Files\Canon\ZoomBrowser EX\Image Library One), use the following instructions. 1. In Windows Explorer, copy each image folder in the [Program Files] folder to a different destination. (Copy the - Canon PowerShot G3 | Software Starter Guide DC SD Ver.11 - Page 122
118 MEMO - Canon PowerShot G3 | Software Starter Guide DC SD Ver.11 - Page 123
Canon Customer Support For Canon Customer Support contacts, please see the Canon Limited Warranty supplied with your camera. Adobe Customer Support Adobe Systems Inc. technical support information is available in the PDF file format on the supplied CD-ROM. PDF File Location and Opening Instructions
-
 1
1 -
 2
2 -
 3
3 -
 4
4 -
 5
5 -
 6
6 -
 7
7 -
8
-
9
-
10
-
11
-
12
-
13
-
14
-
15
-
16
-
17
-
18
-
19
-
20
-
21
-
22
-
23
-
24
-
25
-
26
-
27
-
28
-
29
-
30
-
31
-
32
-
33
-
34
-
35
-
36
-
37
-
38
-
39
-
40
-
41
-
42
-
43
-
44
-
45
-
46
-
47
-
48
-
49
-
50
-
51
-
52
-
53
-
54
-
55
-
56
-
57
-
58
-
59
-
60
-
61
-
62
-
63
-
64
-
65
-
66
-
67
-
68
-
69
-
70
-
71
-
72
-
73
-
74
-
75
-
76
-
77
-
78
-
79
-
80
-
81
-
82
-
83
-
84
-
85
-
86
-
87
-
88
-
89
-
90
-
91
-
92
-
93
-
94
-
95
-
96
-
97
-
98
-
99
-
100
-
101
-
102
-
103
-
104
-
105
-
106
-
107
-
108
-
109
-
110
-
111
-
112
-
113
-
114
-
115
-
116
-
117
-
118
-
119
-
120
-
121
-
122
-
123
 |
 |
Software Starter Guide
(For the Canon Digital Camera Solution Disk Version 11)
PowerShot G3
PowerShot S45
PowerShot S230 DIGITAL ELPH/DIGITAL IXUS v
3
•
This guide explains how to install the software programs and briefly
introduces their functions and operating procedures. For more detailed
explanations, see the Help menu for each program.
•
Please read the software license agreement in this guide before using the
software. By using the software, you agree to be bound by the terms of
the agreement.
ENGLISH
CDI-E071-010
XXXXCHXX
© 2002 CANON INC.
PRINTED IN JAPAN
CDI-E071
Windows
Macintosh
Windows / Macintosh
You must install the sofware bundled on the Canon Digital Camera Solution Disk
before connecting the camera to the computer
Software Starter Guide