Canon PowerShot G3 Software Starter Guide DC SD Ver.11 - Page 57
Downloading Images with ArcSoft PhotoStudio, Downloading Images with ArcSoft PhotoImpression - driver for windows 8 1
 |
View all Canon PowerShot G3 manuals
Add to My Manuals
Save this manual to your list of manuals |
Page 57 highlights
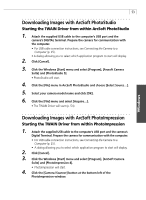
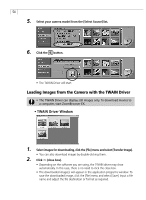
53 Downloading Images with ArcSoft PhotoStudio Starting the TWAIN Driver from within ArcSoft PhotoStudio 1. Attach the supplied USB cable to the computer's USB port and the camera's DIGITAL terminal. Prepare the camera for communication with the computer. • For USB cable connection instructions, see Connecting the Camera to a Computer (p. 25). • A dialog allowing you to select which application program to start will display. 2. Click [Cancel]. 3. Click the Windows [Start] menu and select [Program], [Arcsoft Camera Suite] and [PhotoStudio 5]. • PhotoStudio will start. 4. Click the [File] menu in ArcSoft PhotoStudio and choose [Select Source...]. 5. Select your camera model name and click [OK]. 6. Click the [File] menu and select [Acquire...]. • The TWAIN Driver will start (p. 54). Downloading Images with ArcSoft PhotoImpression Starting the TWAIN Driver from within PhotoImpression 1. Attach the supplied USB cable to the computer's USB port and the camera's Digital Terminal. Prepare the camera for communication with the computer. • For USB cable connection instructions, see Connecting the Camera to a Computer (p. 25). • A dialog allowing you to select which application program to start will display. 2. Click [Cancel]. 3. Click the Windows [Start] menu and select [Program], [ArcSoft Camera Suite] and [PhotoImpression 4]. • PhotoImpression will start. 4. Click the [Camera/Scanner] button at the bottom left of the PhotoImpression window. Windows
-
 1
1 -
2
-
3
-
4
-
5
-
6
-
7
-
8
-
9
-
10
-
11
-
12
-
13
-
14
-
15
-
16
-
17
-
18
-
19
-
20
-
21
-
22
-
23
-
24
-
25
-
26
-
27
-
28
-
29
-
30
-
31
-
32
-
33
-
34
-
35
-
36
-
37
-
38
-
39
-
40
-
41
-
42
-
43
-
44
-
45
-
46
-
47
-
48
-
49
-
50
-
51
-
 52
52 -
 53
53 -
 54
54 -
 55
55 -
 56
56 -
 57
57 -
 58
58 -
 59
59 -
 60
60 -
 61
61 -
 62
62 -
63
-
64
-
65
-
66
-
67
-
68
-
69
-
70
-
71
-
72
-
73
-
74
-
75
-
76
-
77
-
78
-
79
-
80
-
81
-
82
-
83
-
84
-
85
-
86
-
87
-
88
-
89
-
90
-
91
-
92
-
93
-
94
-
95
-
96
-
97
-
98
-
99
-
100
-
101
-
102
-
103
-
104
-
105
-
106
-
107
-
108
-
109
-
110
-
111
-
112
-
113
-
114
-
115
-
116
-
117
-
118
-
119
-
120
-
121
-
122
-
123
 |
 |