Canon PowerShot G3 Software Starter Guide DC SD Ver.11 - Page 54
Interval Timer Shooting, Timer Shooting
 |
View all Canon PowerShot G3 manuals
Add to My Manuals
Save this manual to your list of manuals |
Page 54 highlights
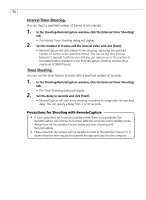
50 Interval Timer Shooting You can shoot a specified number of frames at set intervals. 1. In the Shooting-RemoteCapture window, click the [Interval Timer Shooting] tab. • The Interval Timer Shooting dialog will display. 2. Set the number of frames and the interval value and click [Start]. • RemoteCapture will start Interval Timer shooting, capturing the specified number of frames at the specified interval. You can set the time interval between 5 seconds to 60 minutes and you can capture up to the number of recordable frames displayed in the RemoteCapture Shooting window (to a maximum of 9999 frames). Timer Shooting You can use the timer feature to shoot after a specified number of seconds. 1. In the Shooting-RemoteCapture window, click the [Interval Timer Shooting] tab. • The Timer Shooting dialog will display. 2. Set the delay in seconds and click [Start]. • RemoteCapture will start timer shooting, recording an image after the specified delay. You can specify a delay from 2 to 30 seconds. Precautions for Shooting with RemoteCapture • If your computer is set to go into standby mode, there is no guarantee that RemoteCapture will continue to function after the computer enters standby mode. Always turn off the standby function before you start shooting with RemoteCapture. • Please note that the camera will not be able to shoot at the specified interval if it is shorter than the time required to transmit the data and save it to the computer.
-
 1
1 -
2
-
3
-
4
-
5
-
6
-
7
-
8
-
9
-
10
-
11
-
12
-
13
-
14
-
15
-
16
-
17
-
18
-
19
-
20
-
21
-
22
-
23
-
24
-
25
-
26
-
27
-
28
-
29
-
30
-
31
-
32
-
33
-
34
-
35
-
36
-
37
-
38
-
39
-
40
-
41
-
42
-
43
-
44
-
45
-
46
-
47
-
48
-
 49
49 -
 50
50 -
 51
51 -
 52
52 -
 53
53 -
 54
54 -
 55
55 -
 56
56 -
 57
57 -
 58
58 -
 59
59 -
60
-
61
-
62
-
63
-
64
-
65
-
66
-
67
-
68
-
69
-
70
-
71
-
72
-
73
-
74
-
75
-
76
-
77
-
78
-
79
-
80
-
81
-
82
-
83
-
84
-
85
-
86
-
87
-
88
-
89
-
90
-
91
-
92
-
93
-
94
-
95
-
96
-
97
-
98
-
99
-
100
-
101
-
102
-
103
-
104
-
105
-
106
-
107
-
108
-
109
-
110
-
111
-
112
-
113
-
114
-
115
-
116
-
117
-
118
-
119
-
120
-
121
-
122
-
123
 |
 |
