Canon XA10 XA10 Instruction Manual - Page 89
Infrared Recording
 |
View all Canon XA10 manuals
Add to My Manuals
Save this manual to your list of manuals |
Page 89 highlights
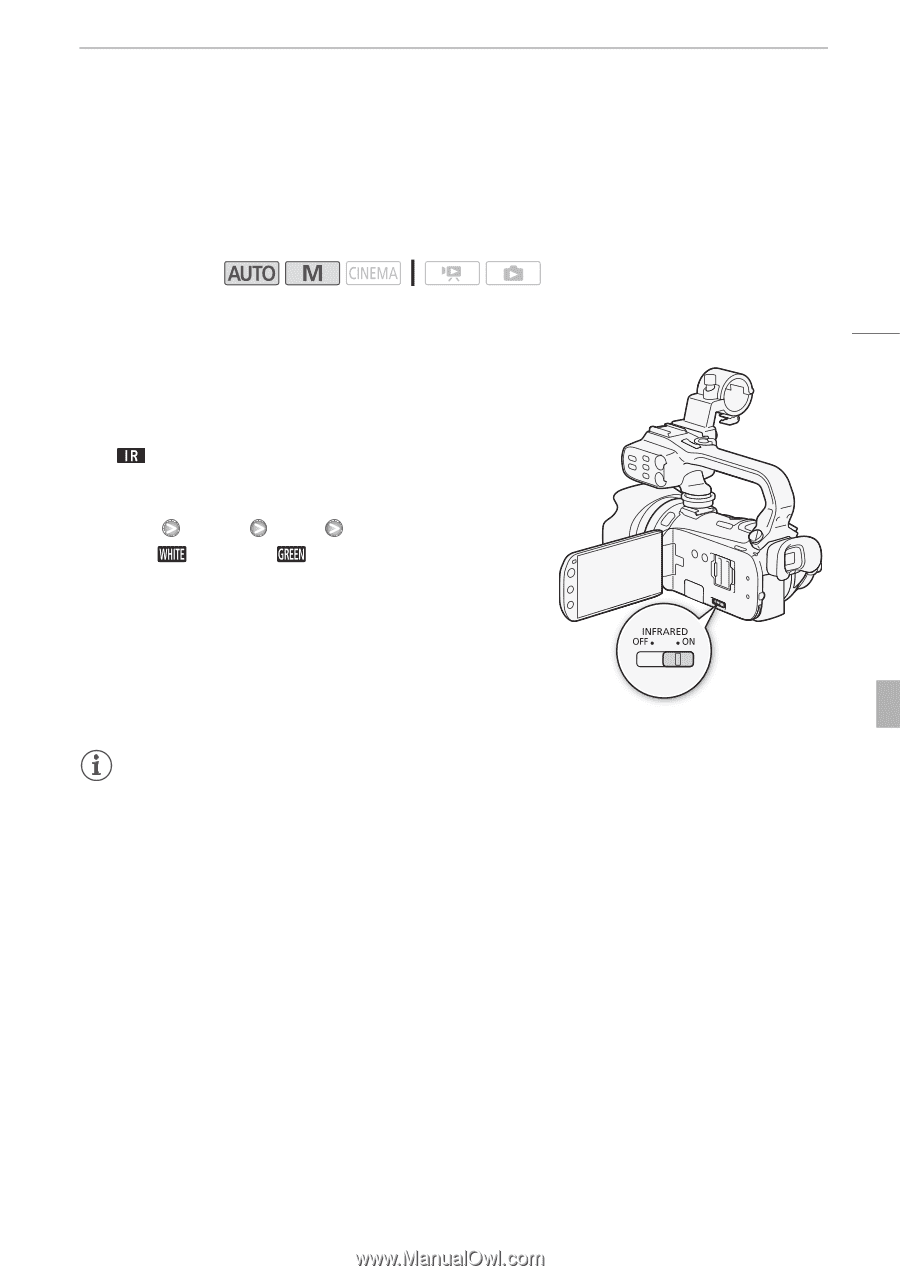
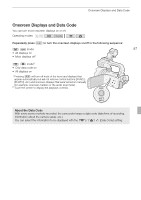
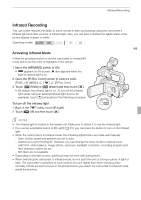
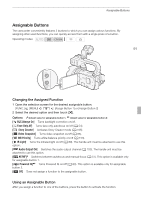
Infrared Recording Infrared Recording This camcorder features the ability to shoot movies in dark surroundings using the camcorder's infrared light and other sources of infrared light. Also, you can select whether the lighter areas of the picture appear in green or white. Operating modes: 89 Activating Infrared Mode Follow the procedure below to set the camcorder to infrared (IR) mode and to set the color of highlights in the picture. 1 Move the INFRARED switch to ON. • appears on the screen. Y also appears when the built-in infrared light is on. 2 Open the [IR Rec Color] screen to select a color. [FUNC.] [MENU] 7 [IR Rec Color] 3 Touch [ White] or [ Green] and then touch [a]. • By default, the infrared light is on. To turn off the infrared light (when using an external infrared light source, for example), touch [f] and perform the following procedure. To turn off the infrared light 1 Back in the 7 menu, touch [IR Light]. 2 Touch [B Off] and then touch [a]. NOTES • The infrared light is located in the handle unit. Make sure to attach it to use the infrared light. • If you set an assignable button to [IR Light] (0 91), you can press the button to turn on the infrared light. • When the camcorder is in Infrared mode, the following adjustments are made automatically. - Gain, shutter speed and aperture are set to auto. - Autofocus is set to Normal AF. However, you can change the focus mode to manual focus. - AGC limit, white balance, image effects, exposure, backlight correction, recording program and face detection cannot be set. - ND filters are not available. • Depending on the light source, autofocus may not work well during zoom. • When switching the camcorder to infrared mode, do not point the lens at strong sources of light or heat. The camcorder's sensitivity to such sources is much higher than when shooting video normally. If there are such sources in the picture before you switch the camcorder to infrared mode, shield the lens first.
-
 1
1 -
2
-
3
-
4
-
5
-
6
-
7
-
8
-
9
-
10
-
11
-
12
-
13
-
14
-
15
-
16
-
17
-
18
-
19
-
20
-
21
-
22
-
23
-
24
-
25
-
26
-
27
-
28
-
29
-
30
-
31
-
32
-
33
-
34
-
35
-
36
-
37
-
38
-
39
-
40
-
41
-
42
-
43
-
44
-
45
-
46
-
47
-
48
-
49
-
50
-
51
-
52
-
53
-
54
-
55
-
56
-
57
-
58
-
59
-
60
-
61
-
62
-
63
-
64
-
65
-
66
-
67
-
68
-
69
-
70
-
71
-
72
-
73
-
74
-
75
-
76
-
77
-
78
-
79
-
80
-
81
-
82
-
83
-
 84
84 -
 85
85 -
 86
86 -
 87
87 -
 88
88 -
 89
89 -
 90
90 -
 91
91 -
 92
92 -
 93
93 -
 94
94 -
95
-
96
-
97
-
98
-
99
-
100
-
101
-
102
-
103
-
104
-
105
-
106
-
107
-
108
-
109
-
110
-
111
-
112
-
113
-
114
-
115
-
116
-
117
-
118
-
119
-
120
-
121
-
122
-
123
-
124
-
125
-
126
-
127
-
128
-
129
-
130
-
131
-
132
-
133
-
134
-
135
-
136
-
137
-
138
-
139
-
140
-
141
-
142
-
143
-
144
-
145
-
146
-
147
-
148
-
149
-
150
-
151
-
152
-
153
-
154
-
155
-
156
-
157
-
158
-
159
-
160
-
161
-
162
-
163
-
164
-
165
-
166
-
167
-
168
-
169
-
170
-
171
-
172
-
173
-
174
-
175
-
176
-
177
-
178
-
179
-
180
-
181
-
182
-
183
-
184
-
185
-
186
-
187
-
188
-
189
-
190
-
191
 |
 |