Compaq CQ2000 Getting Started Guide - Page 124
Connecting the Drive, Inserting the Drive into an HP Drive Bay
 |
View all Compaq CQ2000 manuals
Add to My Manuals
Save this manual to your list of manuals |
Page 124 highlights
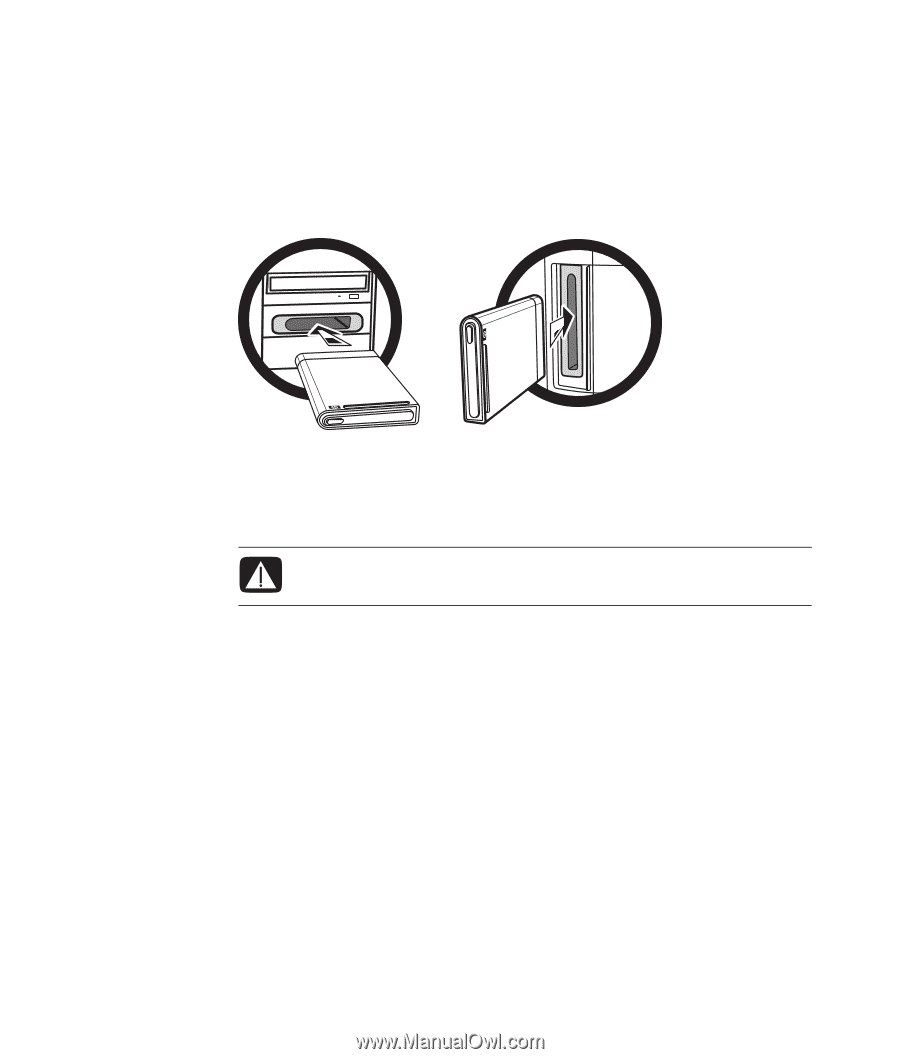
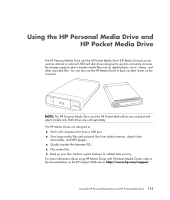
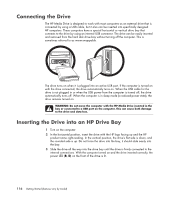
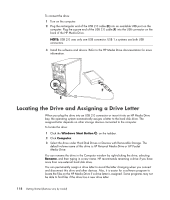
Connecting the Drive The HP Media Drive is designed to work with most computers as an external drive that is connected by using a USB cable, but it also can be inserted into specifically designed HP computers. These computers have a special horizontal or vertical drive bay that connects to the drive by using an internal USB connector. The drive can be easily inserted and removed from the hard disk drive bay without turning off the computer. This is sometimes referred to as warm-swappable. The drive turns on when it is plugged into an active USB port. If the computer is turned on with the drive connected, the drive automatically turns on. When the USB cable for the drive is not plugged in or when the USB power from the computer is turned off, the drive automatically turns off. When the computer is in sleep mode (a reduced-power state), the drive remains turned on. WARNING: Do not move the computer with the HP Media Drive inserted in the bay or connected to a USB port on the computer. This can cause both damage to the drive and data loss. Inserting the Drive into an HP Drive Bay 1 Turn on the computer. 2 In the horizontal position, insert the drive with the HP logo facing up and the HP product name right-reading. In the vertical position, the drive's flat side is down, and the rounded side is up. Do not force the drive into the bay; it should slide easily into the bay. 3 Slide the drive all the way into the drive bay until the drive is firmly connected to the internal connections. With the computer turned on and the drive inserted correctly, the power LED (B, D) on the front of the drive is lit. 116 Getting Started (features vary by model)
-
 1
1 -
2
-
3
-
4
-
5
-
6
-
7
-
8
-
9
-
10
-
11
-
12
-
13
-
14
-
15
-
16
-
17
-
18
-
19
-
20
-
21
-
22
-
23
-
24
-
25
-
26
-
27
-
28
-
29
-
30
-
31
-
32
-
33
-
34
-
35
-
36
-
37
-
38
-
39
-
40
-
41
-
42
-
43
-
44
-
45
-
46
-
47
-
48
-
49
-
50
-
51
-
52
-
53
-
54
-
55
-
56
-
57
-
58
-
59
-
60
-
61
-
62
-
63
-
64
-
65
-
66
-
67
-
68
-
69
-
70
-
71
-
72
-
73
-
74
-
75
-
76
-
77
-
78
-
79
-
80
-
81
-
82
-
83
-
84
-
85
-
86
-
87
-
88
-
89
-
90
-
91
-
92
-
93
-
94
-
95
-
96
-
97
-
98
-
99
-
100
-
101
-
102
-
103
-
104
-
105
-
106
-
107
-
108
-
109
-
110
-
111
-
112
-
113
-
114
-
115
-
116
-
117
-
118
-
 119
119 -
 120
120 -
 121
121 -
 122
122 -
 123
123 -
 124
124 -
 125
125 -
 126
126 -
 127
127 -
 128
128 -
 129
129 -
130
-
131
-
132
-
133
-
134
-
135
-
136
-
137
-
138
-
139
-
140
-
141
-
142
-
143
-
144
-
145
-
146
-
147
-
148
-
149
-
150
-
151
-
152
-
153
-
154
-
155
-
156
-
157
-
158
-
159
-
160
-
161
-
162
-
163
-
164
-
165
-
166
 |
 |