Dell 5200n Mono Laser Printer Dell™ Workgroup Laser Printer M5200 Us - Page 111
Sending a job to print, Canceling a print job, Canceling from the printer operator panel
 |
View all Dell 5200n Mono Laser Printer manuals
Add to My Manuals
Save this manual to your list of manuals |
Page 111 highlights
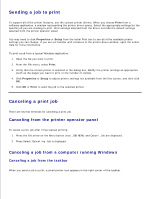
Sending a job to print To support all of the printer features, use the custom printer drivers. When you choose Print from a software application, a window representing the printer driver opens. Select the appropriate settings for the specific job you are sending to print. Print settings selected from the driver override the default settings selected from the printer operator panel. You may need to click Properties or Setup from the initial Print box to see all of the available printer settings you can change. If you are not familiar with a feature in the printer driver window, open the online Help for more information. To print a job from a typical Windows application: 1. Open the file you want to print. 2. From the File menu, select Print. 3. Verify that the correct printer is selected in the dialog box. Modify the printer settings as appropriate (such as the pages you want to print or the number of copies). 4. Click Properties or Setup to adjust printer settings not available from the first screen, and then click OK. 5. Click OK or Print to send the job to the selected printer. Canceling a print job There are several methods for canceling a print job. Canceling from the printer operator panel To cancel a print job after it has started printing: 1. Press the left arrow on the Menu button once. JOB MENU and Cancel Job are displayed. 2. Press Select. Canceling Job is displayed. Canceling a job from a computer running Windows Canceling a job from the taskbar When you send a job to print, a small printer icon appears in the right corner of the taskbar. 1.
-
 1
1 -
2
-
3
-
4
-
5
-
6
-
7
-
8
-
9
-
10
-
11
-
12
-
13
-
14
-
15
-
16
-
17
-
18
-
19
-
20
-
21
-
22
-
23
-
24
-
25
-
26
-
27
-
28
-
29
-
30
-
31
-
32
-
33
-
34
-
35
-
36
-
37
-
38
-
39
-
40
-
41
-
42
-
43
-
44
-
45
-
46
-
47
-
48
-
49
-
50
-
51
-
52
-
53
-
54
-
55
-
56
-
57
-
58
-
59
-
60
-
61
-
62
-
63
-
64
-
65
-
66
-
67
-
68
-
69
-
70
-
71
-
72
-
73
-
74
-
75
-
76
-
77
-
78
-
79
-
80
-
81
-
82
-
83
-
84
-
85
-
86
-
87
-
88
-
89
-
90
-
91
-
92
-
93
-
94
-
95
-
96
-
97
-
98
-
99
-
100
-
101
-
102
-
103
-
104
-
105
-
 106
106 -
 107
107 -
 108
108 -
 109
109 -
 110
110 -
 111
111 -
 112
112 -
 113
113 -
 114
114 -
 115
115 -
 116
116 -
117
-
118
-
119
-
120
-
121
-
122
-
123
-
124
-
125
-
126
-
127
-
128
-
129
-
130
-
131
-
132
-
133
-
134
-
135
-
136
-
137
-
138
-
139
-
140
-
141
-
142
-
143
-
144
-
145
-
146
-
147
-
148
-
149
-
150
-
151
-
152
-
153
-
154
-
155
-
156
-
157
-
158
-
159
-
160
-
161
-
162
-
163
-
164
-
165
-
166
-
167
-
168
-
169
-
170
-
171
-
172
-
173
-
174
-
175
-
176
-
177
-
178
-
179
-
180
-
181
-
182
-
183
-
184
-
185
-
186
-
187
-
188
-
189
-
190
-
191
-
192
-
193
-
194
-
195
-
196
-
197
-
198
-
199
-
200
-
201
-
202
-
203
-
204
-
205
-
206
-
207
-
208
-
209
-
210
-
211
-
212
-
213
-
214
-
215
-
216
-
217
-
218
-
219
-
220
-
221
-
222
-
223
-
224
-
225
-
226
-
227
-
228
 |
 |
