Dell 5200n Mono Laser Printer Dell™ Workgroup Laser Printer M5200 Us - Page 114
Accessing held jobs from the operator panel, Delete All Jobs
 |
View all Dell 5200n Mono Laser Printer manuals
Add to My Manuals
Save this manual to your list of manuals |
Page 114 highlights
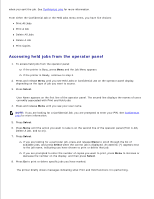
when you sent the job. See Confidential jobs for more information. From either the Confidential Job or the Held Jobs menu items, you have five choices: Print All Jobs Print A Job Delete All Jobs Delete A Job Print Copies Accessing held jobs from the operator panel 1. To access held jobs from the operator panel: If the printer is Busy, press Menu and the Job Menu appears. If the printer is Ready, continue to step 2. 2. Press and release Menu until you see Held Jobs or Confidential Job on the operator panel display, depending on the type of job you want to access. 3. Press Select. User Name appears on the first line of the operator panel. The second line displays the names of users currently associated with Print and Hold jobs. 4. Press and release Menu until you see your user name. NOTE: If you are looking for a Confidential Job, you are prompted to enter your PIN. See Confidential jobs for more information. 5. Press Select. 6. Press Menu until the action you want to take is on the second line of the operator panel (Print A Job, Delete A Job, and so on). 7. Press Select. If you are looking for a particular job, press and release Menu to scroll through the list of available jobs, and press Select when the correct job is displayed. An asterisk (*) appears next to the job name, indicating you have chosen to print or delete that job. If you are prompted to enter the number of copies you want to print, press Menu to increase or decrease the number on the display, and then press Select. 8. Press Go to print or delete specific jobs you have marked. The printer briefly shows messages indicating what Print and Hold functions it is performing.
-
 1
1 -
2
-
3
-
4
-
5
-
6
-
7
-
8
-
9
-
10
-
11
-
12
-
13
-
14
-
15
-
16
-
17
-
18
-
19
-
20
-
21
-
22
-
23
-
24
-
25
-
26
-
27
-
28
-
29
-
30
-
31
-
32
-
33
-
34
-
35
-
36
-
37
-
38
-
39
-
40
-
41
-
42
-
43
-
44
-
45
-
46
-
47
-
48
-
49
-
50
-
51
-
52
-
53
-
54
-
55
-
56
-
57
-
58
-
59
-
60
-
61
-
62
-
63
-
64
-
65
-
66
-
67
-
68
-
69
-
70
-
71
-
72
-
73
-
74
-
75
-
76
-
77
-
78
-
79
-
80
-
81
-
82
-
83
-
84
-
85
-
86
-
87
-
88
-
89
-
90
-
91
-
92
-
93
-
94
-
95
-
96
-
97
-
98
-
99
-
100
-
101
-
102
-
103
-
104
-
105
-
106
-
107
-
108
-
 109
109 -
 110
110 -
 111
111 -
 112
112 -
 113
113 -
 114
114 -
 115
115 -
 116
116 -
 117
117 -
 118
118 -
 119
119 -
120
-
121
-
122
-
123
-
124
-
125
-
126
-
127
-
128
-
129
-
130
-
131
-
132
-
133
-
134
-
135
-
136
-
137
-
138
-
139
-
140
-
141
-
142
-
143
-
144
-
145
-
146
-
147
-
148
-
149
-
150
-
151
-
152
-
153
-
154
-
155
-
156
-
157
-
158
-
159
-
160
-
161
-
162
-
163
-
164
-
165
-
166
-
167
-
168
-
169
-
170
-
171
-
172
-
173
-
174
-
175
-
176
-
177
-
178
-
179
-
180
-
181
-
182
-
183
-
184
-
185
-
186
-
187
-
188
-
189
-
190
-
191
-
192
-
193
-
194
-
195
-
196
-
197
-
198
-
199
-
200
-
201
-
202
-
203
-
204
-
205
-
206
-
207
-
208
-
209
-
210
-
211
-
212
-
213
-
214
-
215
-
216
-
217
-
218
-
219
-
220
-
221
-
222
-
223
-
224
-
225
-
226
-
227
-
228
 |
 |
