Dell 5200n Mono Laser Printer Dell™ Workgroup Laser Printer M5200 Us - Page 70
Printing a printer network setup Select, Start, Settings, Printers, Dell Laser Printer M5200
 |
View all Dell 5200n Mono Laser Printer manuals
Add to My Manuals
Save this manual to your list of manuals |
Page 70 highlights
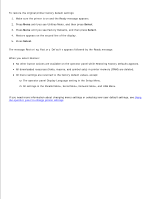
The Menu Settings page lists all the options you purchased or installed. If a feature or an option is not listed, you need to check your installation. 1. Make sure the printer is on. 2. Press Menu until you see Utilities Menu, and then press Select. 3. Press Menu until you see Print Menus, and then press Select to print the page. The message Printing Menus appears on the display. 4. Verify that the options you installed are correctly listed under "Installed Features." 5. If an option you installed is not listed, turn the printer off, unplug the power cord, and reinstall the option. 6. Verify the amount of memory installed is correctly listed under "Printer Information." 7. Verify that any optional trays you installed are configured for the sizes and types of print media you loaded. When you add or remove an option, remember to update the printer's configuration through your printer driver. The following instructions may vary, depending on your operating system. 1. Click Start Settings Printers. 2. Right-click the Dell Laser Printer M5200 icon and select Properties. 3. Select the Device tab, and then select the option. 4. Click Update, and then click Apply. Printing a printer network setup page If the printer is attached to a network, print a network setup page to verify the network connection. This page also provides important information that helps you configure for network printing. 1. Make sure the printer is on. 2. Press Menu until you see Utilities Menu, and then press Select. 3. Press Menu until you see Print Net Setup, and then press Select to print the page. 4. Check the first section on the network setup page and confirm that Status is "Connected." If Status is "Not Connected," your LAN drop may not be active or your network cable may be malfunctioning. Consult your network administrator for a solution. Afterward, print another network setup page to verify connection to your network.
-
 1
1 -
2
-
3
-
4
-
5
-
6
-
7
-
8
-
9
-
10
-
11
-
12
-
13
-
14
-
15
-
16
-
17
-
18
-
19
-
20
-
21
-
22
-
23
-
24
-
25
-
26
-
27
-
28
-
29
-
30
-
31
-
32
-
33
-
34
-
35
-
36
-
37
-
38
-
39
-
40
-
41
-
42
-
43
-
44
-
45
-
46
-
47
-
48
-
49
-
50
-
51
-
52
-
53
-
54
-
55
-
56
-
57
-
58
-
59
-
60
-
61
-
62
-
63
-
64
-
 65
65 -
 66
66 -
 67
67 -
 68
68 -
 69
69 -
 70
70 -
 71
71 -
 72
72 -
 73
73 -
 74
74 -
 75
75 -
76
-
77
-
78
-
79
-
80
-
81
-
82
-
83
-
84
-
85
-
86
-
87
-
88
-
89
-
90
-
91
-
92
-
93
-
94
-
95
-
96
-
97
-
98
-
99
-
100
-
101
-
102
-
103
-
104
-
105
-
106
-
107
-
108
-
109
-
110
-
111
-
112
-
113
-
114
-
115
-
116
-
117
-
118
-
119
-
120
-
121
-
122
-
123
-
124
-
125
-
126
-
127
-
128
-
129
-
130
-
131
-
132
-
133
-
134
-
135
-
136
-
137
-
138
-
139
-
140
-
141
-
142
-
143
-
144
-
145
-
146
-
147
-
148
-
149
-
150
-
151
-
152
-
153
-
154
-
155
-
156
-
157
-
158
-
159
-
160
-
161
-
162
-
163
-
164
-
165
-
166
-
167
-
168
-
169
-
170
-
171
-
172
-
173
-
174
-
175
-
176
-
177
-
178
-
179
-
180
-
181
-
182
-
183
-
184
-
185
-
186
-
187
-
188
-
189
-
190
-
191
-
192
-
193
-
194
-
195
-
196
-
197
-
198
-
199
-
200
-
201
-
202
-
203
-
204
-
205
-
206
-
207
-
208
-
209
-
210
-
211
-
212
-
213
-
214
-
215
-
216
-
217
-
218
-
219
-
220
-
221
-
222
-
223
-
224
-
225
-
226
-
227
-
228
 |
 |
