Dell 5200n Mono Laser Printer Dell™ Workgroup Laser Printer M5200 Us - Page 20
Connecting the printer to the network
 |
View all Dell 5200n Mono Laser Printer manuals
Add to My Manuals
Save this manual to your list of manuals |
Page 20 highlights
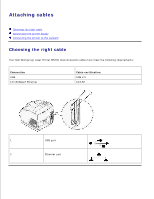
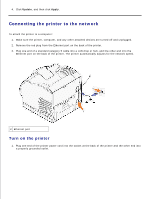
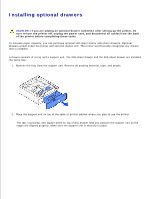
3. 4. Click Update, and then click Apply. Connecting the printer to the network To attach the printer to a computer: 1. Make sure the printer, computer, and any other attached devices are turned off and unplugged. 2. Remove the red plug from the Ethernet port on the back of the printer. 3. Plug one end of a standard category 5 cable into a LAN drop or hub, and the other end into the Ethernet port on the back of the printer. The printer automatically adjusts for the network speed. 2 Ethernet port Turn on the printer 1. Plug one end of the printer power cord into the socket at the back of the printer and the other end into a properly grounded outlet.
-
 1
1 -
2
-
3
-
4
-
5
-
6
-
7
-
8
-
9
-
10
-
11
-
12
-
13
-
14
-
 15
15 -
 16
16 -
 17
17 -
 18
18 -
 19
19 -
 20
20 -
 21
21 -
 22
22 -
 23
23 -
 24
24 -
 25
25 -
26
-
27
-
28
-
29
-
30
-
31
-
32
-
33
-
34
-
35
-
36
-
37
-
38
-
39
-
40
-
41
-
42
-
43
-
44
-
45
-
46
-
47
-
48
-
49
-
50
-
51
-
52
-
53
-
54
-
55
-
56
-
57
-
58
-
59
-
60
-
61
-
62
-
63
-
64
-
65
-
66
-
67
-
68
-
69
-
70
-
71
-
72
-
73
-
74
-
75
-
76
-
77
-
78
-
79
-
80
-
81
-
82
-
83
-
84
-
85
-
86
-
87
-
88
-
89
-
90
-
91
-
92
-
93
-
94
-
95
-
96
-
97
-
98
-
99
-
100
-
101
-
102
-
103
-
104
-
105
-
106
-
107
-
108
-
109
-
110
-
111
-
112
-
113
-
114
-
115
-
116
-
117
-
118
-
119
-
120
-
121
-
122
-
123
-
124
-
125
-
126
-
127
-
128
-
129
-
130
-
131
-
132
-
133
-
134
-
135
-
136
-
137
-
138
-
139
-
140
-
141
-
142
-
143
-
144
-
145
-
146
-
147
-
148
-
149
-
150
-
151
-
152
-
153
-
154
-
155
-
156
-
157
-
158
-
159
-
160
-
161
-
162
-
163
-
164
-
165
-
166
-
167
-
168
-
169
-
170
-
171
-
172
-
173
-
174
-
175
-
176
-
177
-
178
-
179
-
180
-
181
-
182
-
183
-
184
-
185
-
186
-
187
-
188
-
189
-
190
-
191
-
192
-
193
-
194
-
195
-
196
-
197
-
198
-
199
-
200
-
201
-
202
-
203
-
204
-
205
-
206
-
207
-
208
-
209
-
210
-
211
-
212
-
213
-
214
-
215
-
216
-
217
-
218
-
219
-
220
-
221
-
222
-
223
-
224
-
225
-
226
-
227
-
228
 |
 |

Click
Update
, and then click
Apply
.
4.
Connecting the printer to the network
To attach the printer to a computer:
Make sure the printer, computer, and any other attached devices are turned off and unplugged.
1.
Remove the red plug from the Ethernet port on the back of the printer.
2.
Plug one end of a standard category 5 cable into a LAN drop or hub, and the other end into the
Ethernet port on the back of the printer. The printer automatically adjusts for the network speed.
3.
2
Ethernet port
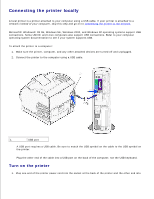
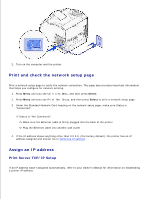
Turn on the printer
Plug one end of the printer power cord into the socket at the back of the printer and the other end into
a properly grounded outlet.
1.