Dell 5200n Mono Laser Printer Dell™ Workgroup Laser Printer M5200 Us - Page 212
Reattaching the shield and closing the doors
 |
View all Dell 5200n Mono Laser Printer manuals
Add to My Manuals
Save this manual to your list of manuals |
Page 212 highlights
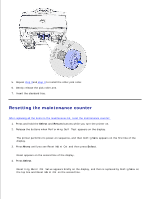
5. Place the card in its original packaging. If you did not save the original packaging, wrap it in paper and store it in a box for protection. 6. If you need to install a replacement optional card on the system board, refer to the Owner's Manual. Reattaching the shield and closing the doors After you have installed any type of option card on the printer system board, follow these instructions to attach the shield and close the doors. 1. Grasp the shield by the tabs and align the three keyholes on the shield with the top three screws. Holding the shield by the tabs, slide it down onto the screws. Tighten all six screws. 2. 3.
-
 1
1 -
2
-
3
-
4
-
5
-
6
-
7
-
8
-
9
-
10
-
11
-
12
-
13
-
14
-
15
-
16
-
17
-
18
-
19
-
20
-
21
-
22
-
23
-
24
-
25
-
26
-
27
-
28
-
29
-
30
-
31
-
32
-
33
-
34
-
35
-
36
-
37
-
38
-
39
-
40
-
41
-
42
-
43
-
44
-
45
-
46
-
47
-
48
-
49
-
50
-
51
-
52
-
53
-
54
-
55
-
56
-
57
-
58
-
59
-
60
-
61
-
62
-
63
-
64
-
65
-
66
-
67
-
68
-
69
-
70
-
71
-
72
-
73
-
74
-
75
-
76
-
77
-
78
-
79
-
80
-
81
-
82
-
83
-
84
-
85
-
86
-
87
-
88
-
89
-
90
-
91
-
92
-
93
-
94
-
95
-
96
-
97
-
98
-
99
-
100
-
101
-
102
-
103
-
104
-
105
-
106
-
107
-
108
-
109
-
110
-
111
-
112
-
113
-
114
-
115
-
116
-
117
-
118
-
119
-
120
-
121
-
122
-
123
-
124
-
125
-
126
-
127
-
128
-
129
-
130
-
131
-
132
-
133
-
134
-
135
-
136
-
137
-
138
-
139
-
140
-
141
-
142
-
143
-
144
-
145
-
146
-
147
-
148
-
149
-
150
-
151
-
152
-
153
-
154
-
155
-
156
-
157
-
158
-
159
-
160
-
161
-
162
-
163
-
164
-
165
-
166
-
167
-
168
-
169
-
170
-
171
-
172
-
173
-
174
-
175
-
176
-
177
-
178
-
179
-
180
-
181
-
182
-
183
-
184
-
185
-
186
-
187
-
188
-
189
-
190
-
191
-
192
-
193
-
194
-
195
-
196
-
197
-
198
-
199
-
200
-
201
-
202
-
203
-
204
-
205
-
206
-
 207
207 -
 208
208 -
 209
209 -
 210
210 -
 211
211 -
 212
212 -
 213
213 -
 214
214 -
 215
215 -
 216
216 -
 217
217 -
218
-
219
-
220
-
221
-
222
-
223
-
224
-
225
-
226
-
227
-
228
 |
 |

Place the card in its original packaging. If you did not save the original packaging, wrap it in paper and
store it in a box for protection.
5.
If you need to install a replacement optional card on the system board, refer to the
Owner's Manual
.
6.
Reattaching the shield and closing the doors
After you have installed any type of option card on the printer system board, follow these instructions to
attach the shield and close the doors.
Grasp the shield by the tabs and align the three keyholes on the shield with the top three screws.
Holding the shield by the tabs, slide it down onto the screws. Tighten all six screws.
1.
2.