Dell Inspiron 7000 Dell Inspiron 7000 Service Manual - Page 24
Removing and Replacing Parts.
 |
View all Dell Inspiron 7000 manuals
Add to My Manuals
Save this manual to your list of manuals |
Page 24 highlights
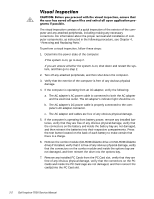
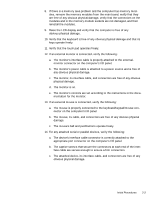
The visual inspection consists of a quick inspection of the exterior of the computer and any attached peripherals, including making any necessary corrections. For information about the proper removal and installation of computer components, as instructed in the following procedure, see Chapter 4, "Removing and Replacing Parts." To perform a visual inspection, follow these steps: 1. Determine the power state of the computer. If the system is on, go to step 2. If you are unsure whether the system is on, shut down and restart the system, and then go to step 2. 2. Turn off any attached peripherals, and then shut down the computer. 3. Verify that the exterior of the computer is free of any obvious physical damage. 4. If the computer is operating from an AC adapter, verify the following: a. The AC adapter's AC power cable is connected to both the AC adapter and the electrical outlet. The AC adapter's indicator light should be on. b. The AC adapter's DC power cable is properly connected to the computer's AC adapter connector. c. The AC adapter and cables are free of any obvious physical damage. 5. If the computer is operating from battery power, remove any installed batteries, verify that they are free of any obvious physical damage, verify that the connectors on the battery and inside the battery bay are not damaged, and then reinsert the batteries into their respective compartments. Press the test button located on the back of each battery to make certain that there is a charge. 6. Remove the combo module (CD-ROM/diskette drive or DVD-ROM/diskette drive) if installed, verify that it is free of any obvious physical damage, verify that the connectors on the combo module and inside the options bay are not damaged, and then reinsert the drive into the options bay. 7. Remove any installed PC Cards from the PC Card slot, verify that they are free of any obvious physical damage, verify that the connectors on the PC Cards and inside the PC Card cage are not damaged, and then reinsert the card(s) into the PC Card slot. 2-2
-
 1
1 -
2
-
3
-
4
-
5
-
6
-
7
-
8
-
9
-
10
-
11
-
12
-
13
-
14
-
15
-
16
-
17
-
18
-
 19
19 -
 20
20 -
 21
21 -
 22
22 -
 23
23 -
 24
24 -
 25
25 -
 26
26 -
 27
27 -
 28
28 -
 29
29 -
30
-
31
-
32
-
33
-
34
-
35
-
36
-
37
-
38
-
39
-
40
-
41
-
42
-
43
-
44
-
45
-
46
-
47
-
48
-
49
-
50
-
51
-
52
-
53
-
54
-
55
-
56
-
57
-
58
-
59
-
60
-
61
-
62
-
63
-
64
-
65
-
66
-
67
-
68
-
69
-
70
-
71
-
72
-
73
-
74
-
75
-
76
-
77
-
78
-
79
-
80
-
81
-
82
-
83
-
84
-
85
-
86
-
87
-
88
-
89
-
90
-
91
-
92
-
93
-
94
-
95
-
96
-
97
-
98
-
99
-
100
-
101
-
102
-
103
-
104
 |
 |